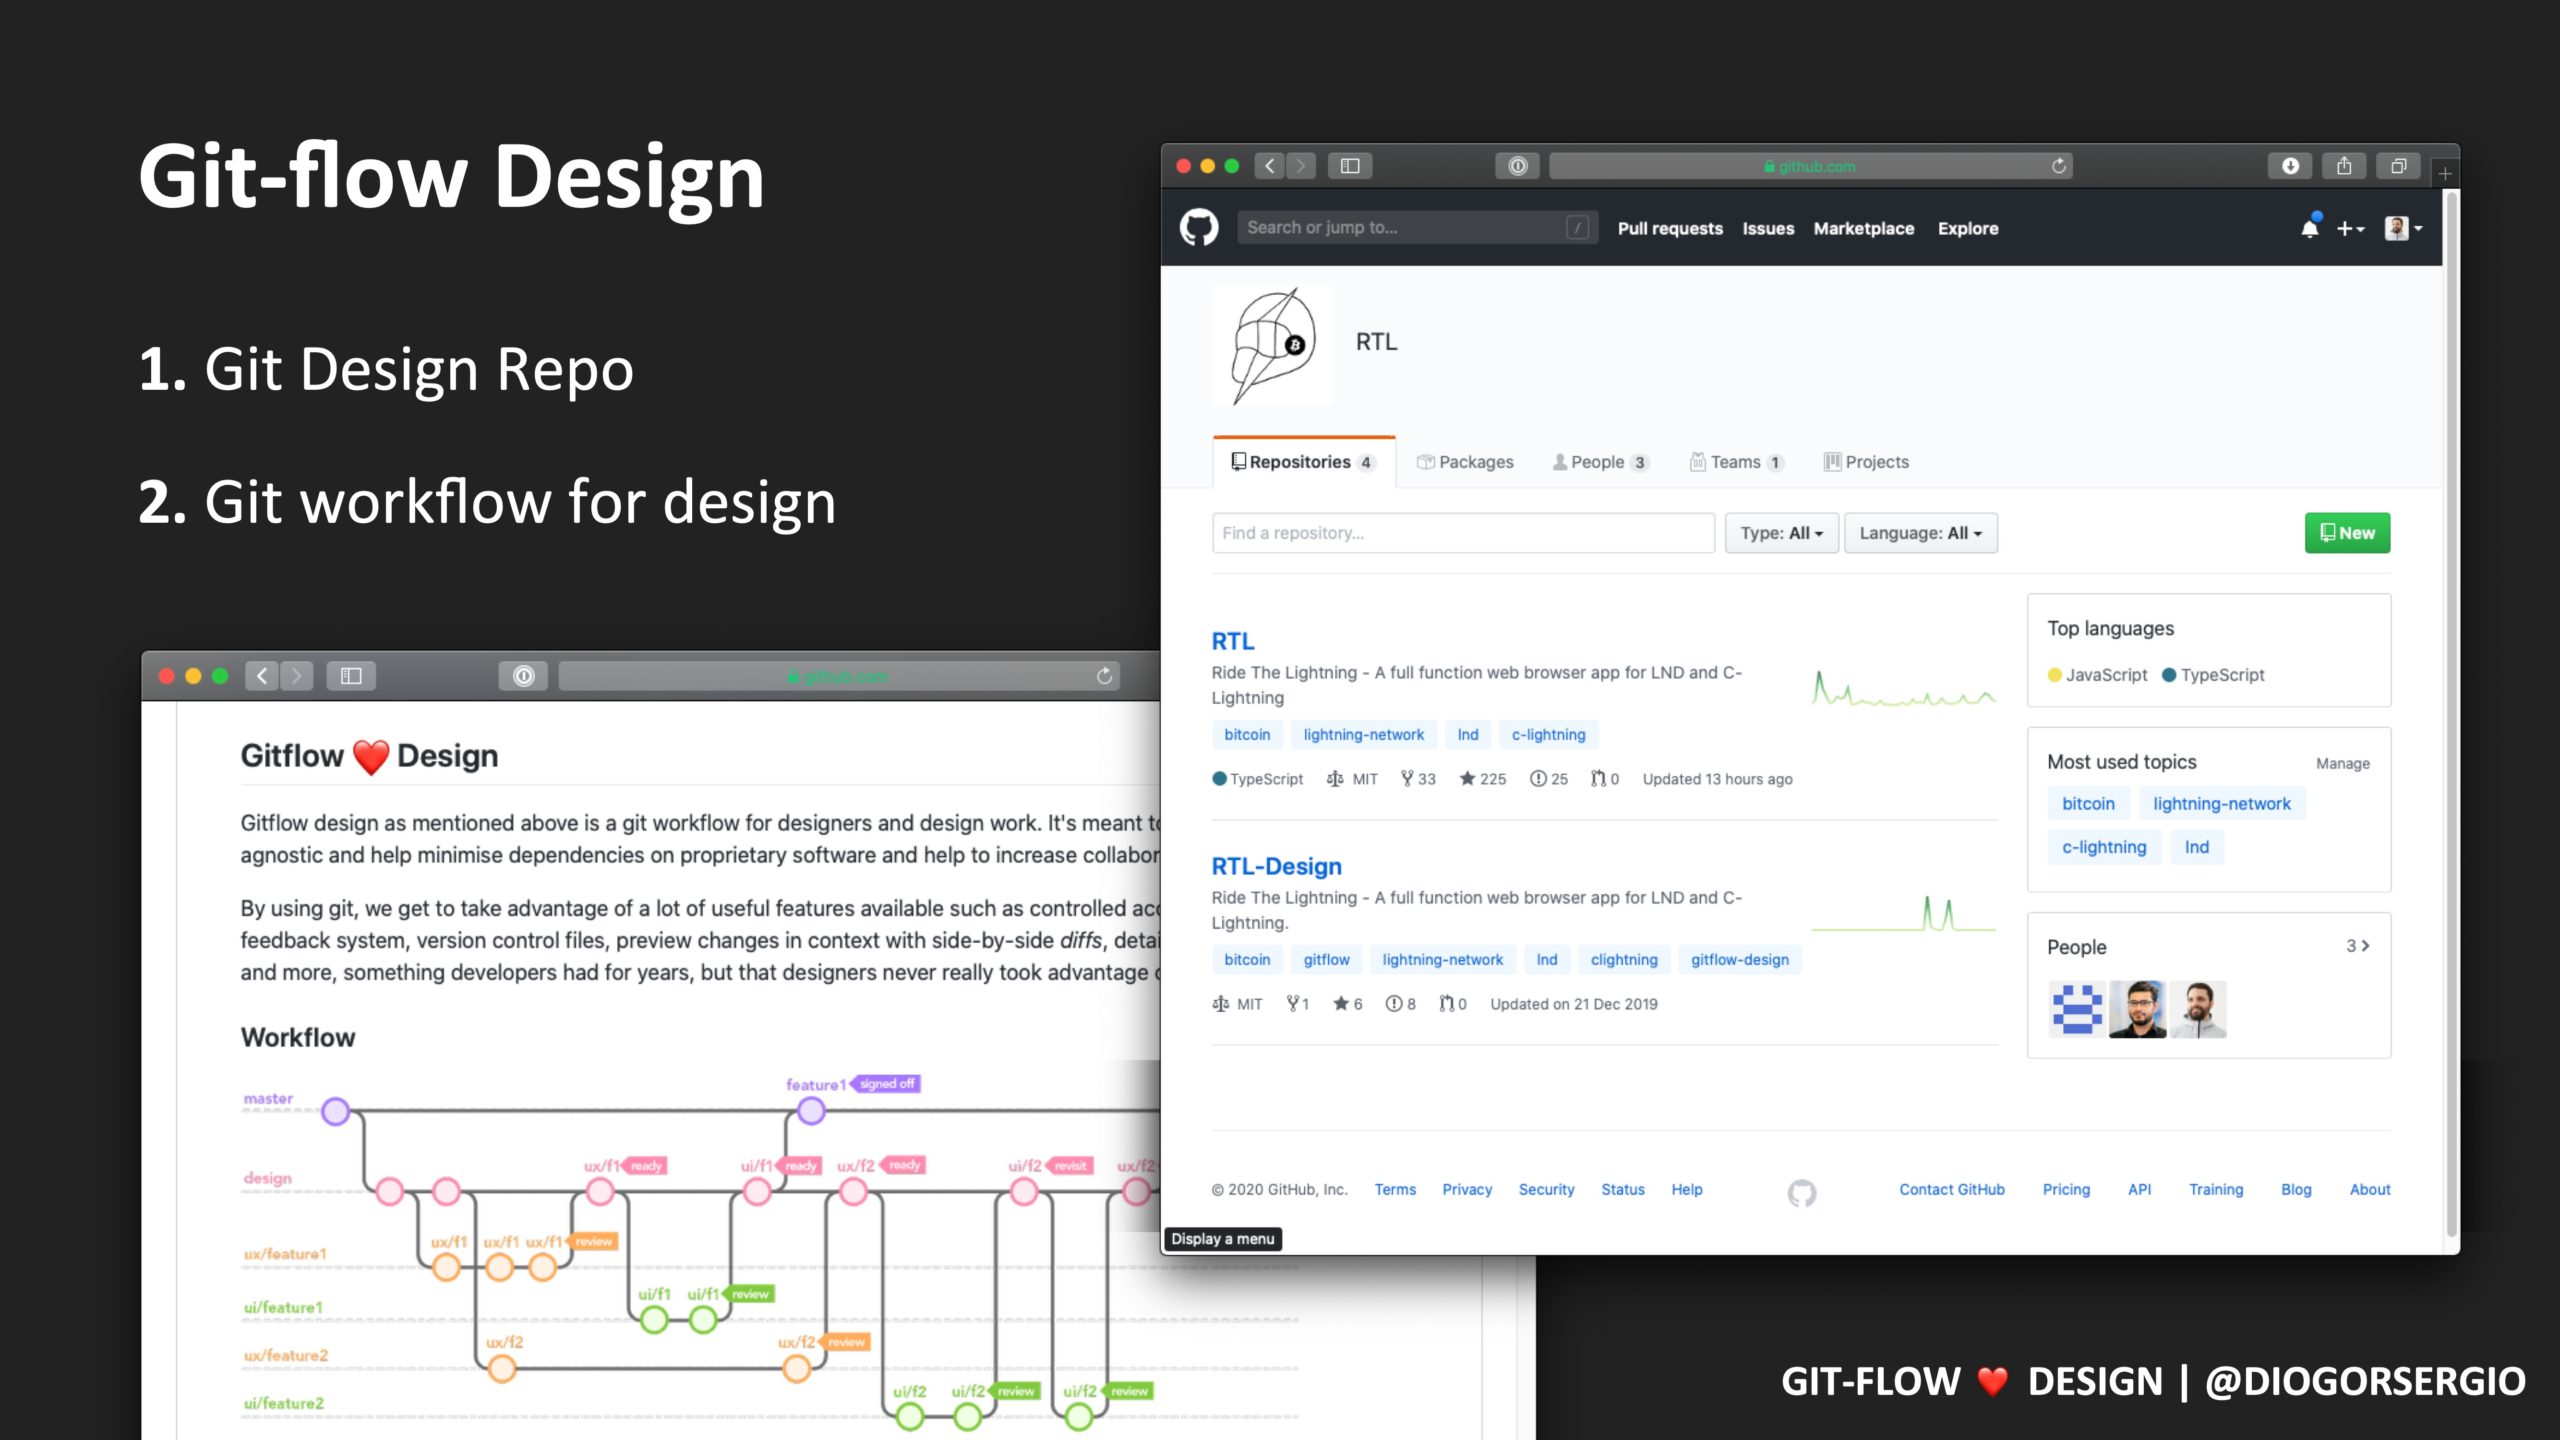
Gitflow Design
Gitflow-design is a git workflow for designers and design work. It’s meant to be open, platform agnostic and looking to minimise dependencies on proprietary software to help increase collaboration. The workflow itself is essentially a set of procedures that every team member has to follow in order to come to a design process.
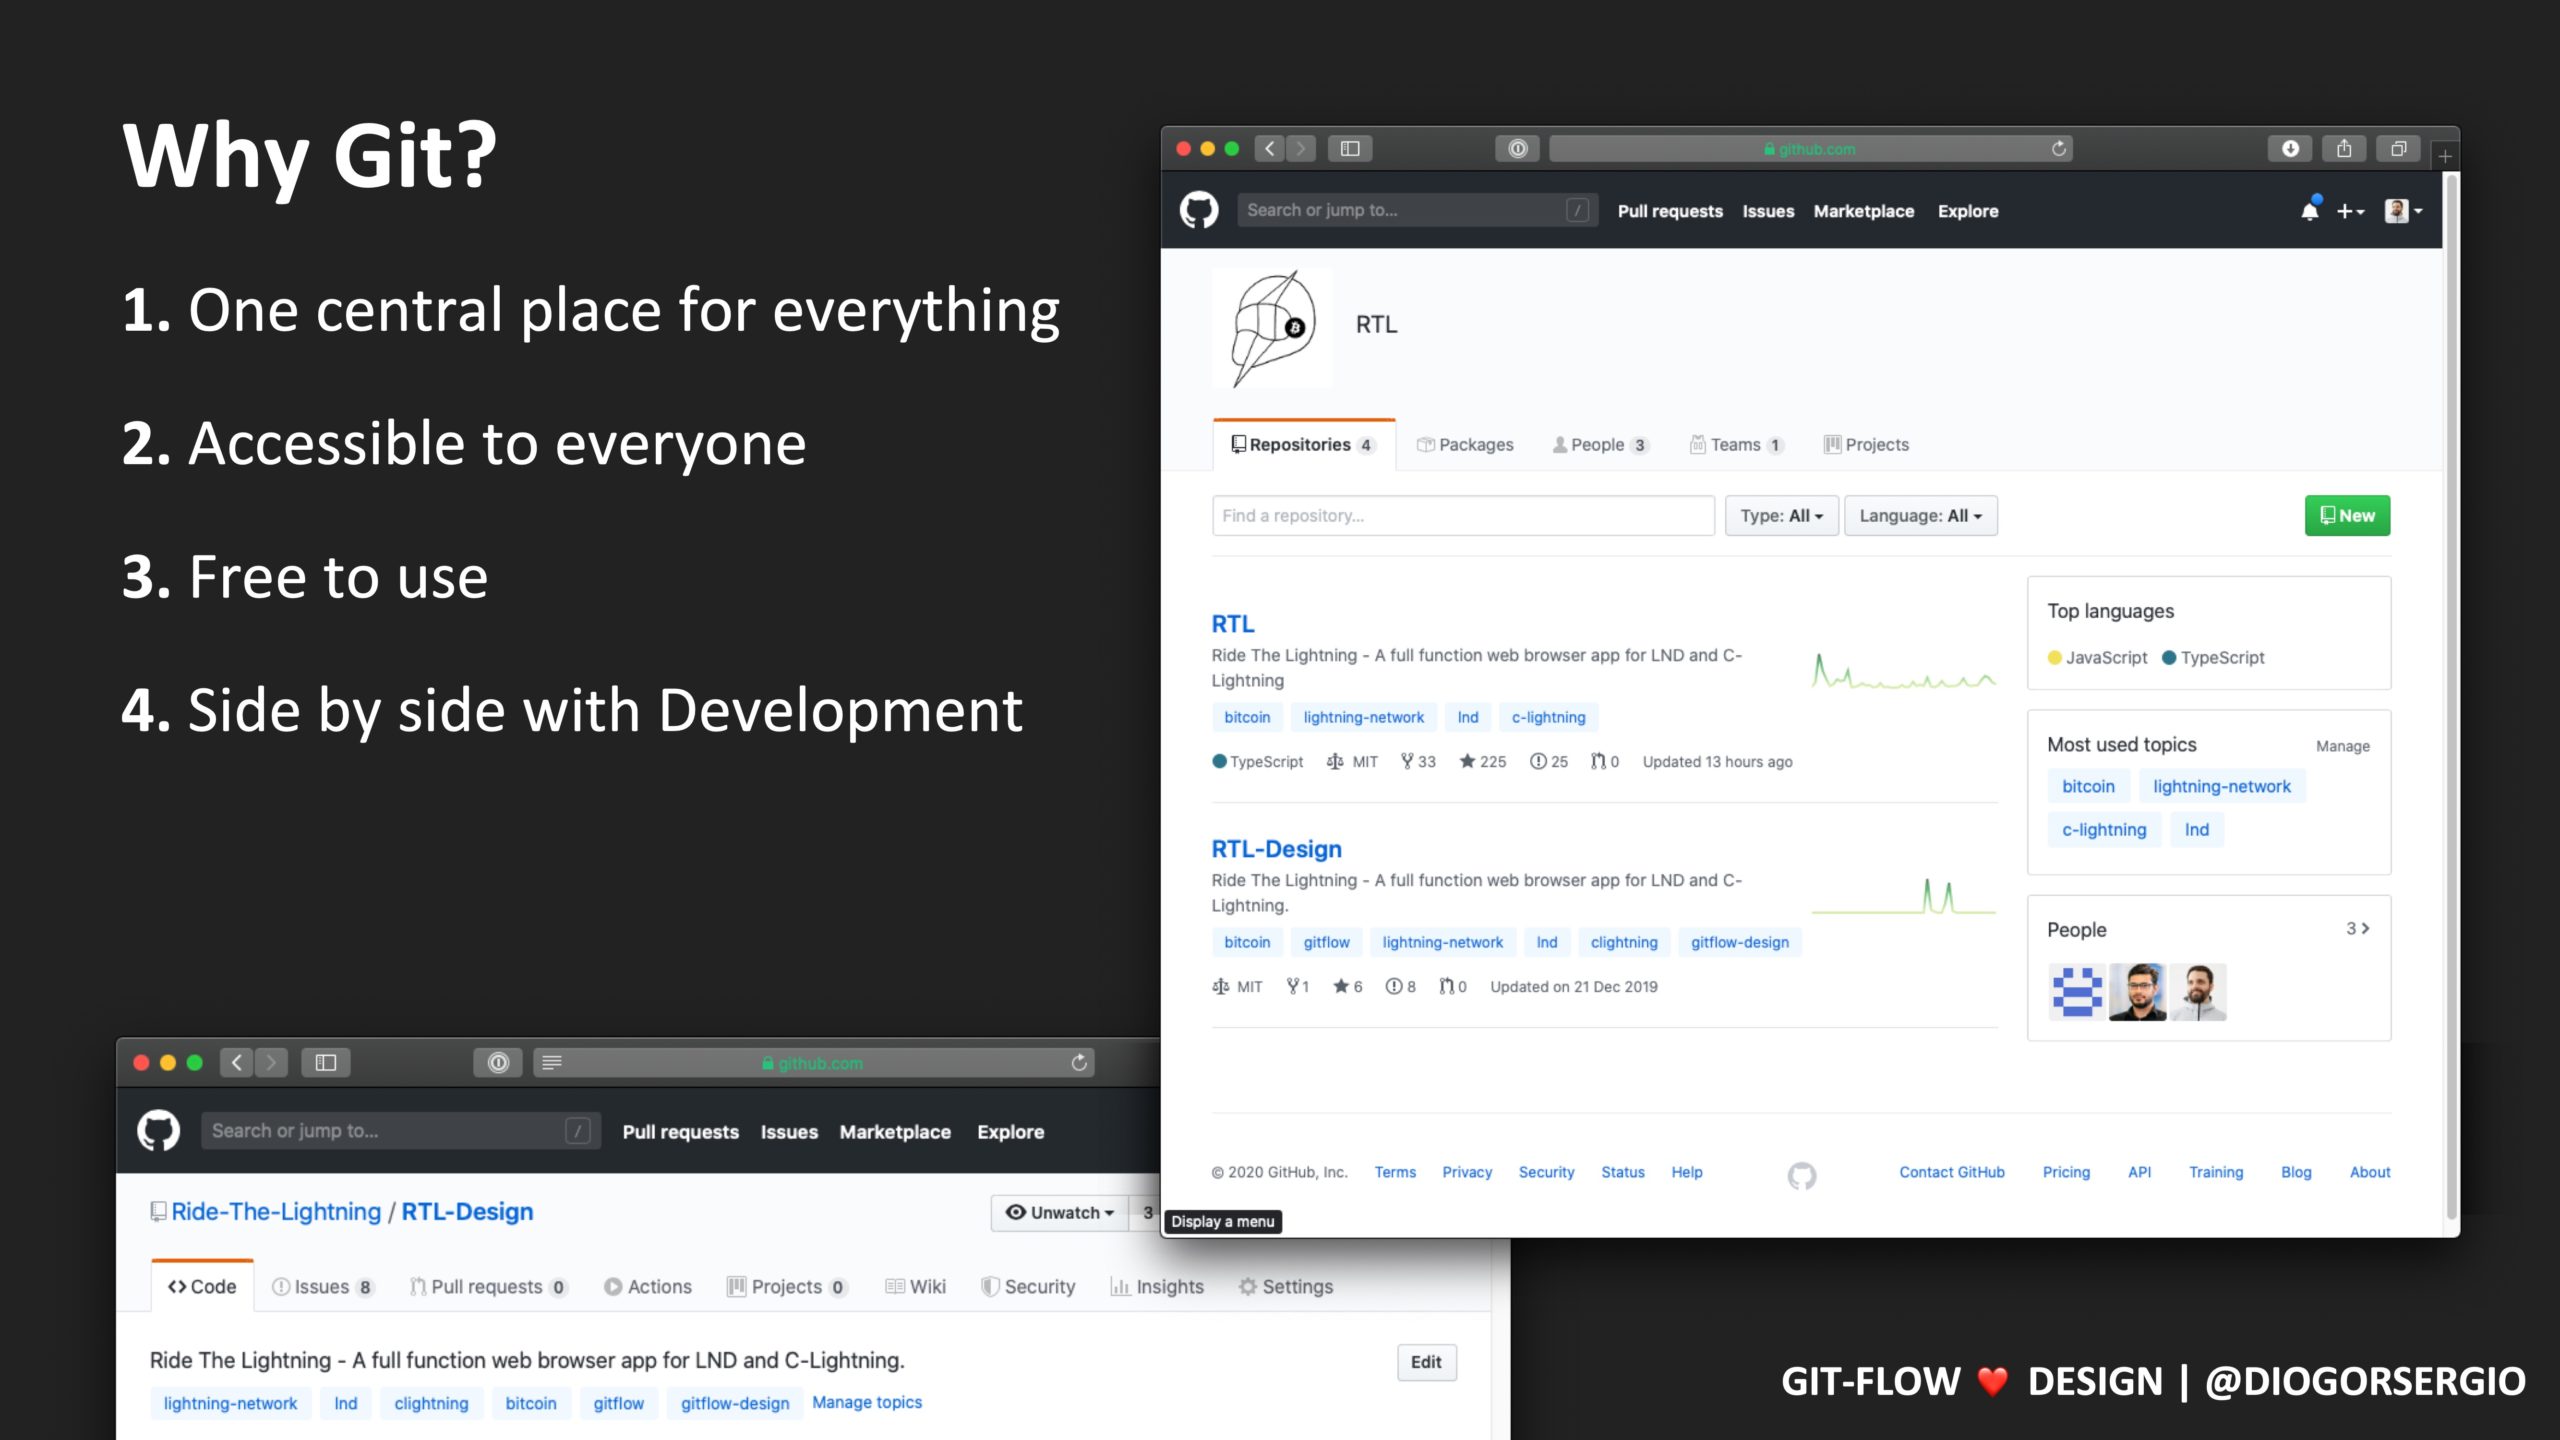
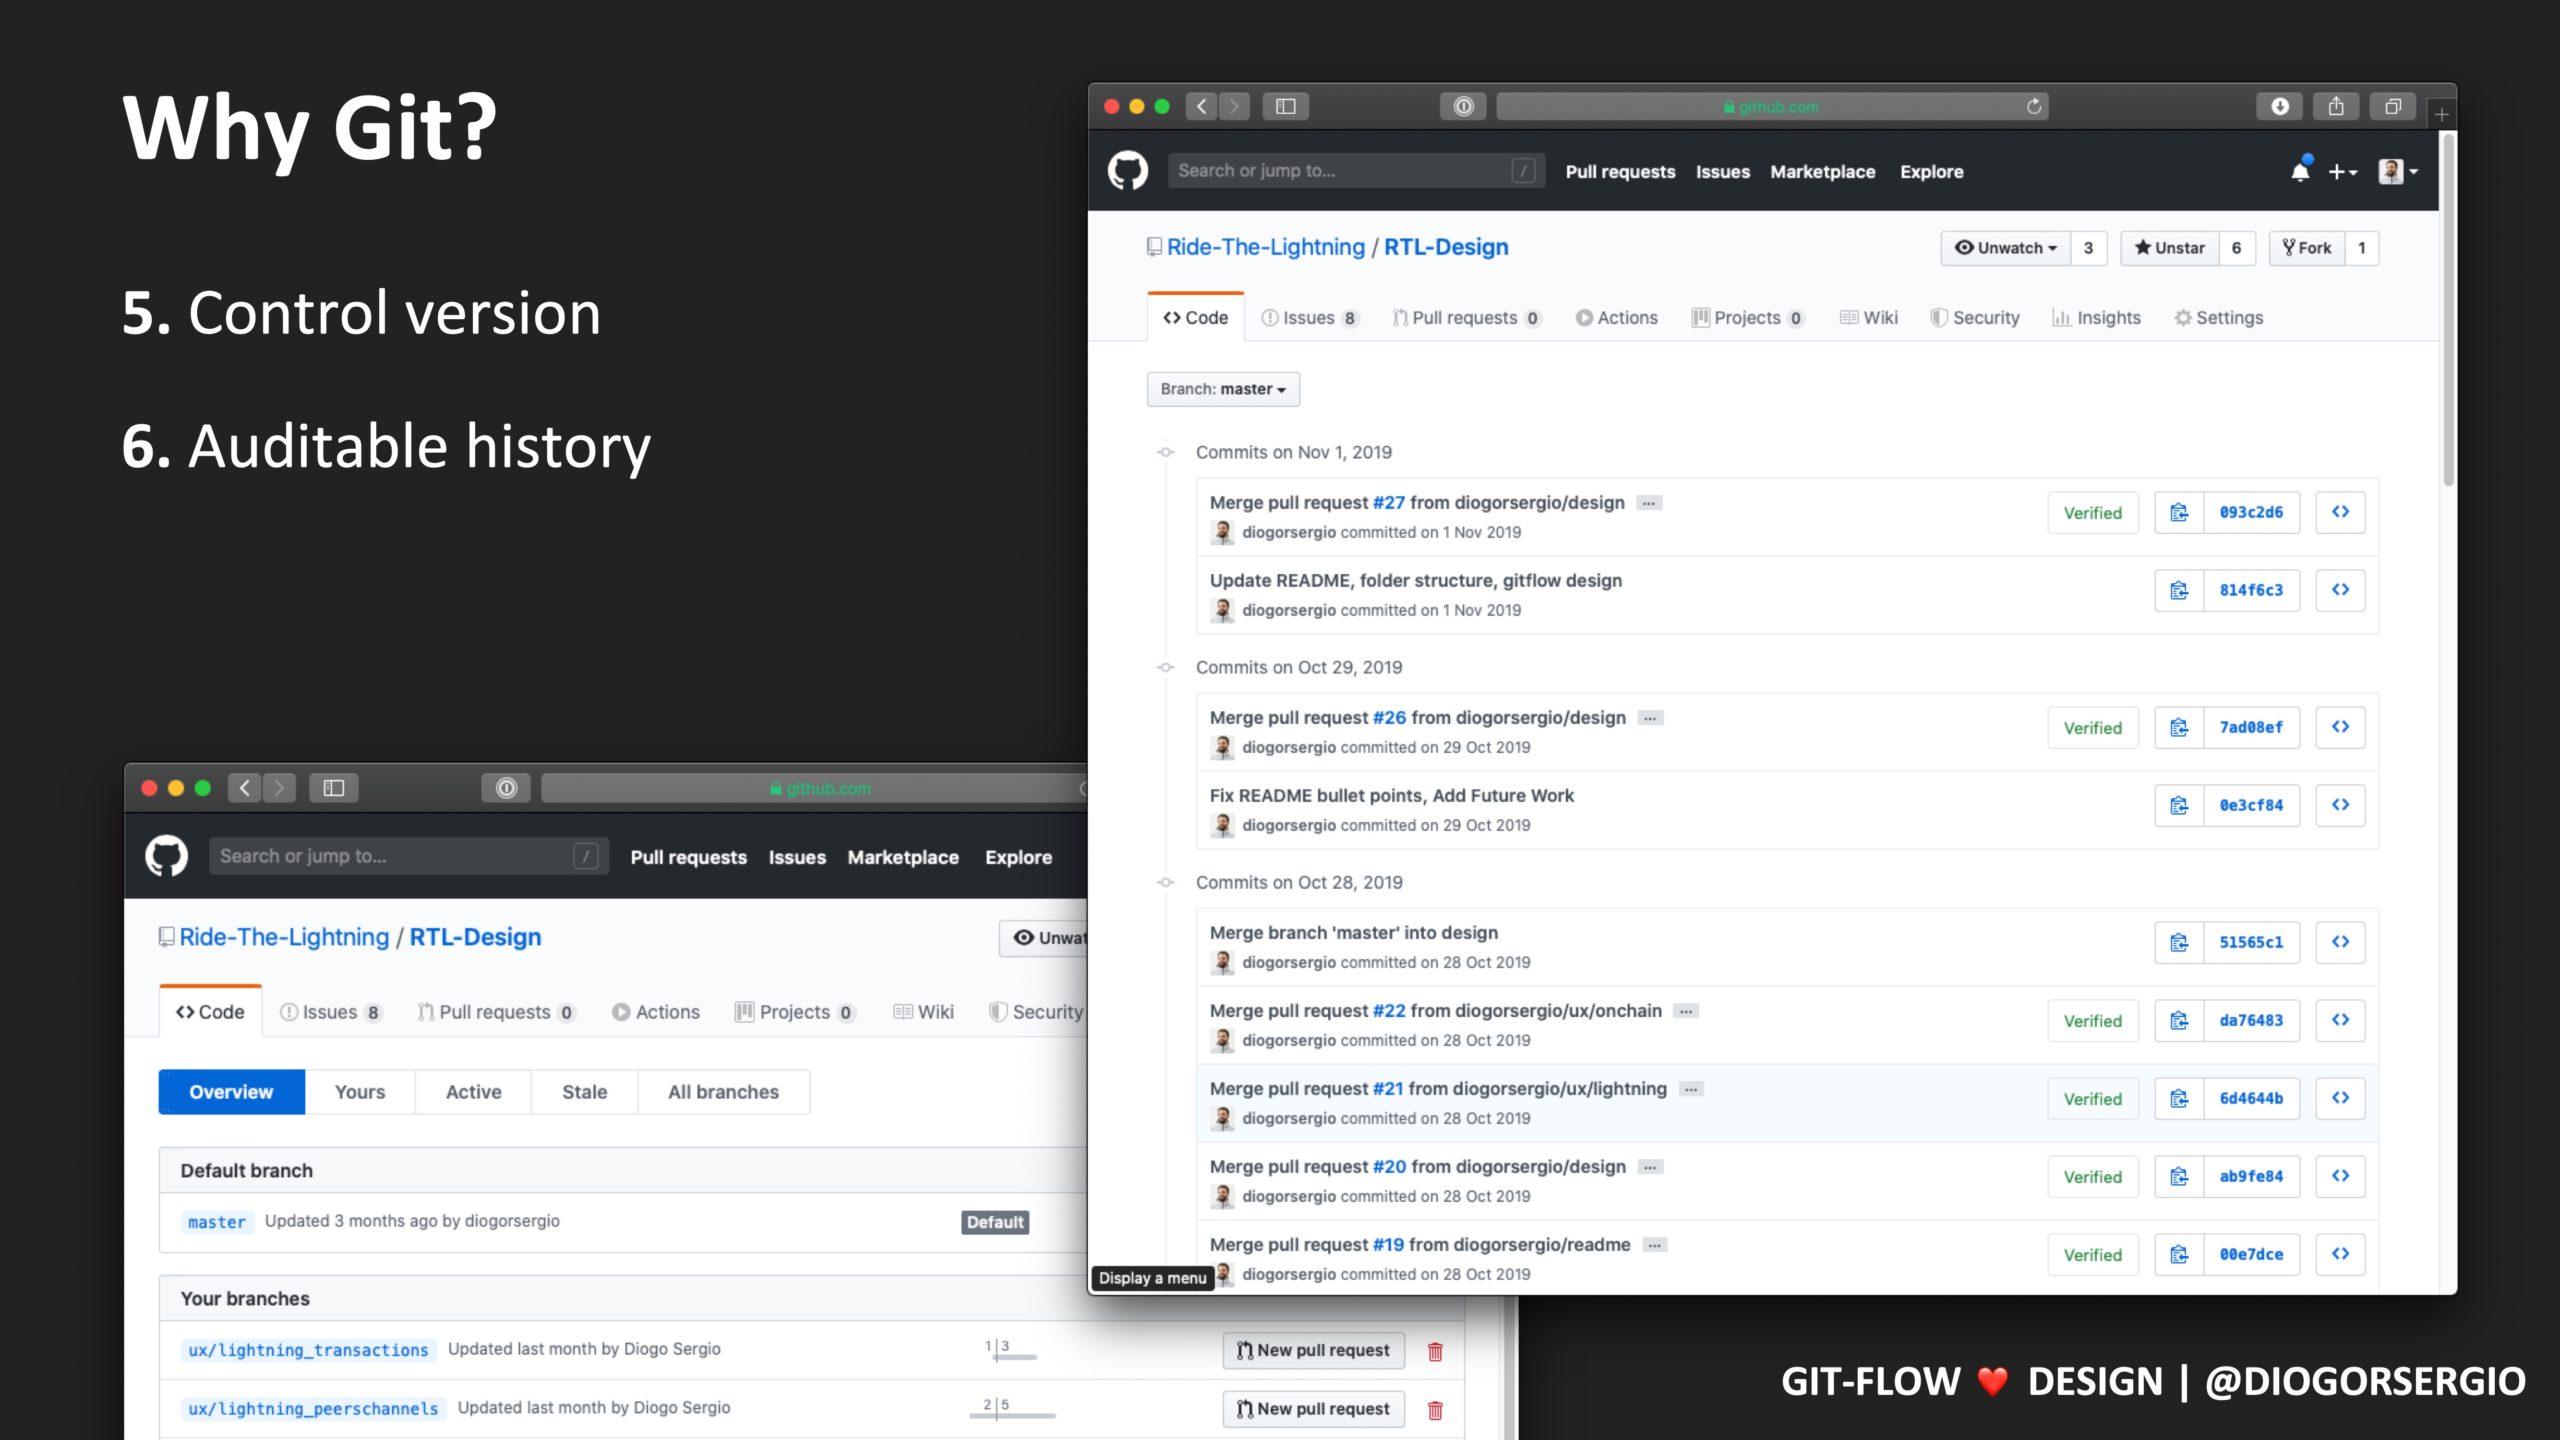
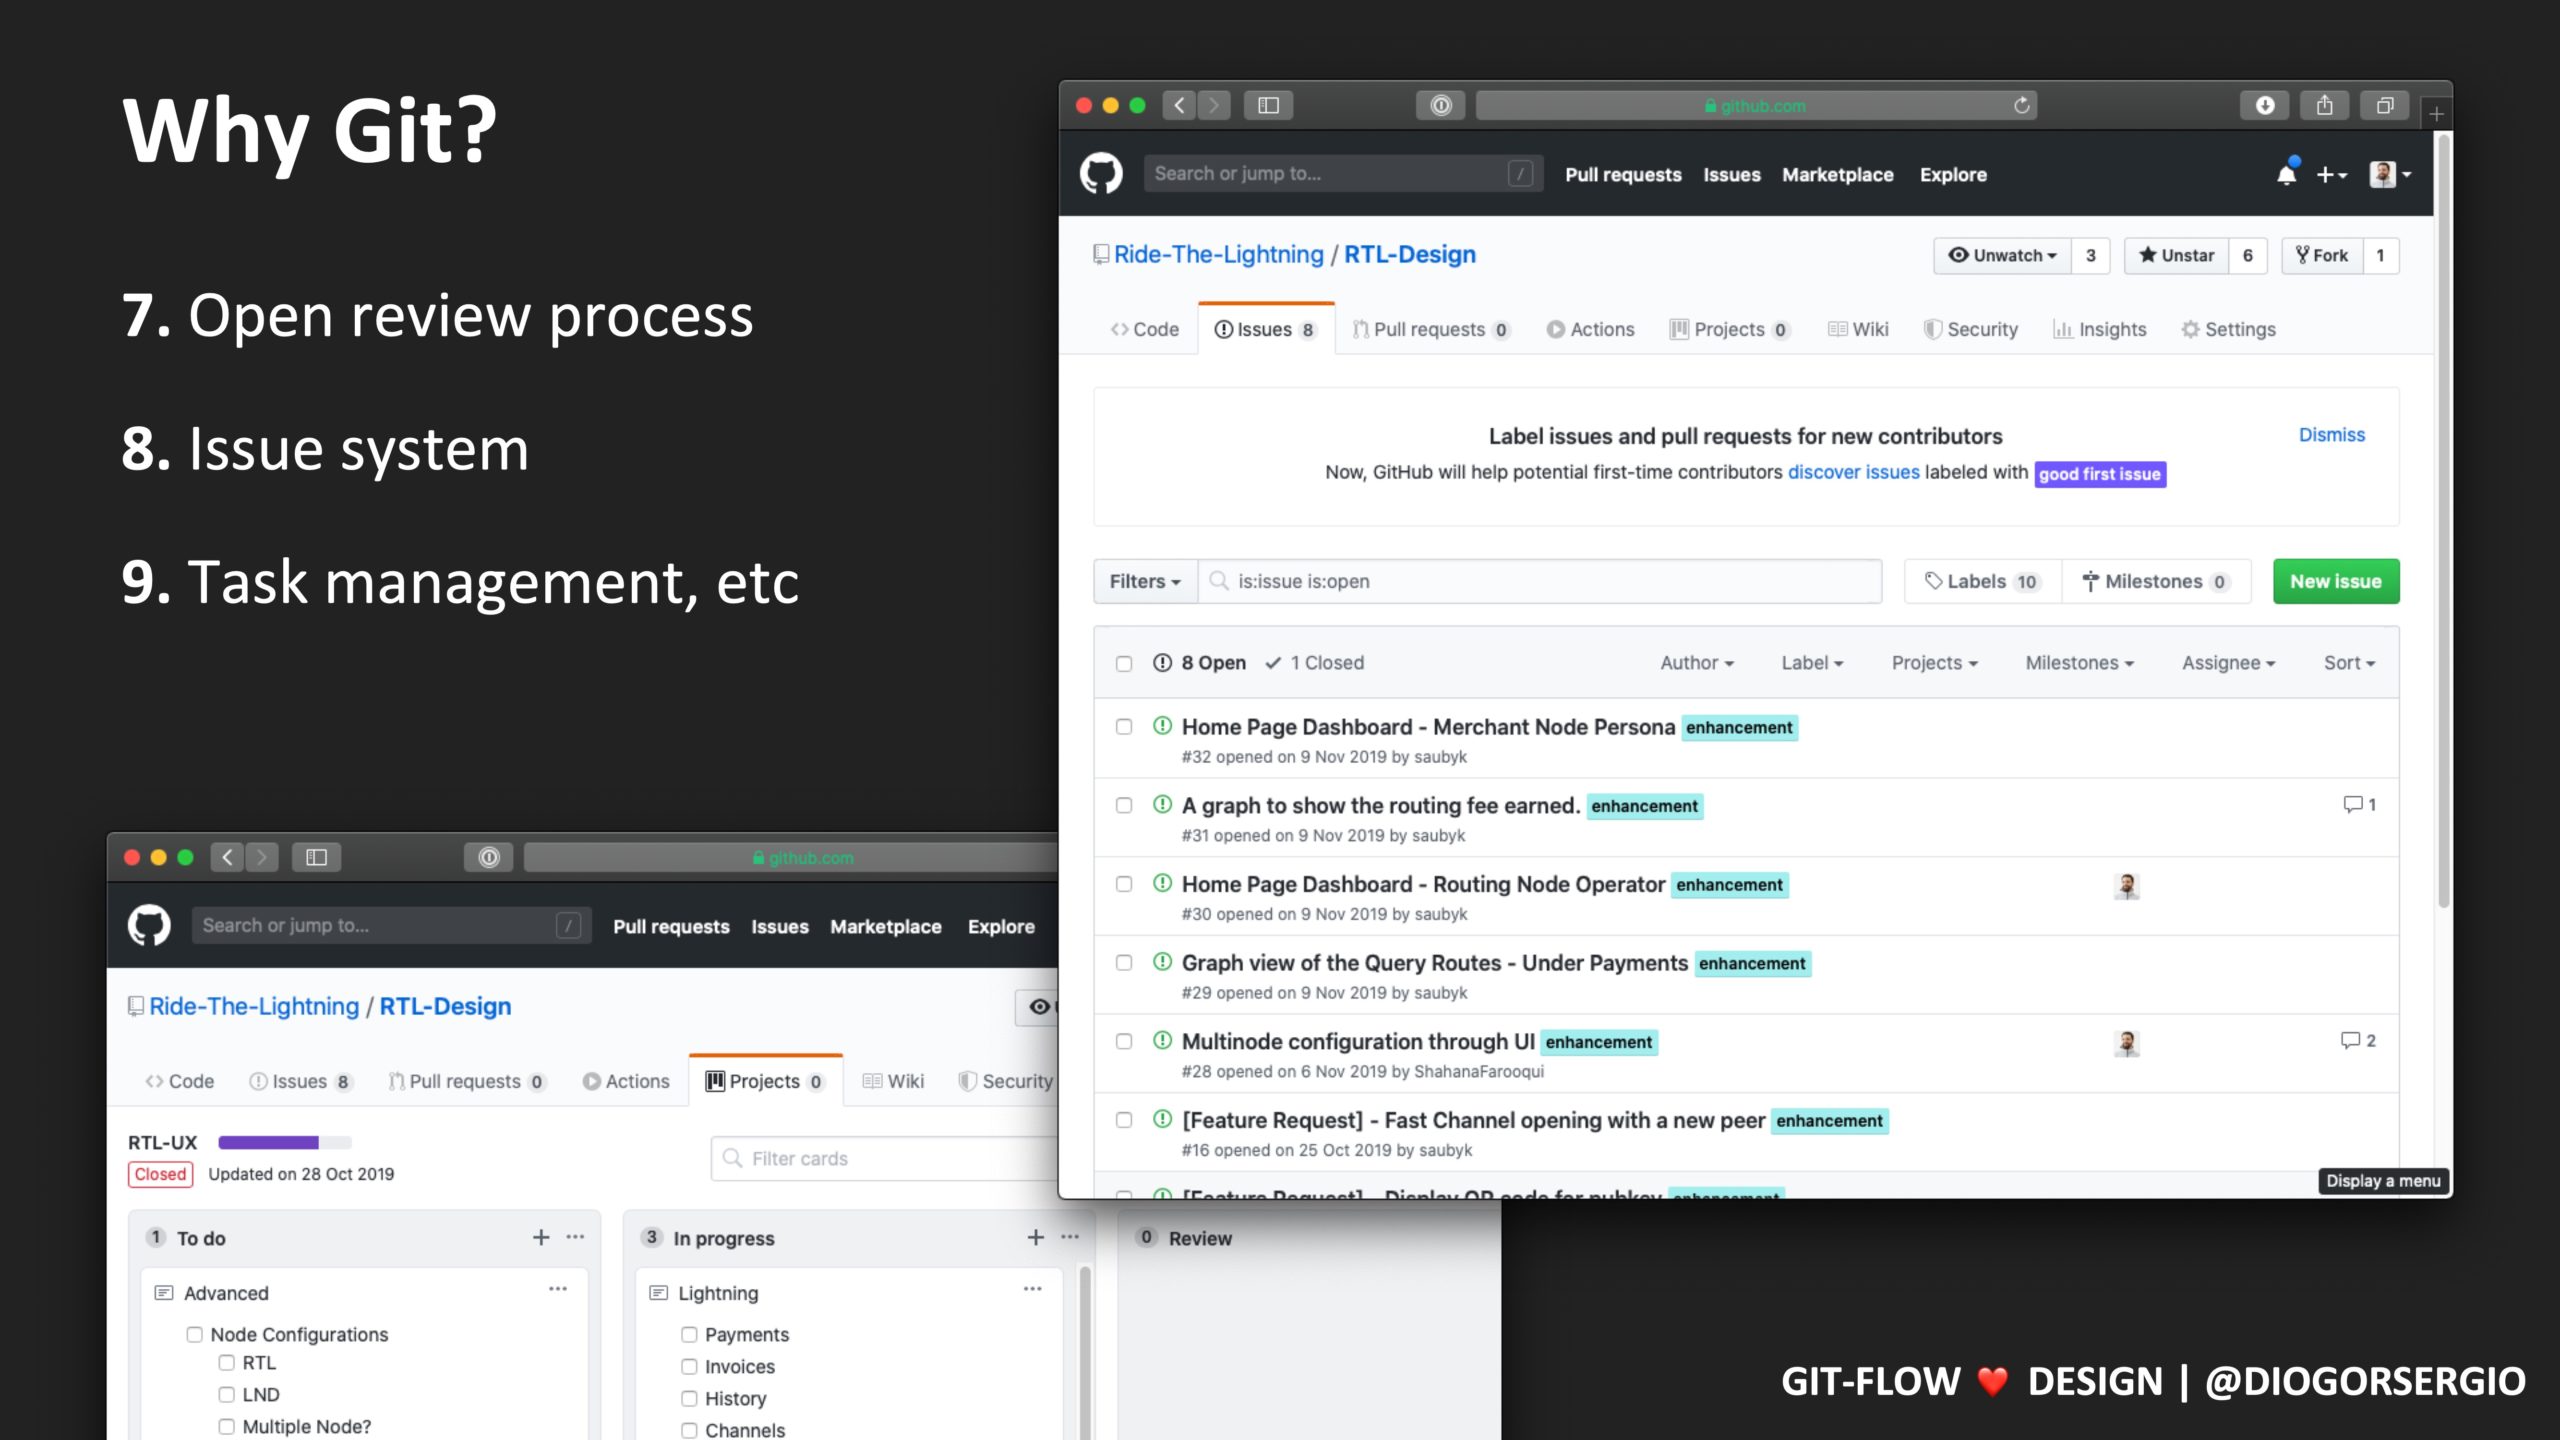
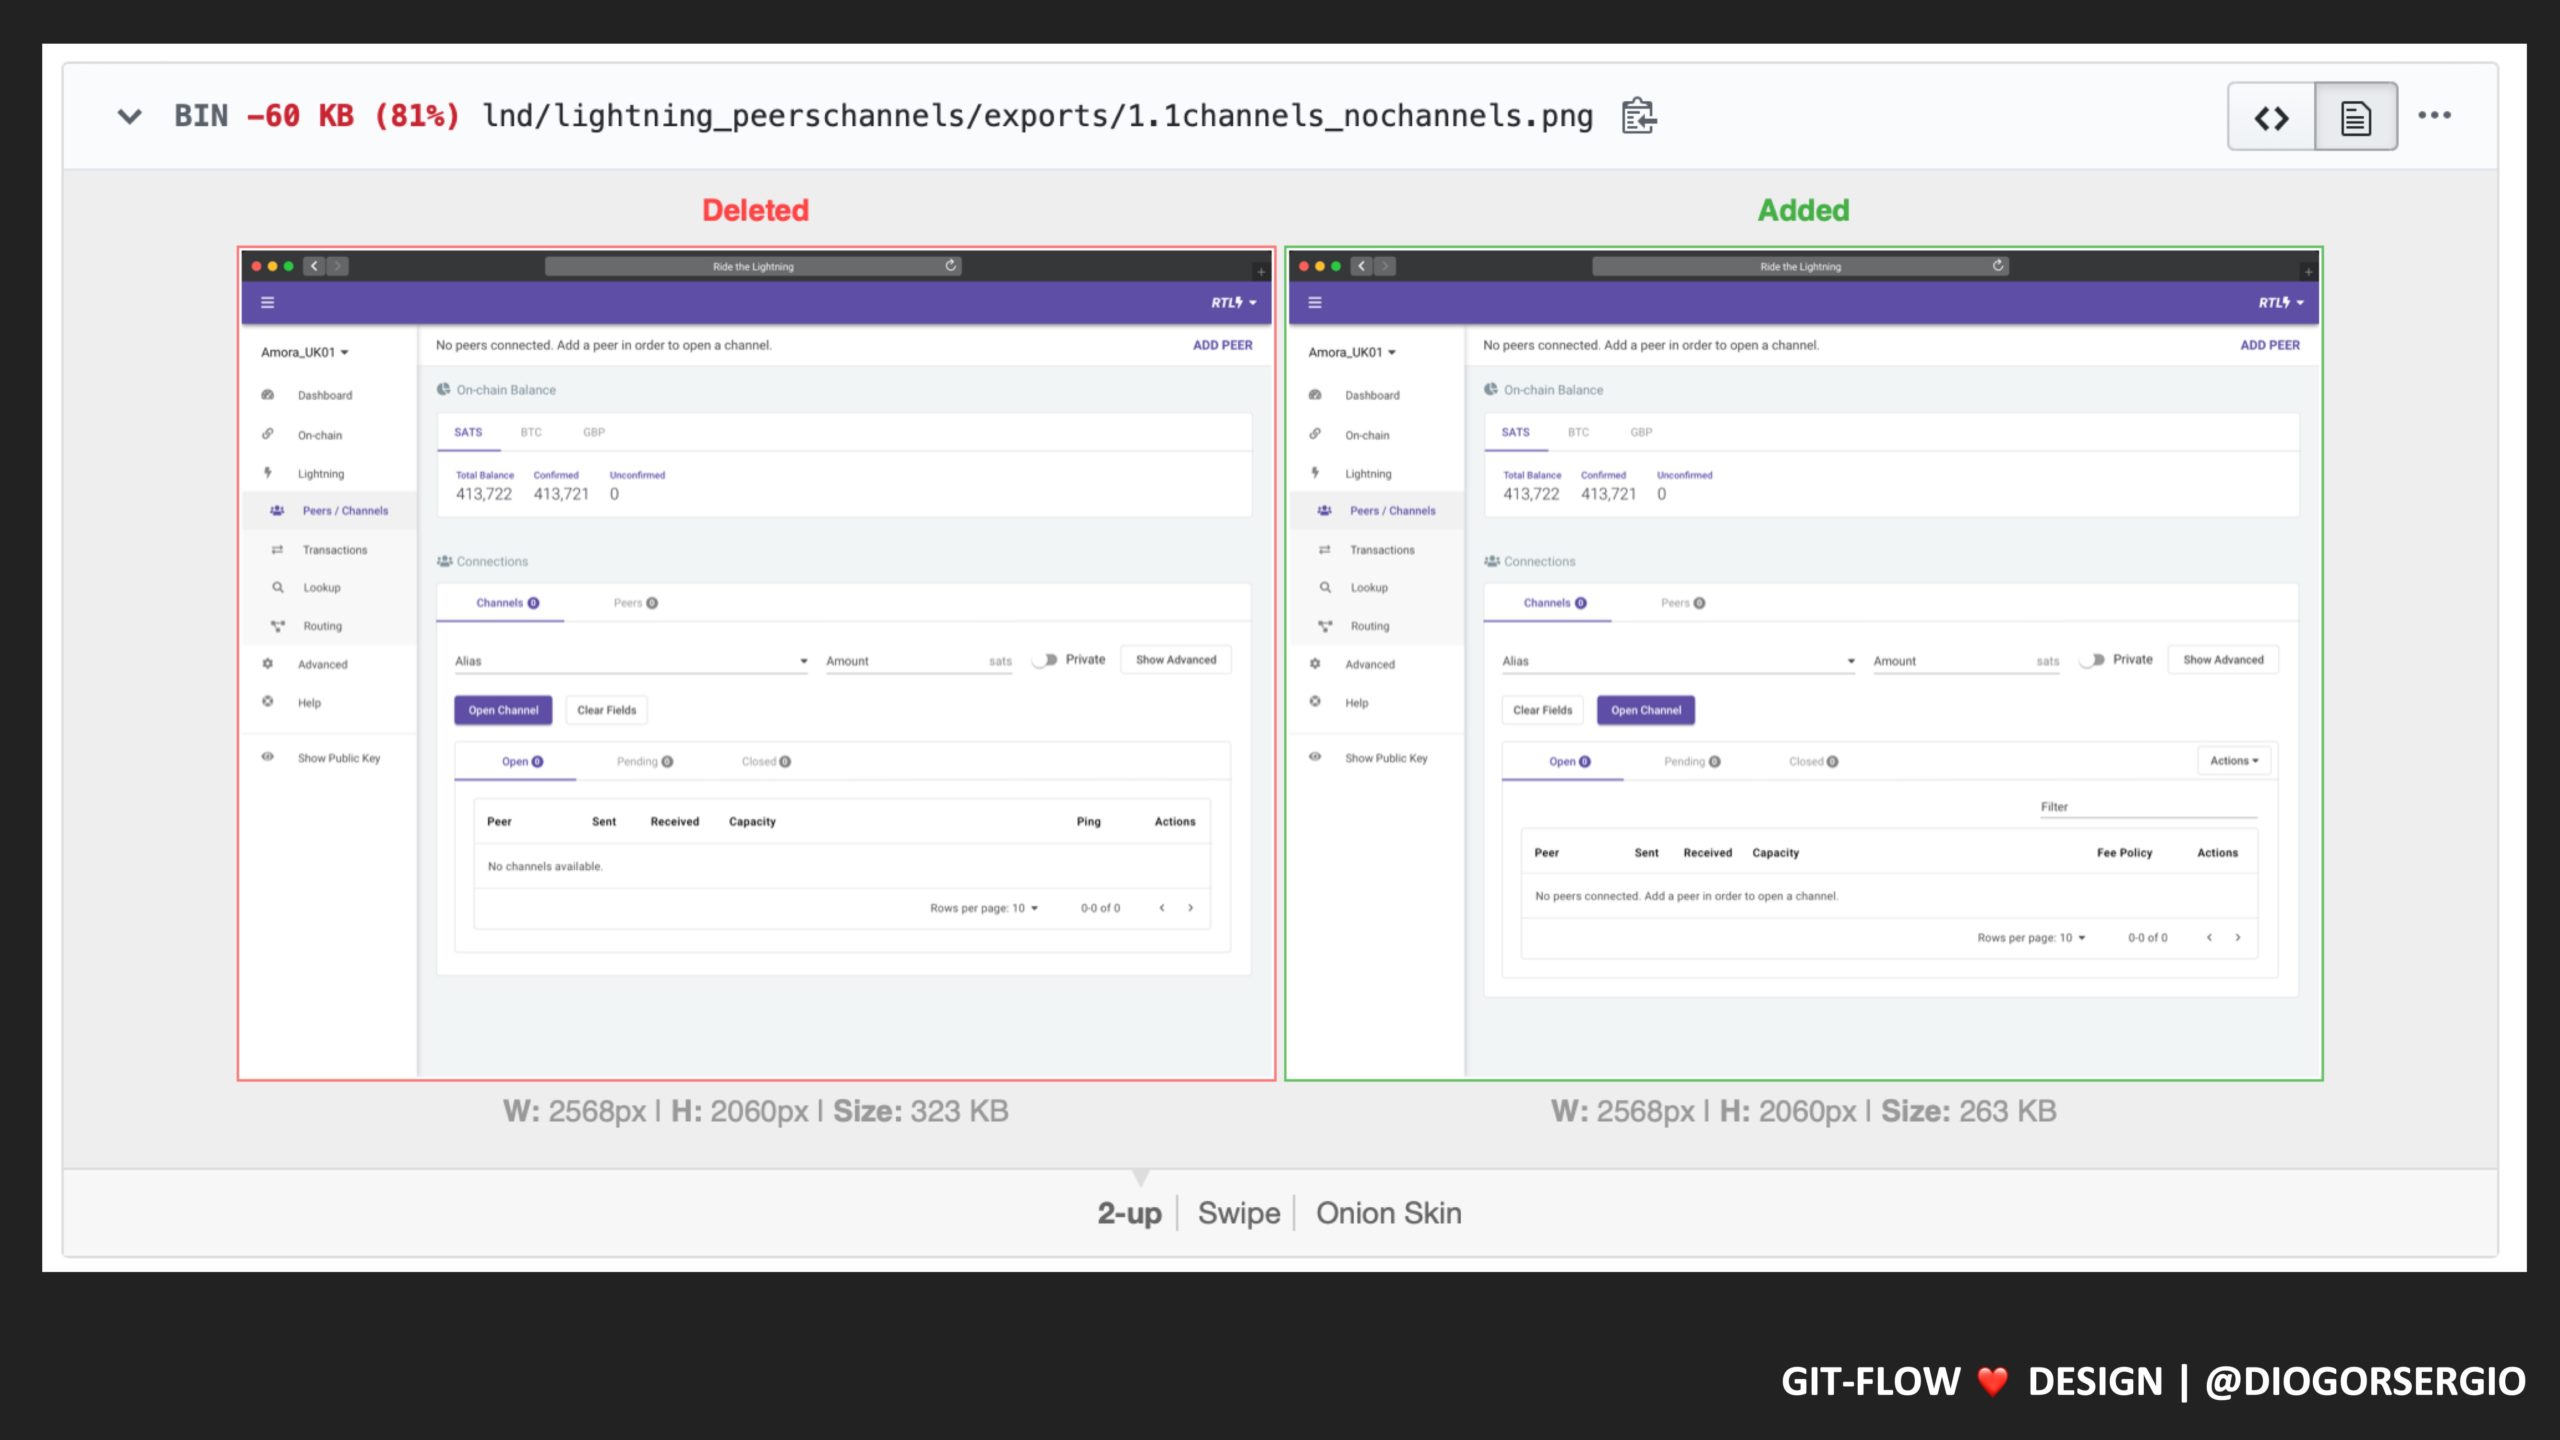
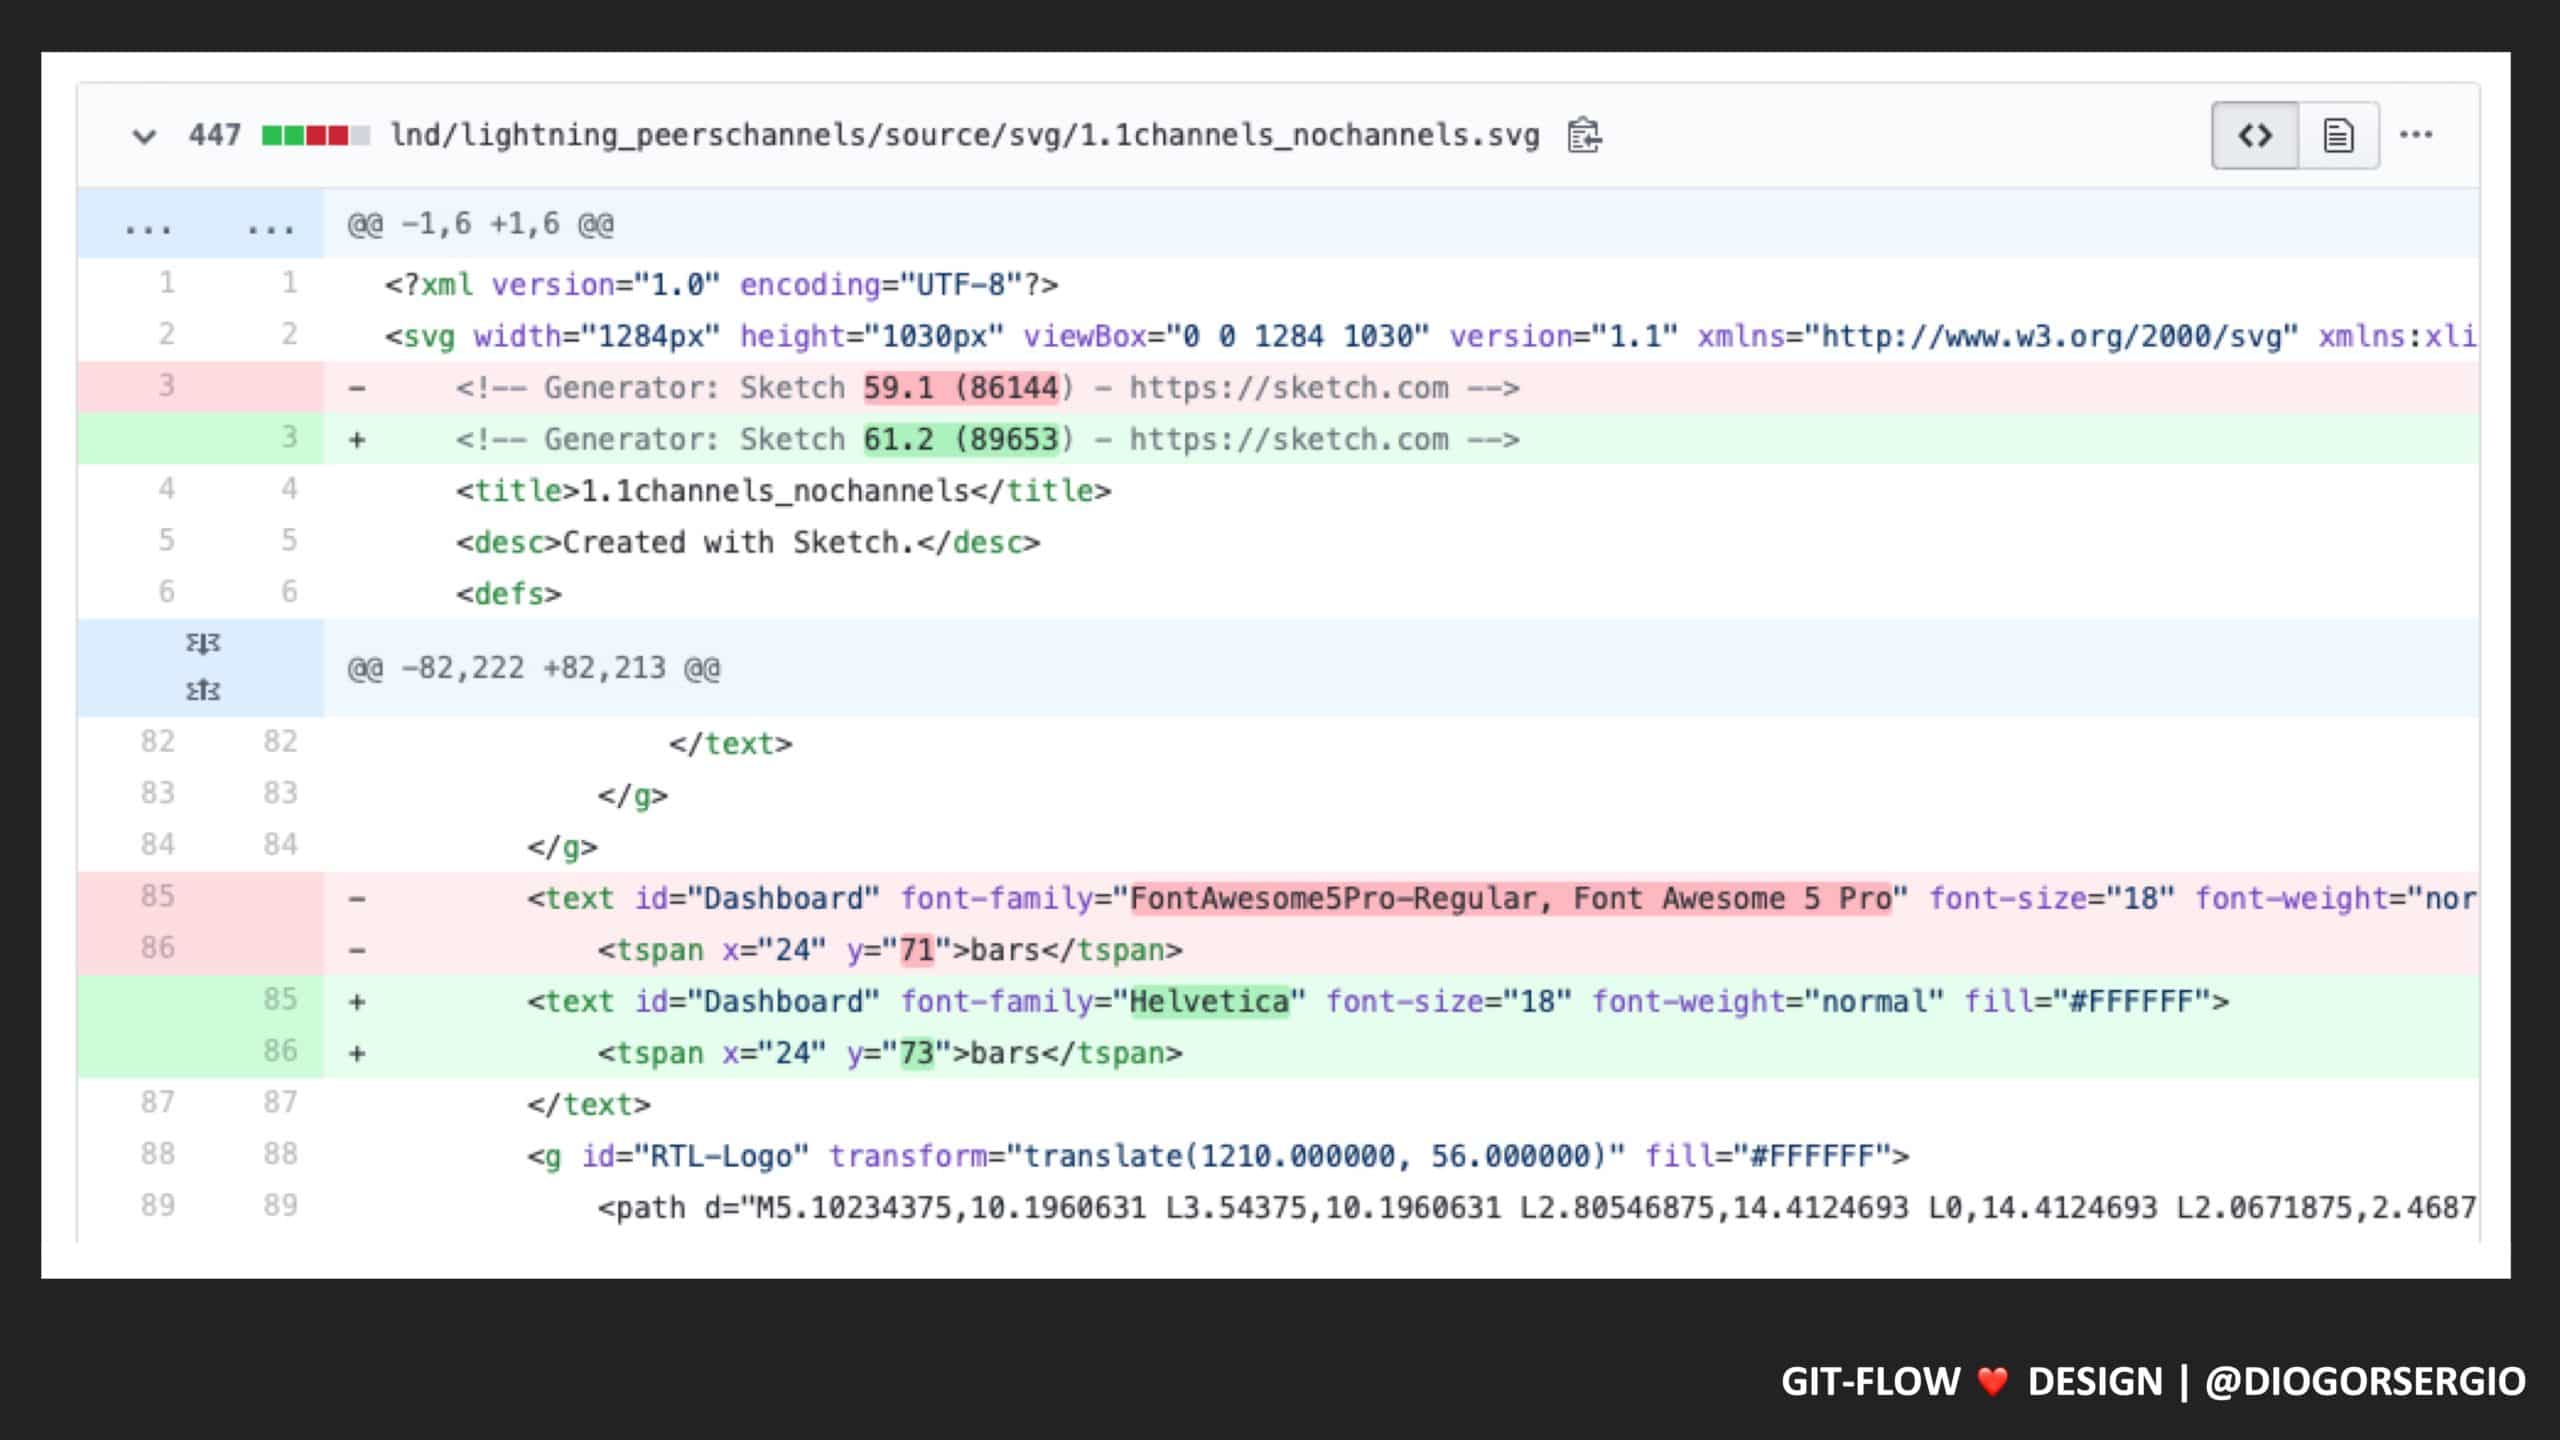
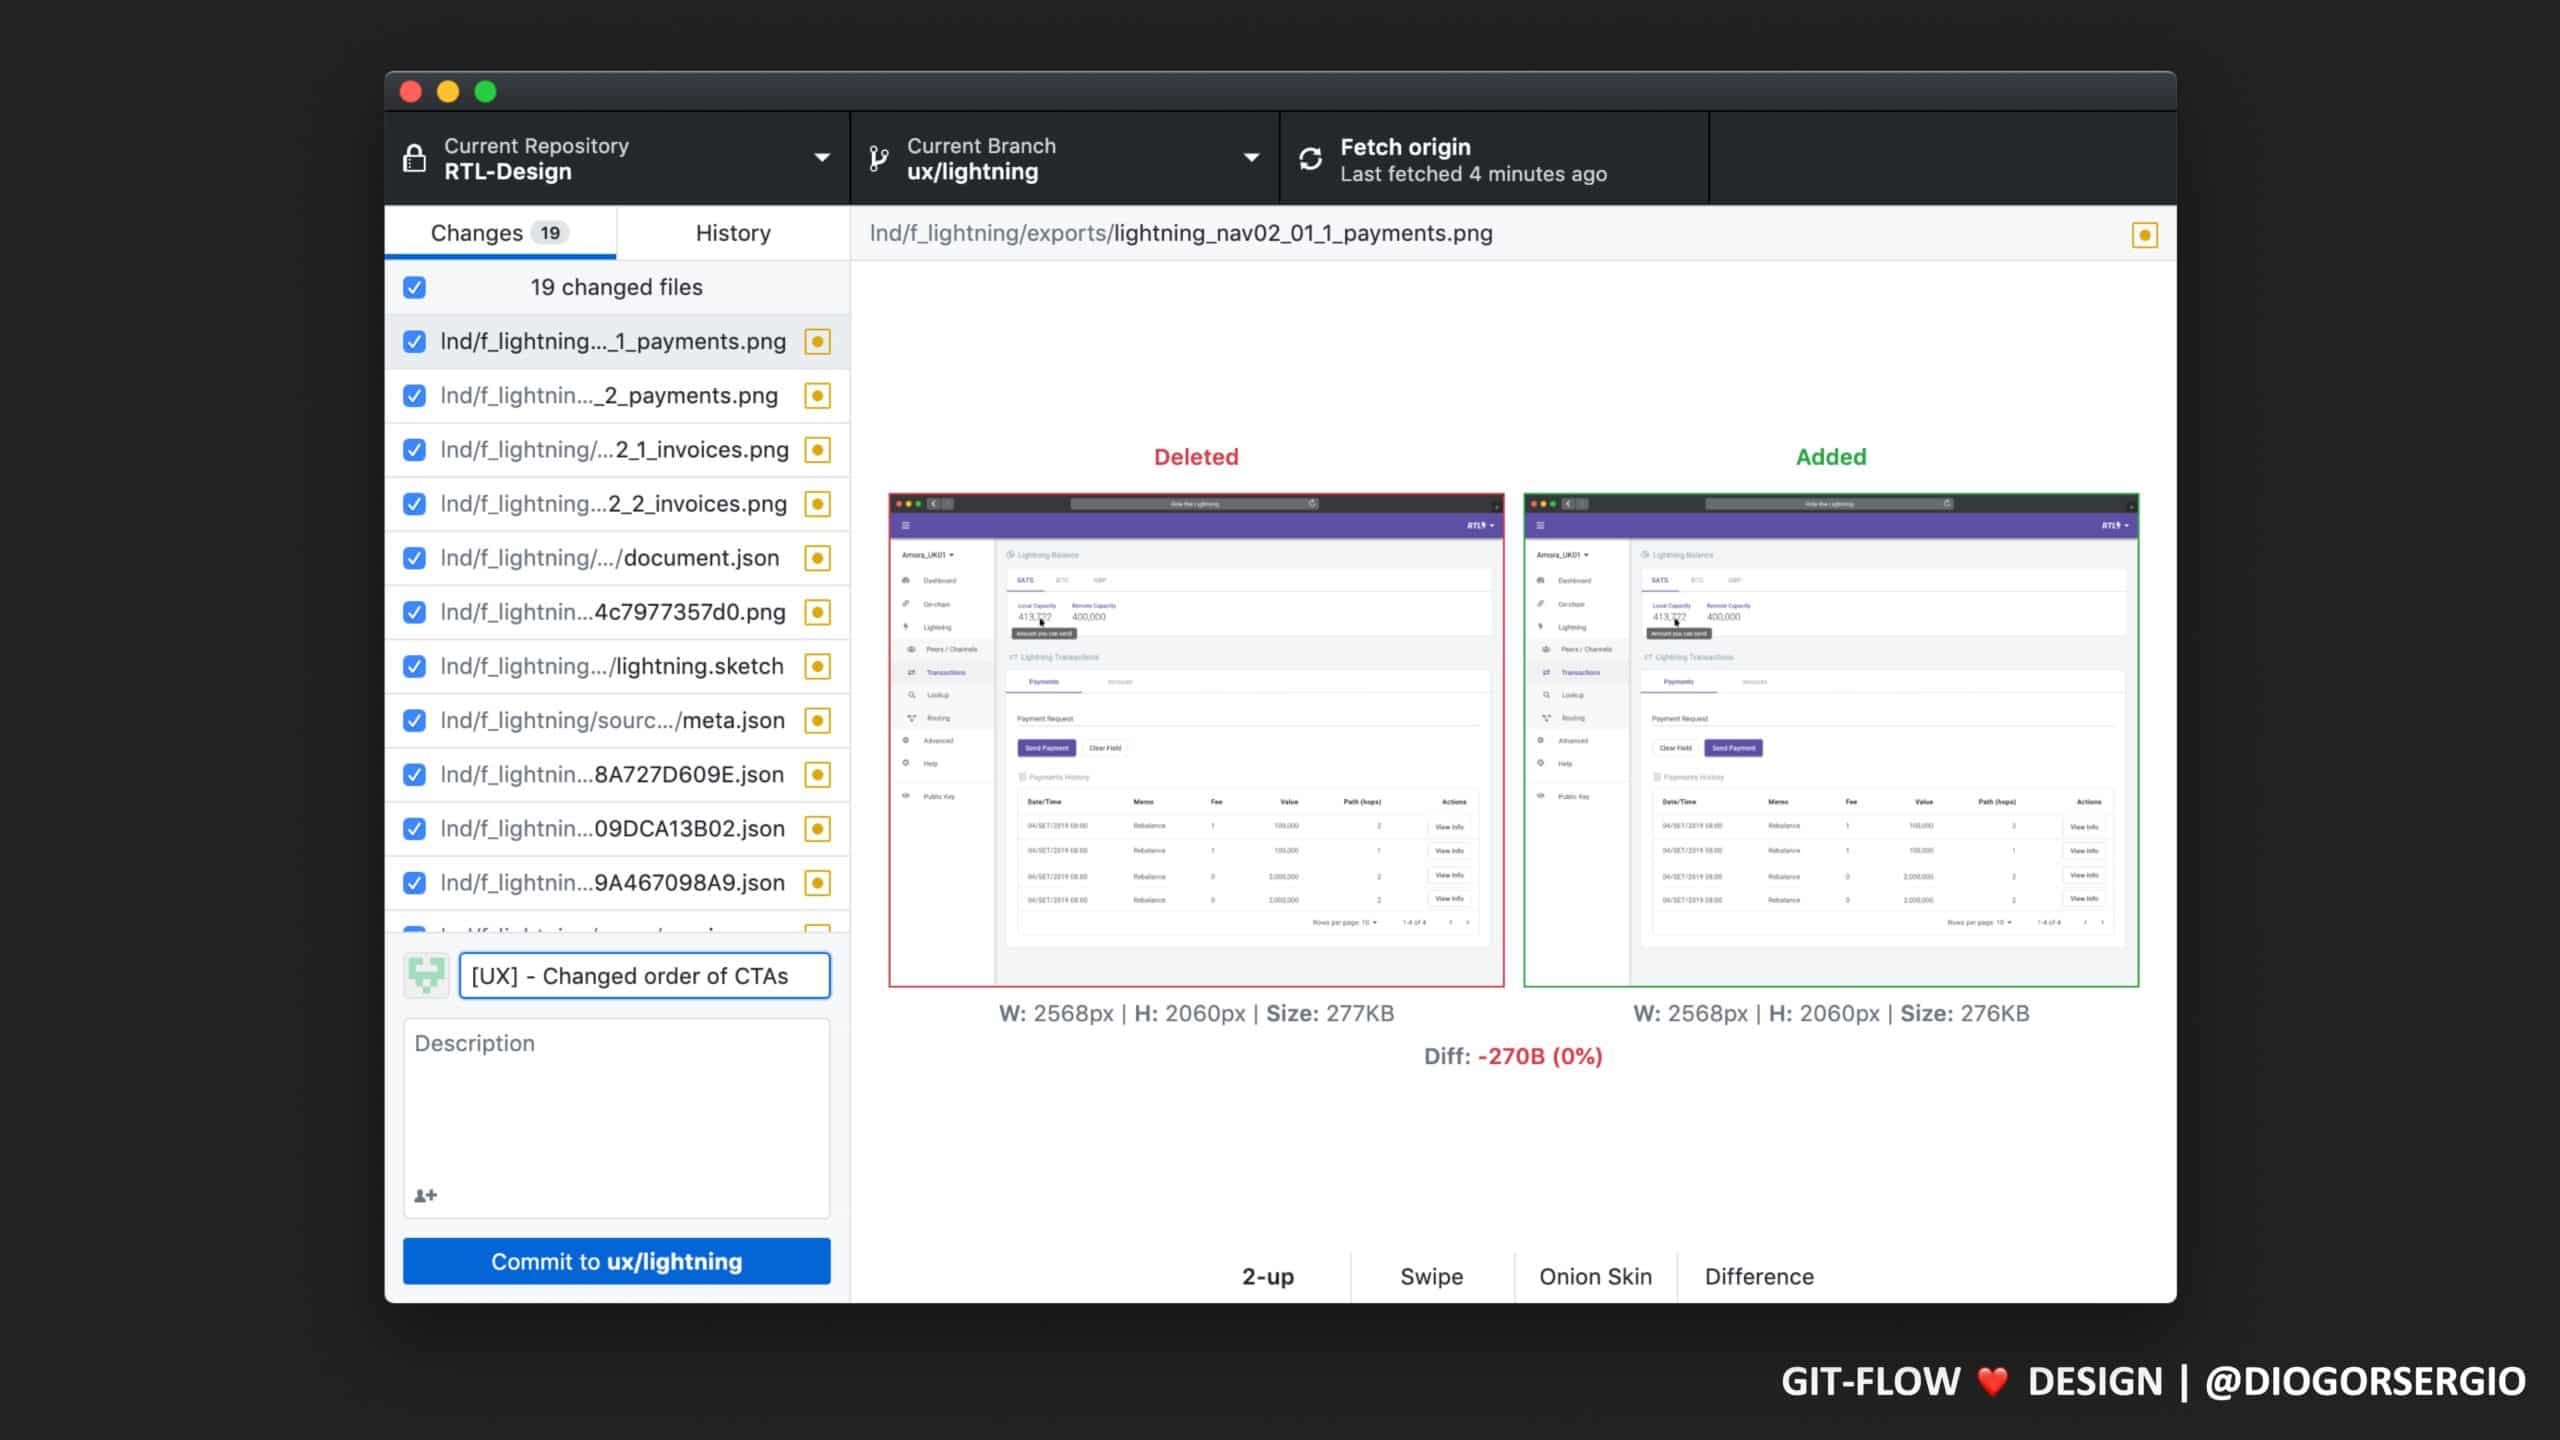
By using git, we get to take advantage of a lot of useful features available such as controlled access, review process, feedback system, version control files, preview changes in context with side-by-side diffs, detailed history of changes and more.
ConferenceFOSDEMYear2020


Gitflow Design
Gitflow-design is a git workflow for designers and design work. It’s meant to be open, platform agnostic and looking to minimise dependencies on proprietary software to help increase collaboration. The workflow itself is essentially a set of procedures that every team member has to follow in order to come to a design process.
By using git, we get to take advantage of a lot of useful features available such as controlled access, review process, feedback system, version control files, preview changes in context with side-by-side diffs, detailed history of changes and more.
Overview
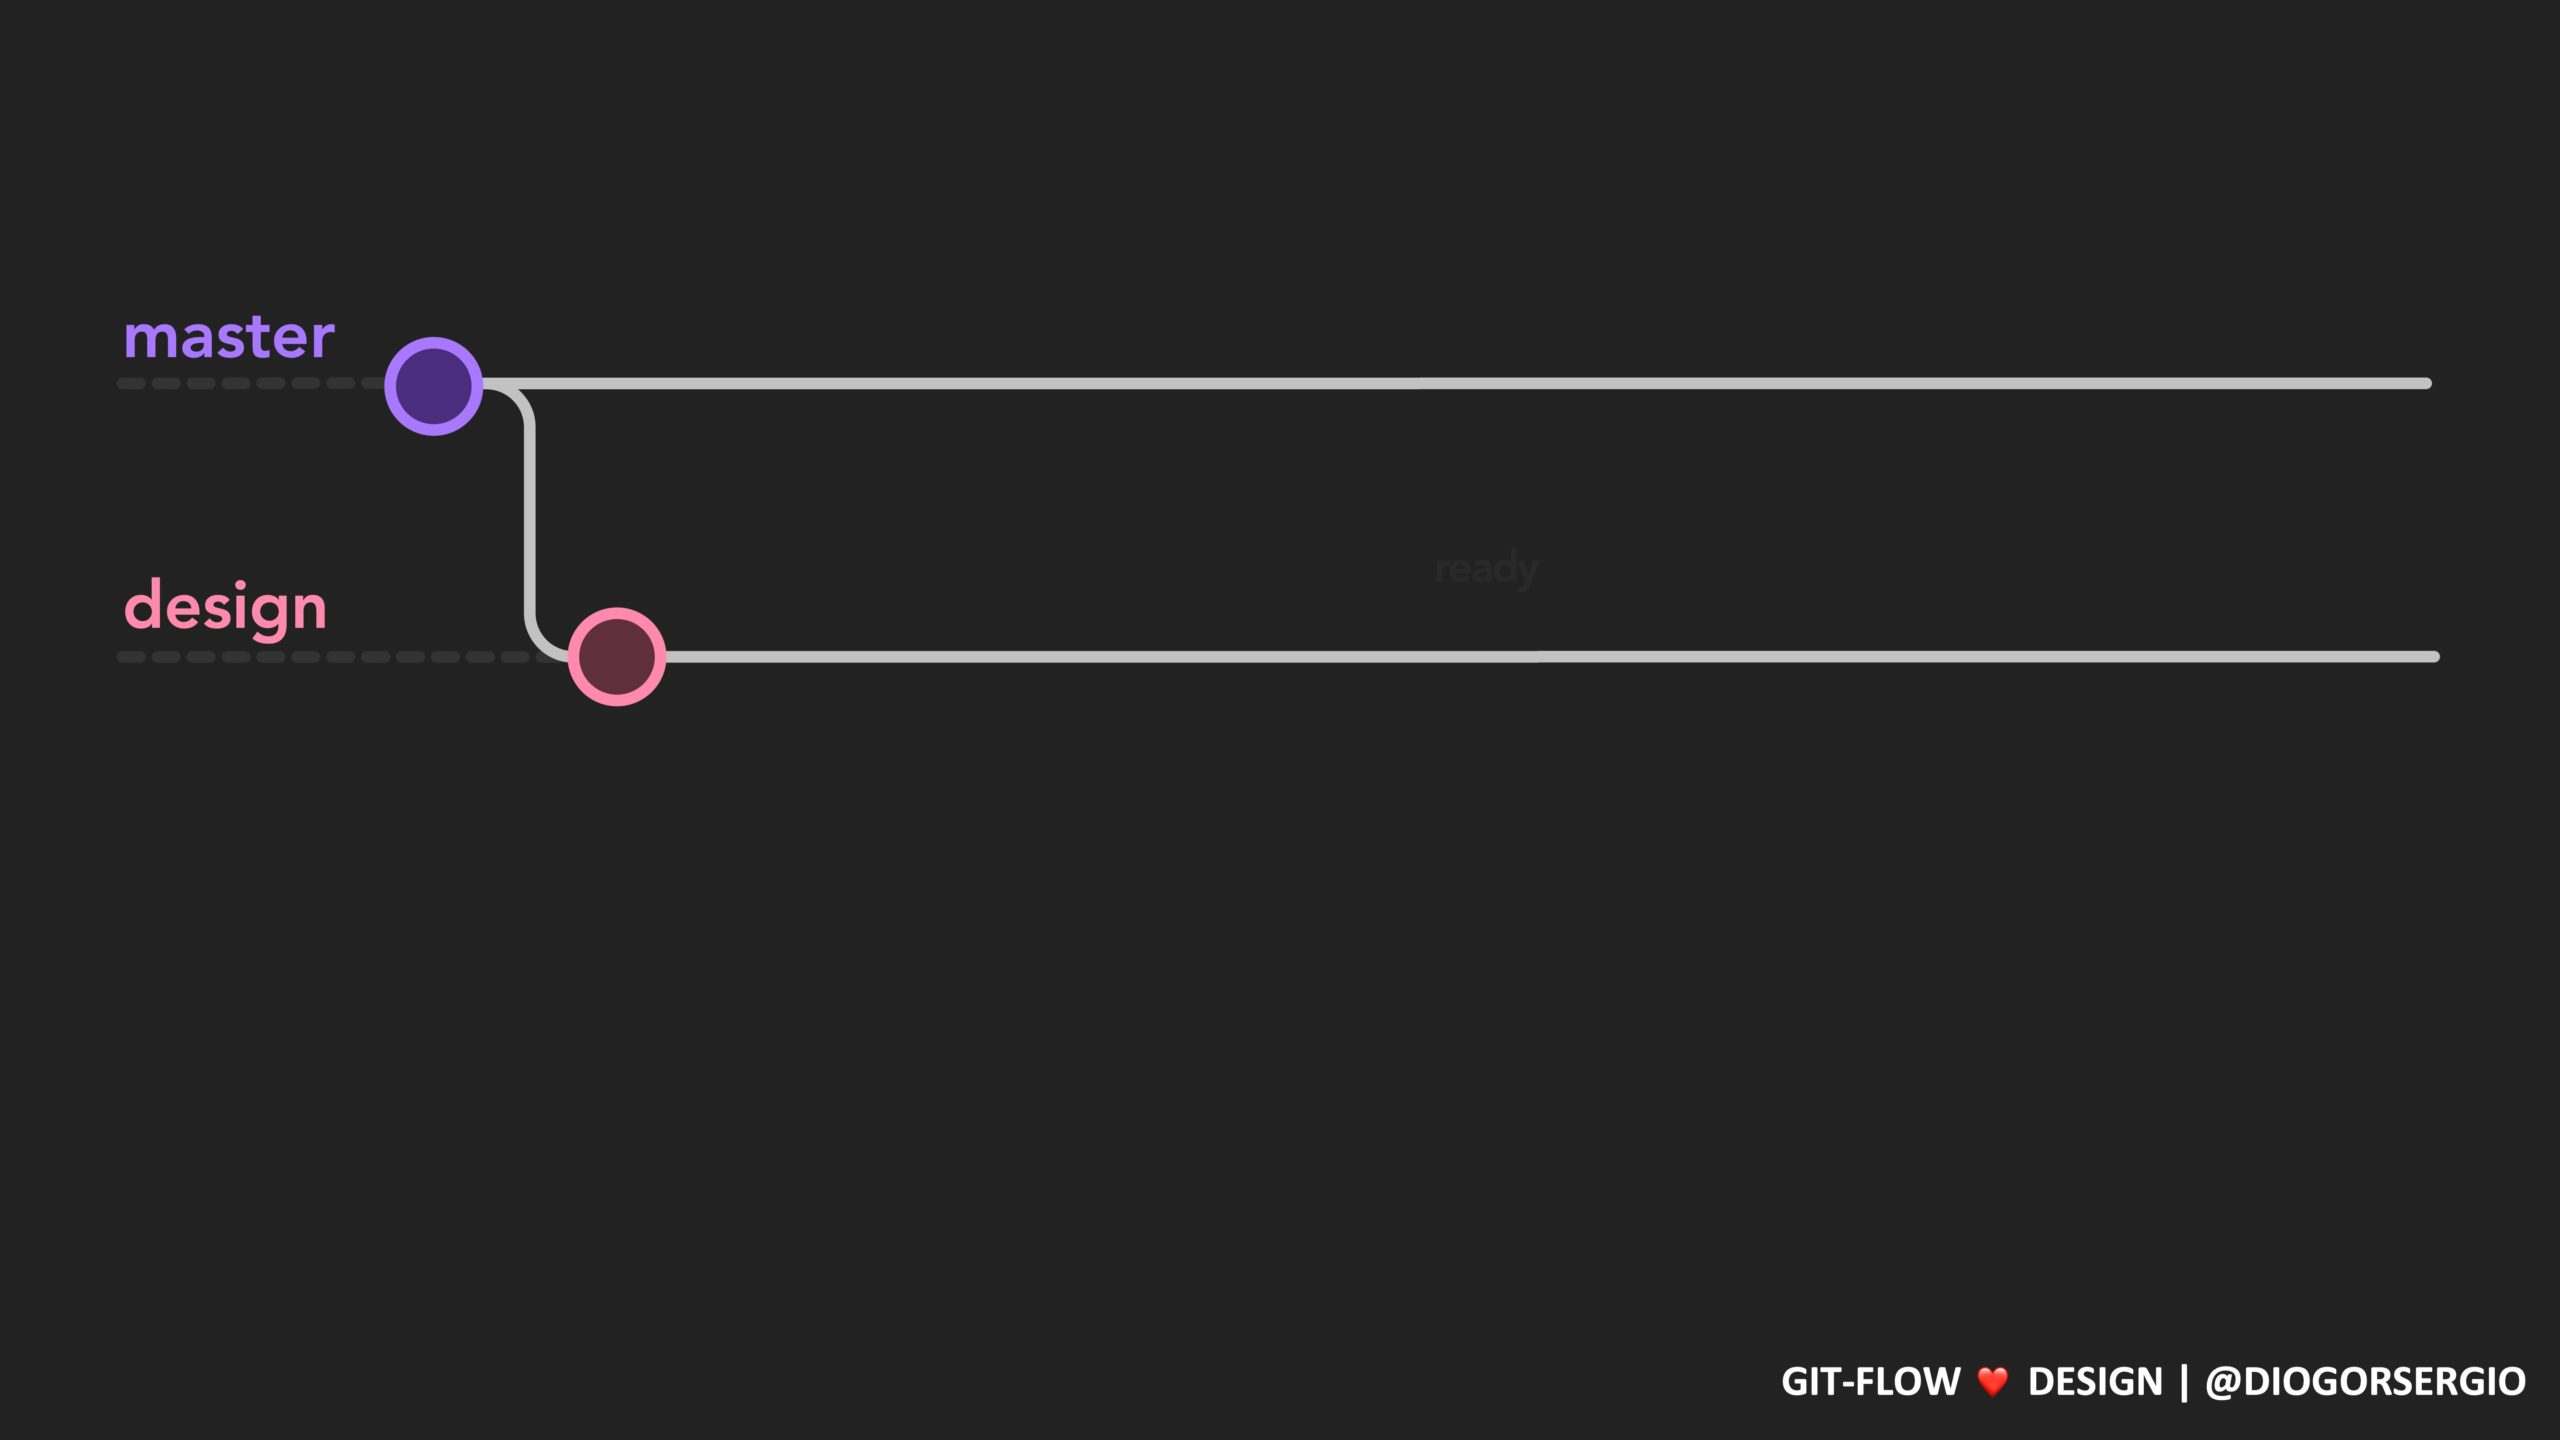
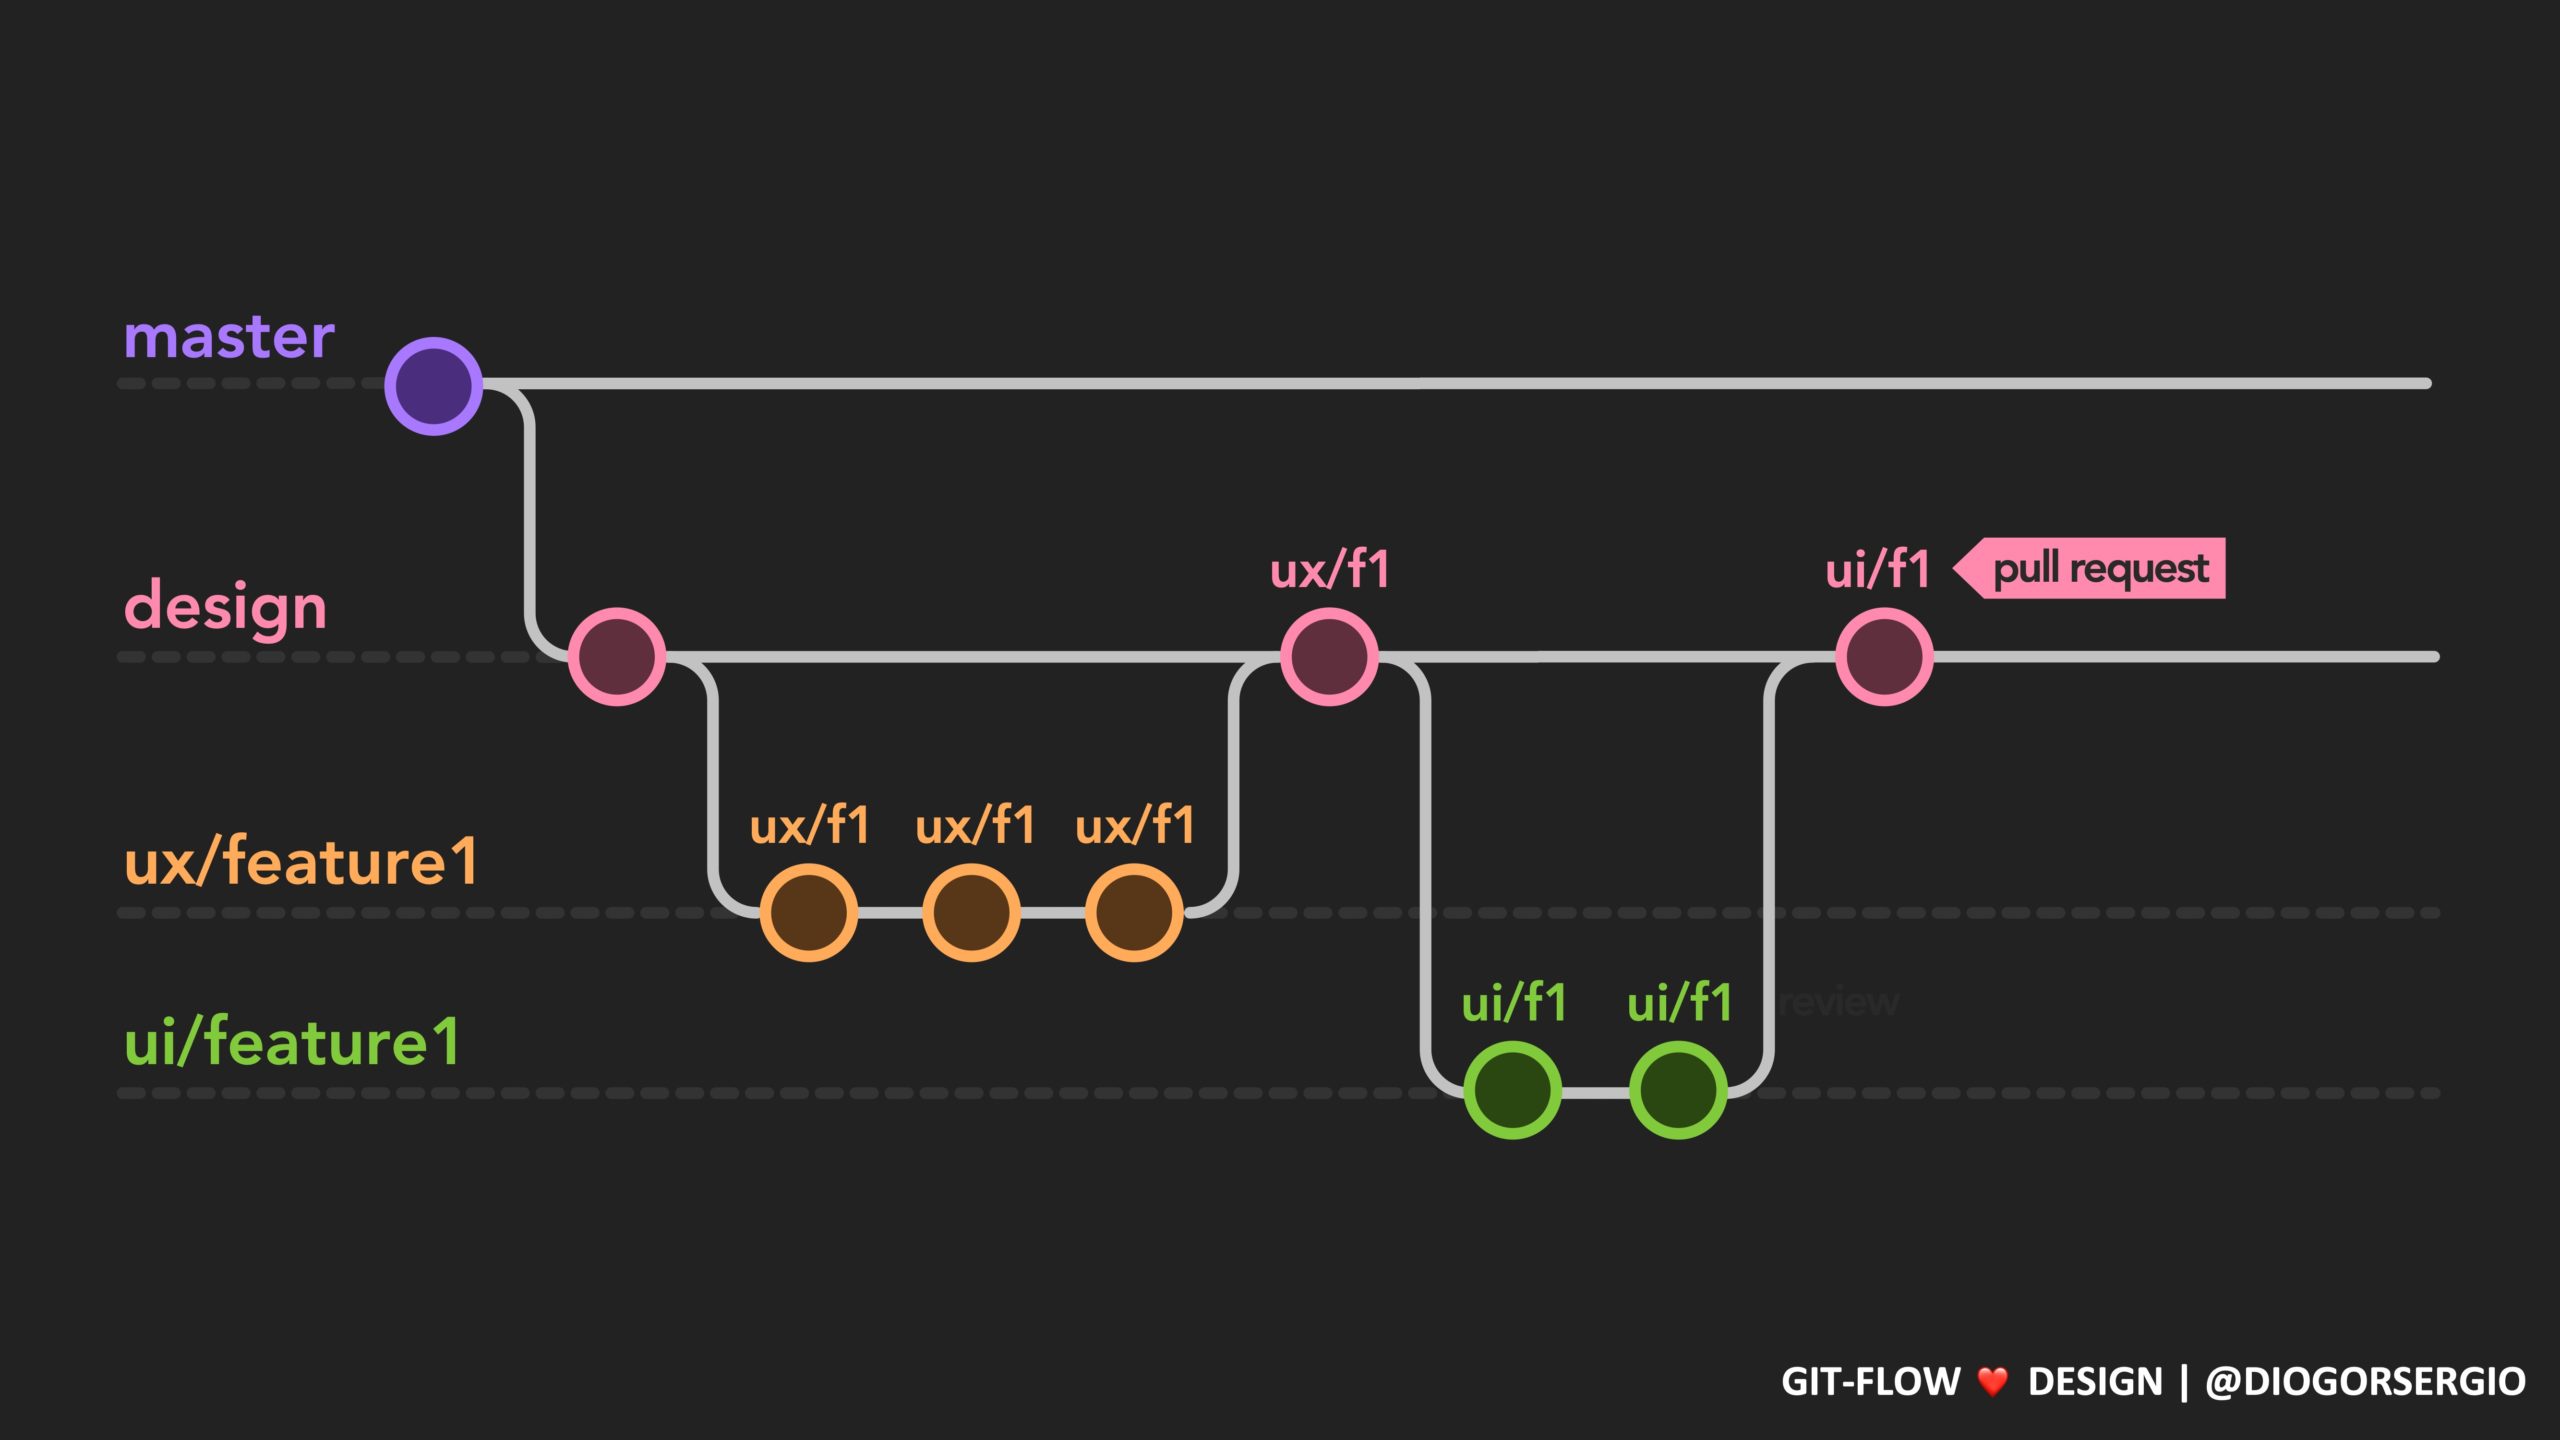
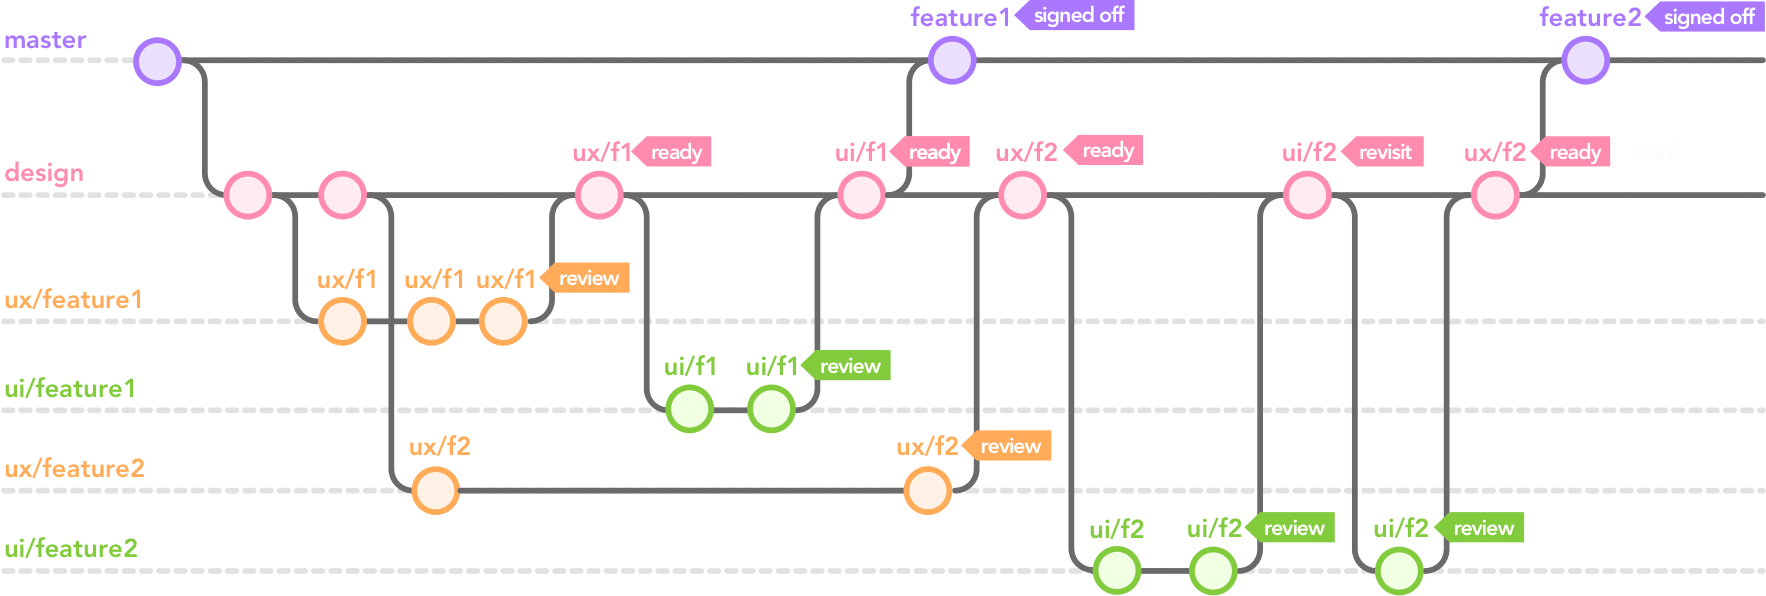
Gitflow-design is a git branching model and at its core, there are two main branches to record the history, master and design, which are followed by supporting branches. We will explain more about this bellow, but here is a diagram overview of the workflow.
Main Branches
master, design
Instead of a single master branch, this workflow uses two main branches to record the history as mentioned above. The master branch stores all the signed off releases from the design branch, and the design branch serves as an integration branch for the ux and ui supporting branches. All merge requests from supporting branches are only merged into design after being reviewed and approved by the design team.
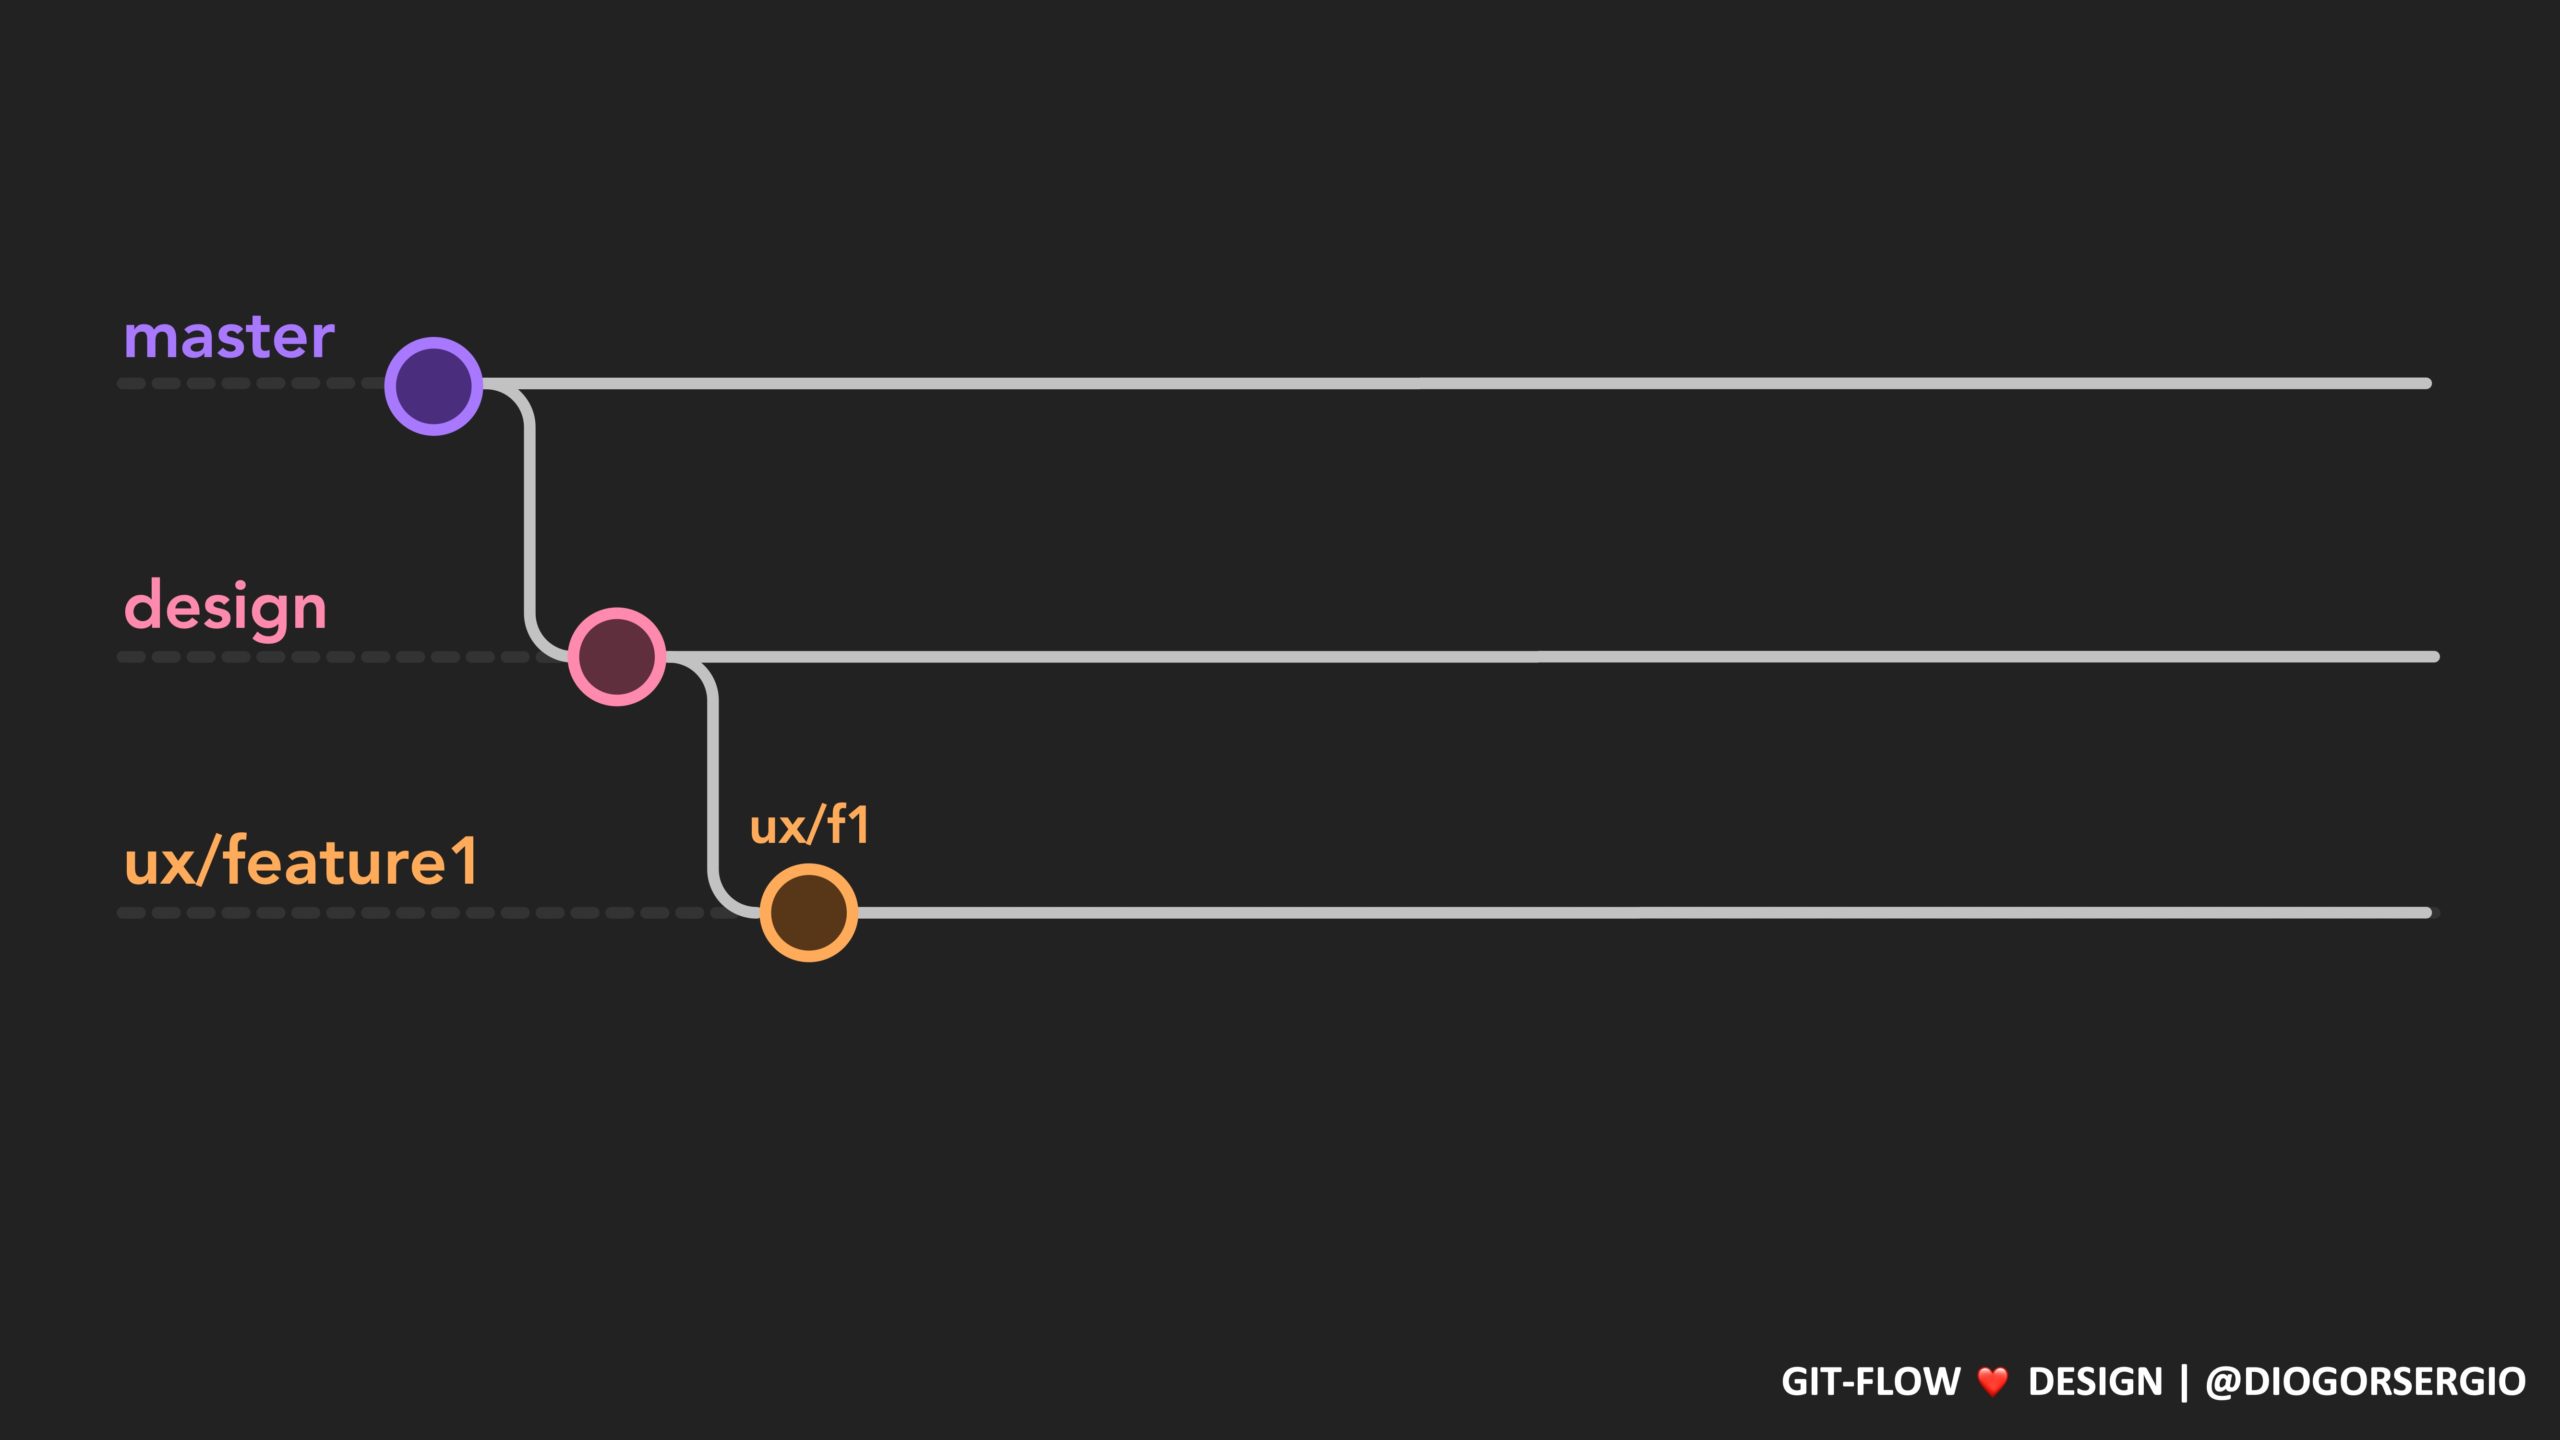
Supporting Branches
ux/feature, ui/feature
There are two types of feature branches, one for the user experience work with the prefix ux/ and the other for visual design work with the prefix ui/. Ideally one leads to the other, but in some cases they might be done at the same time, so they can also be represented by the prefix uxui/.
Example:
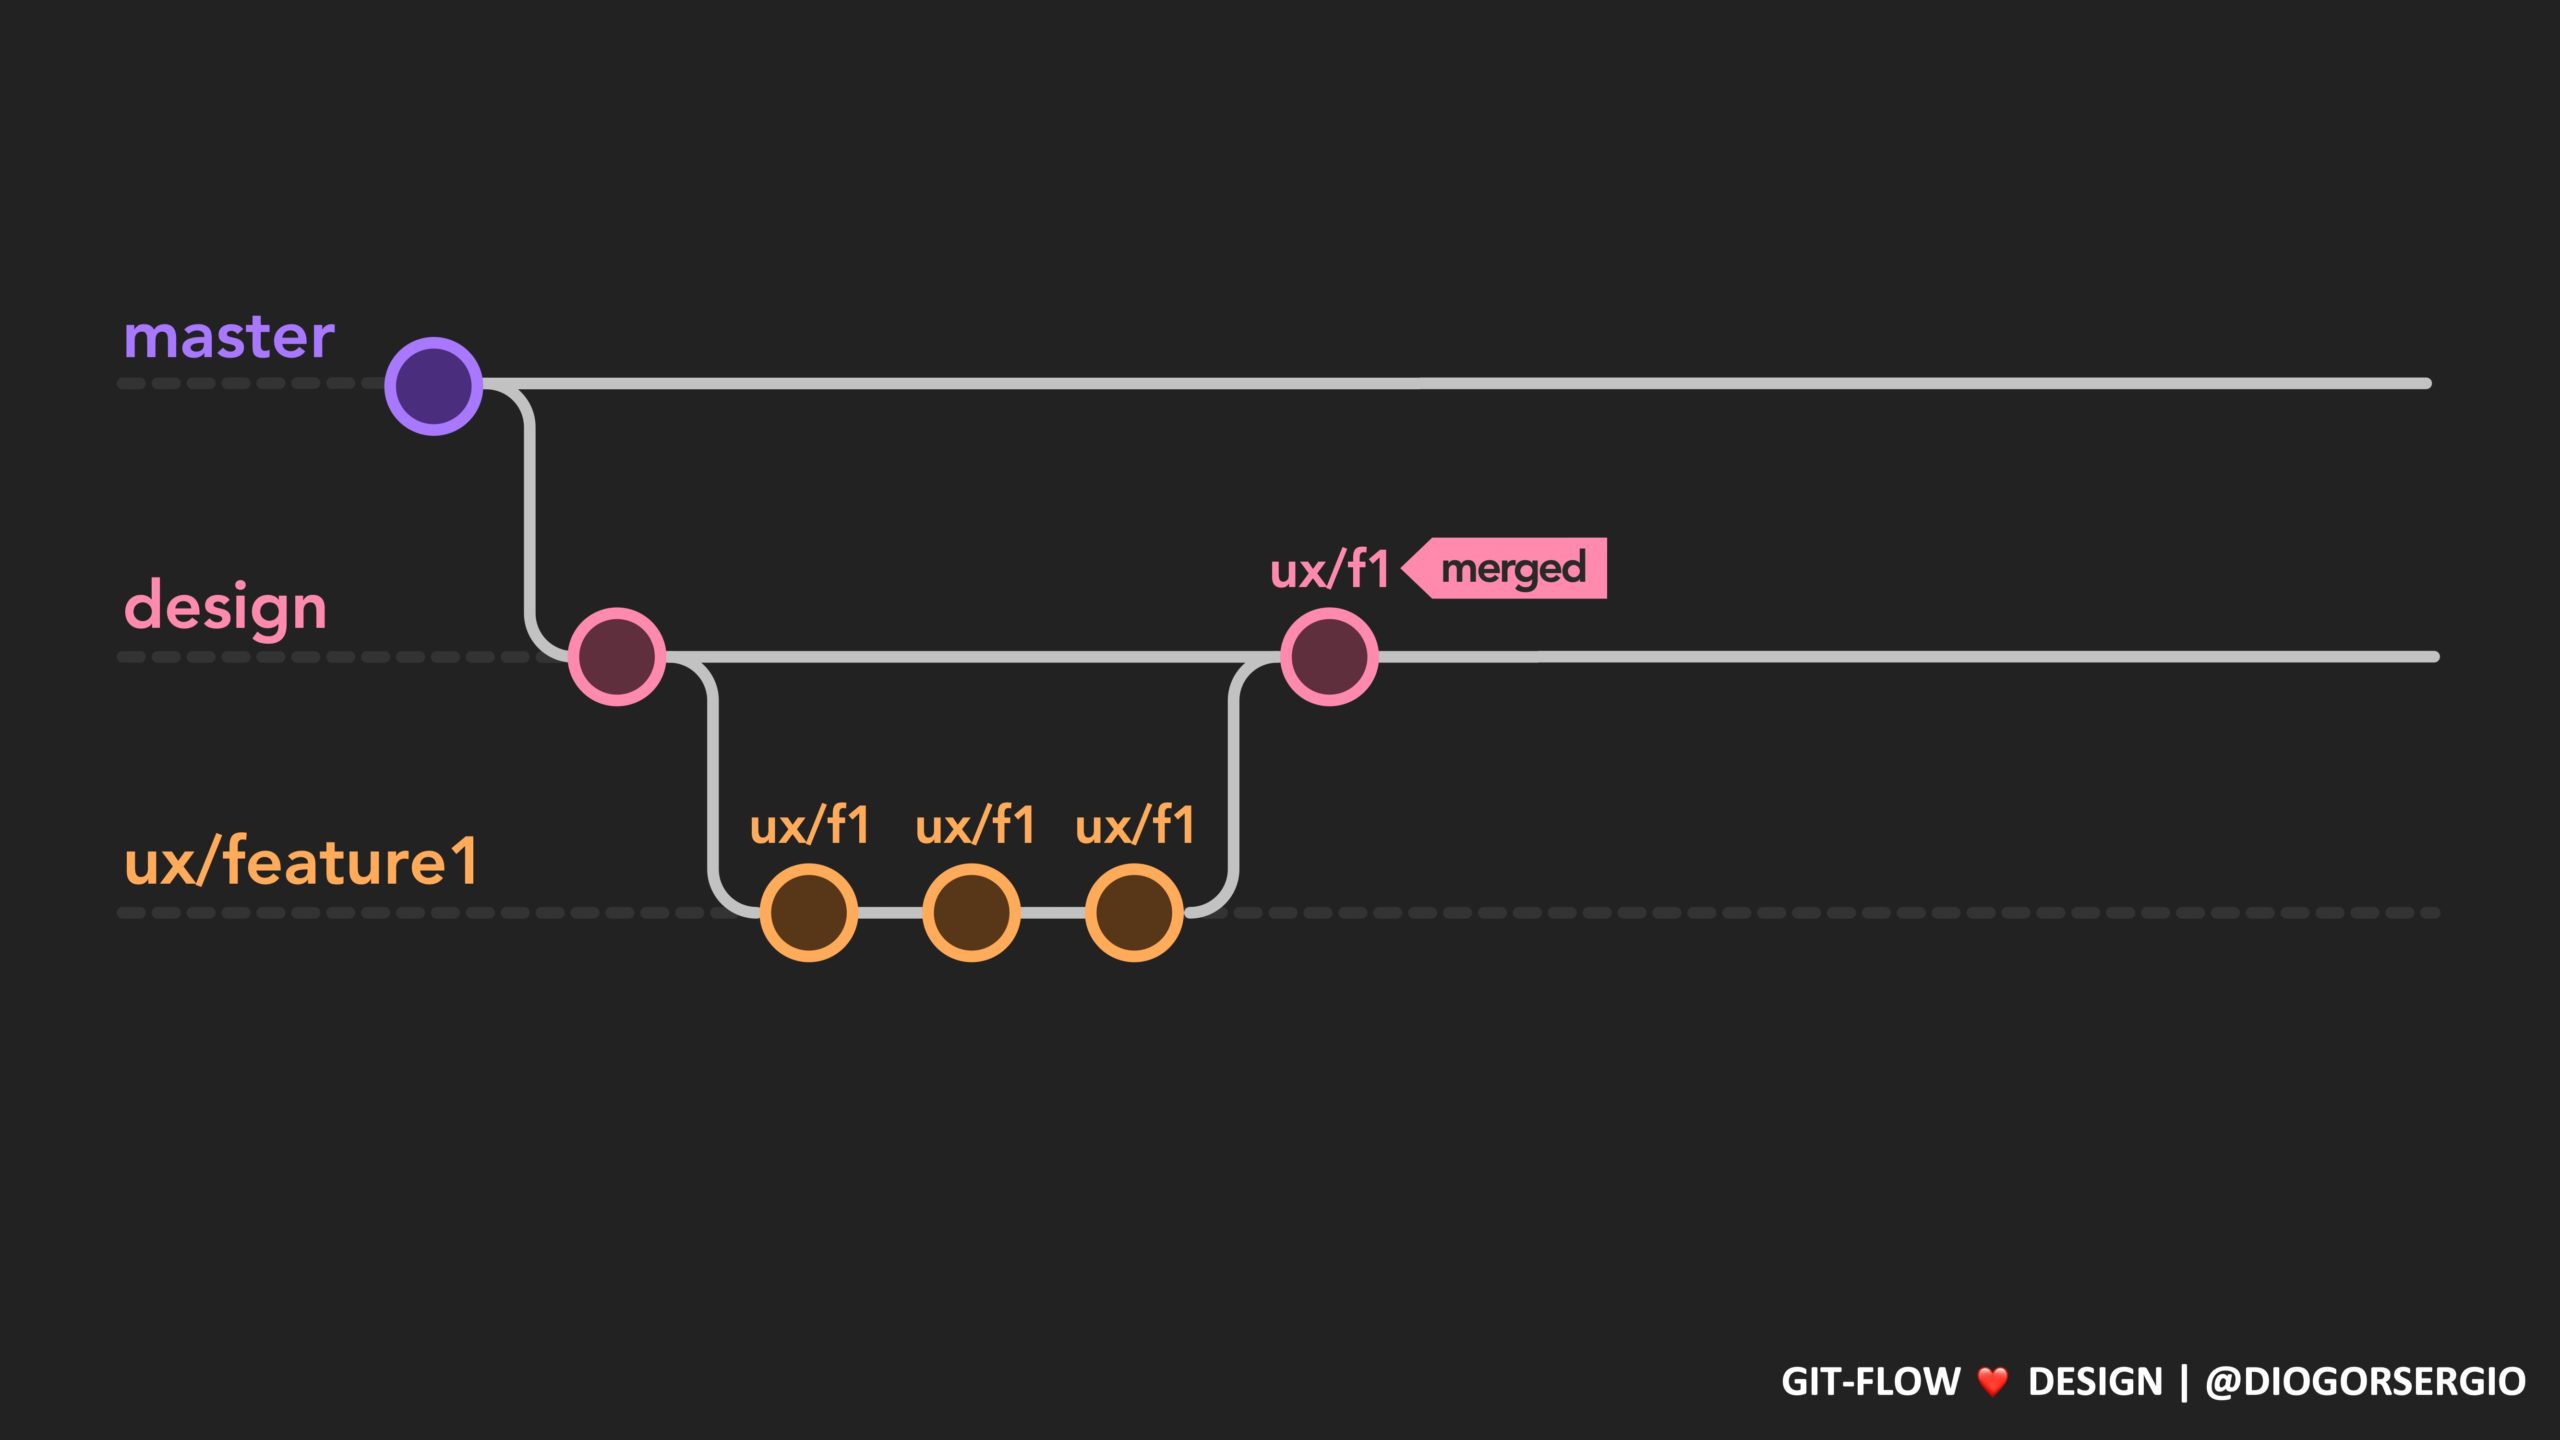
We have an upcoming task to redesign the tor download page. To kickoff this work, a ux feature branch is created and named ux/downloadpage, and this is where the ux work will happen. Once the work has been done the designer will create a merge request to the design branch and start the review process. If the reviewers are happy with the work, the merge request is accepted and the branch ux/downloadpage is merged into design.
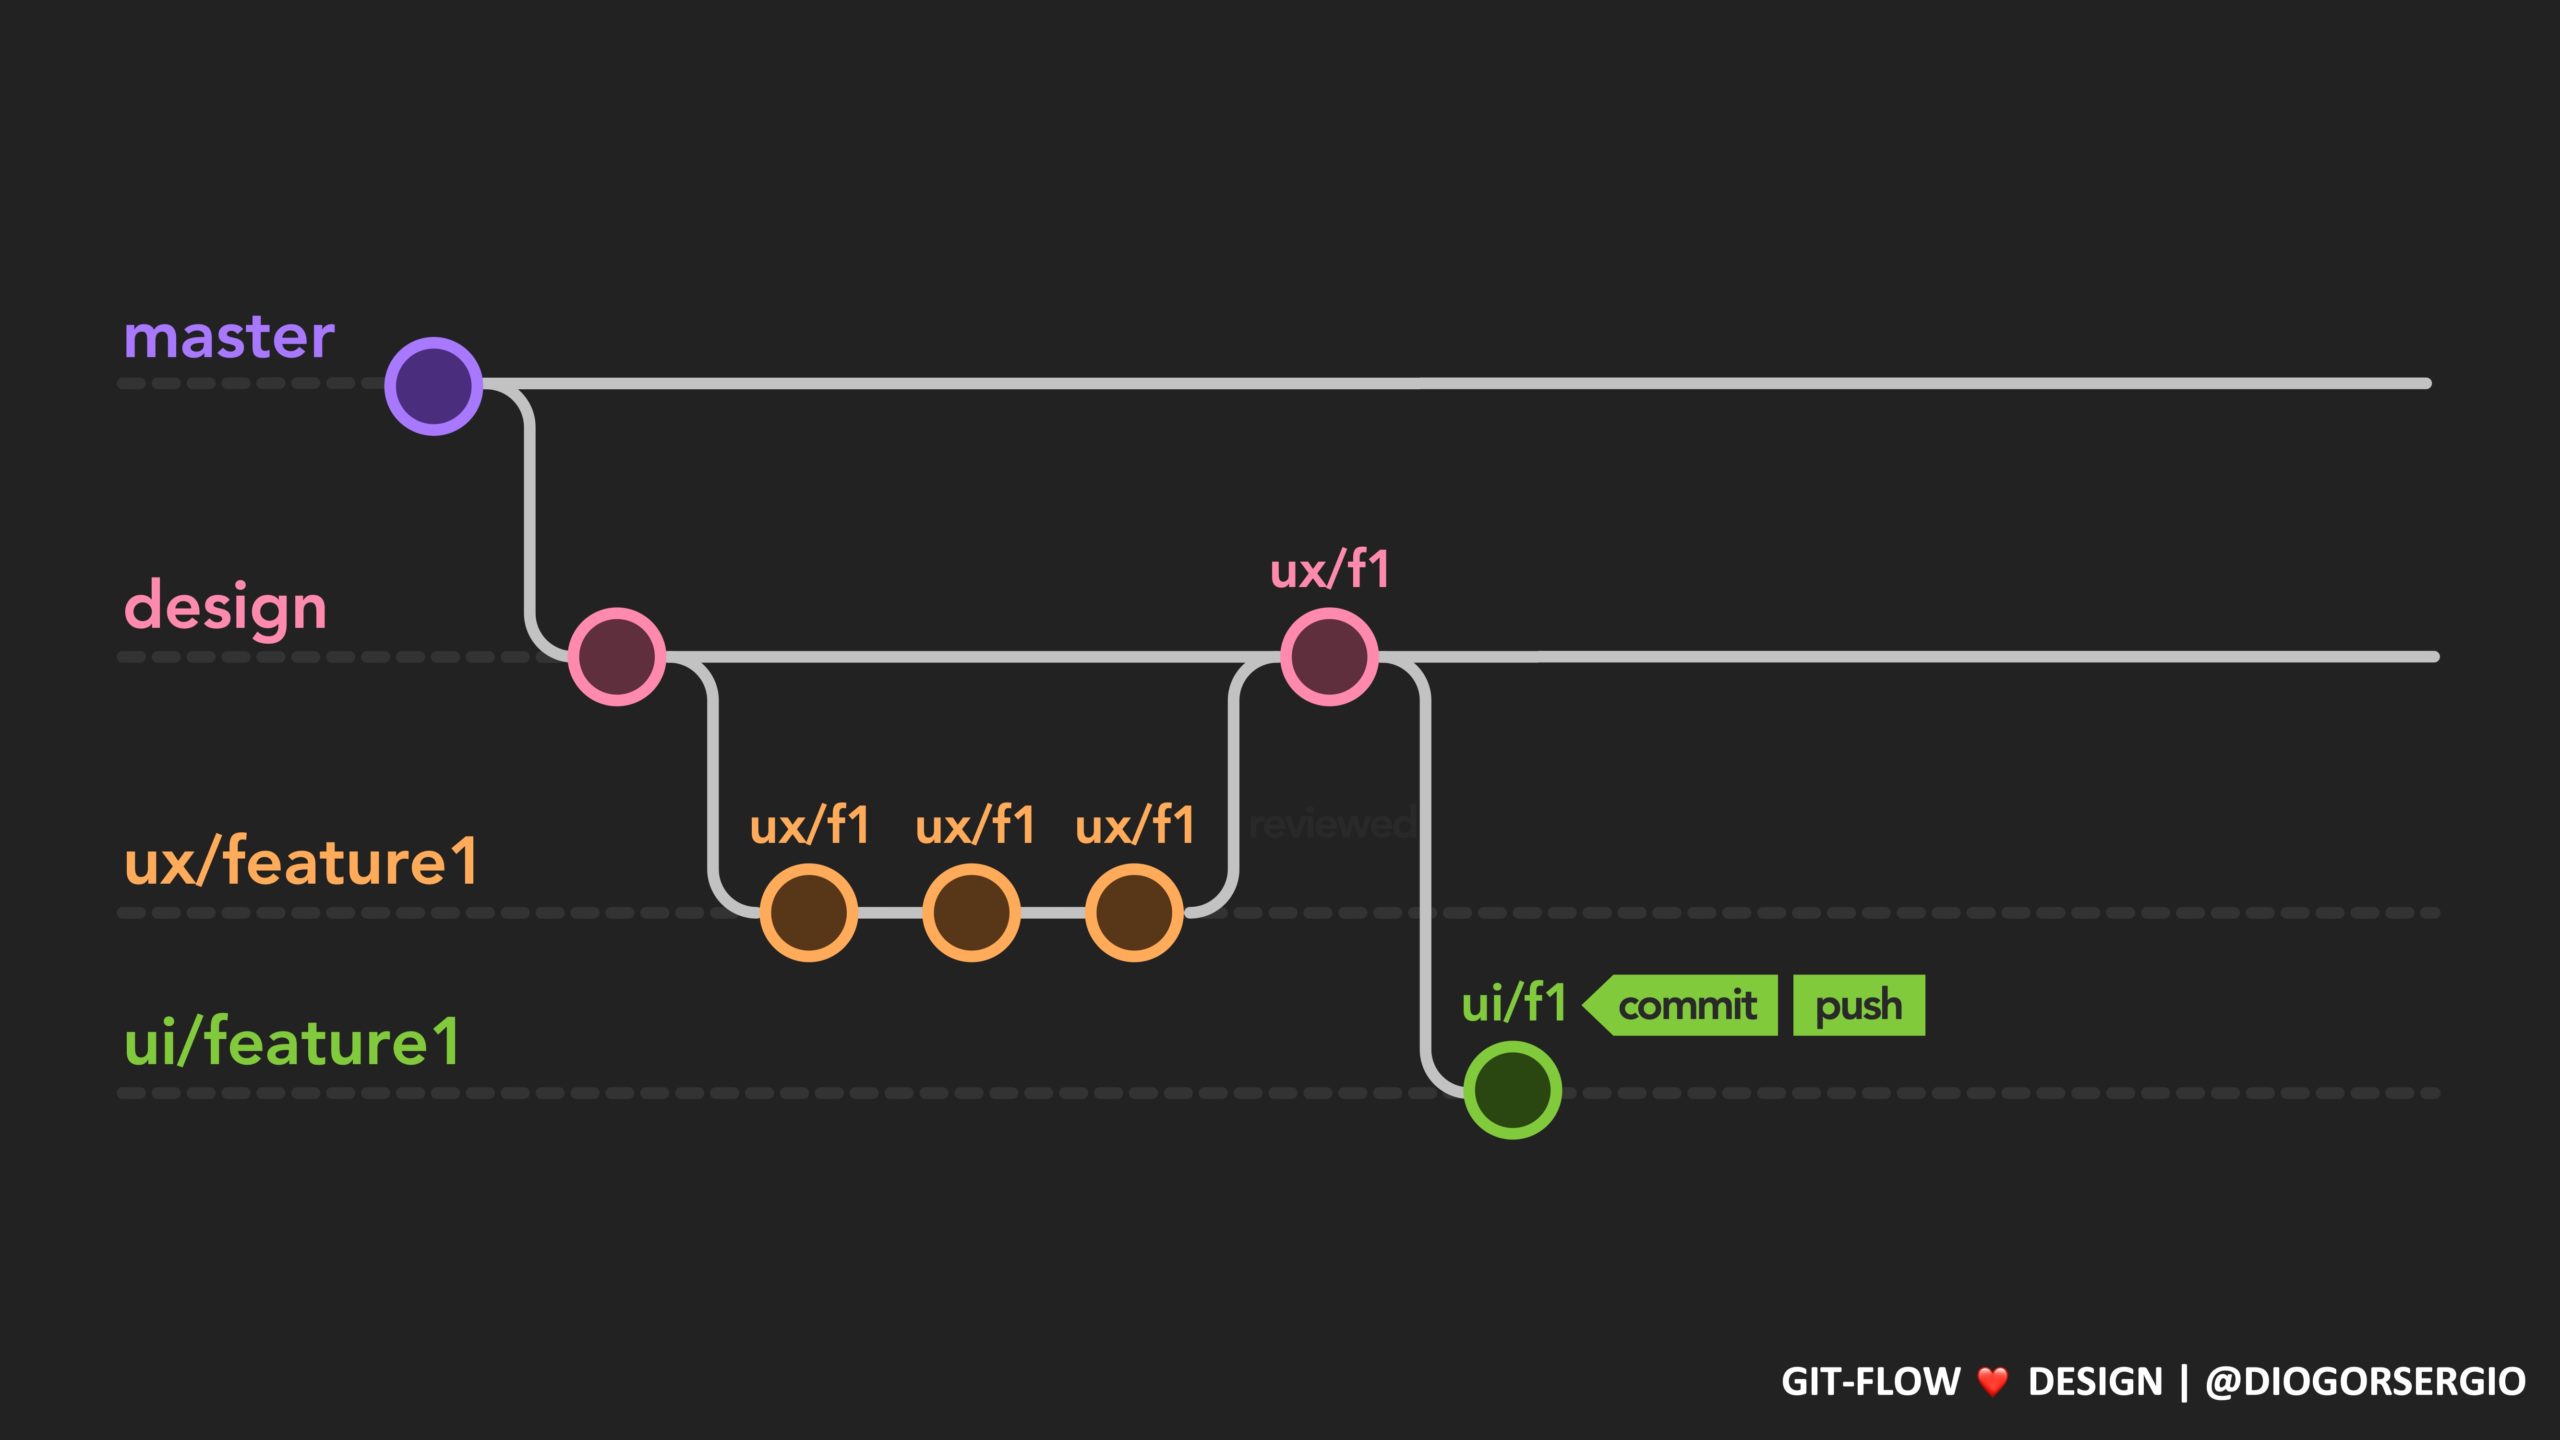
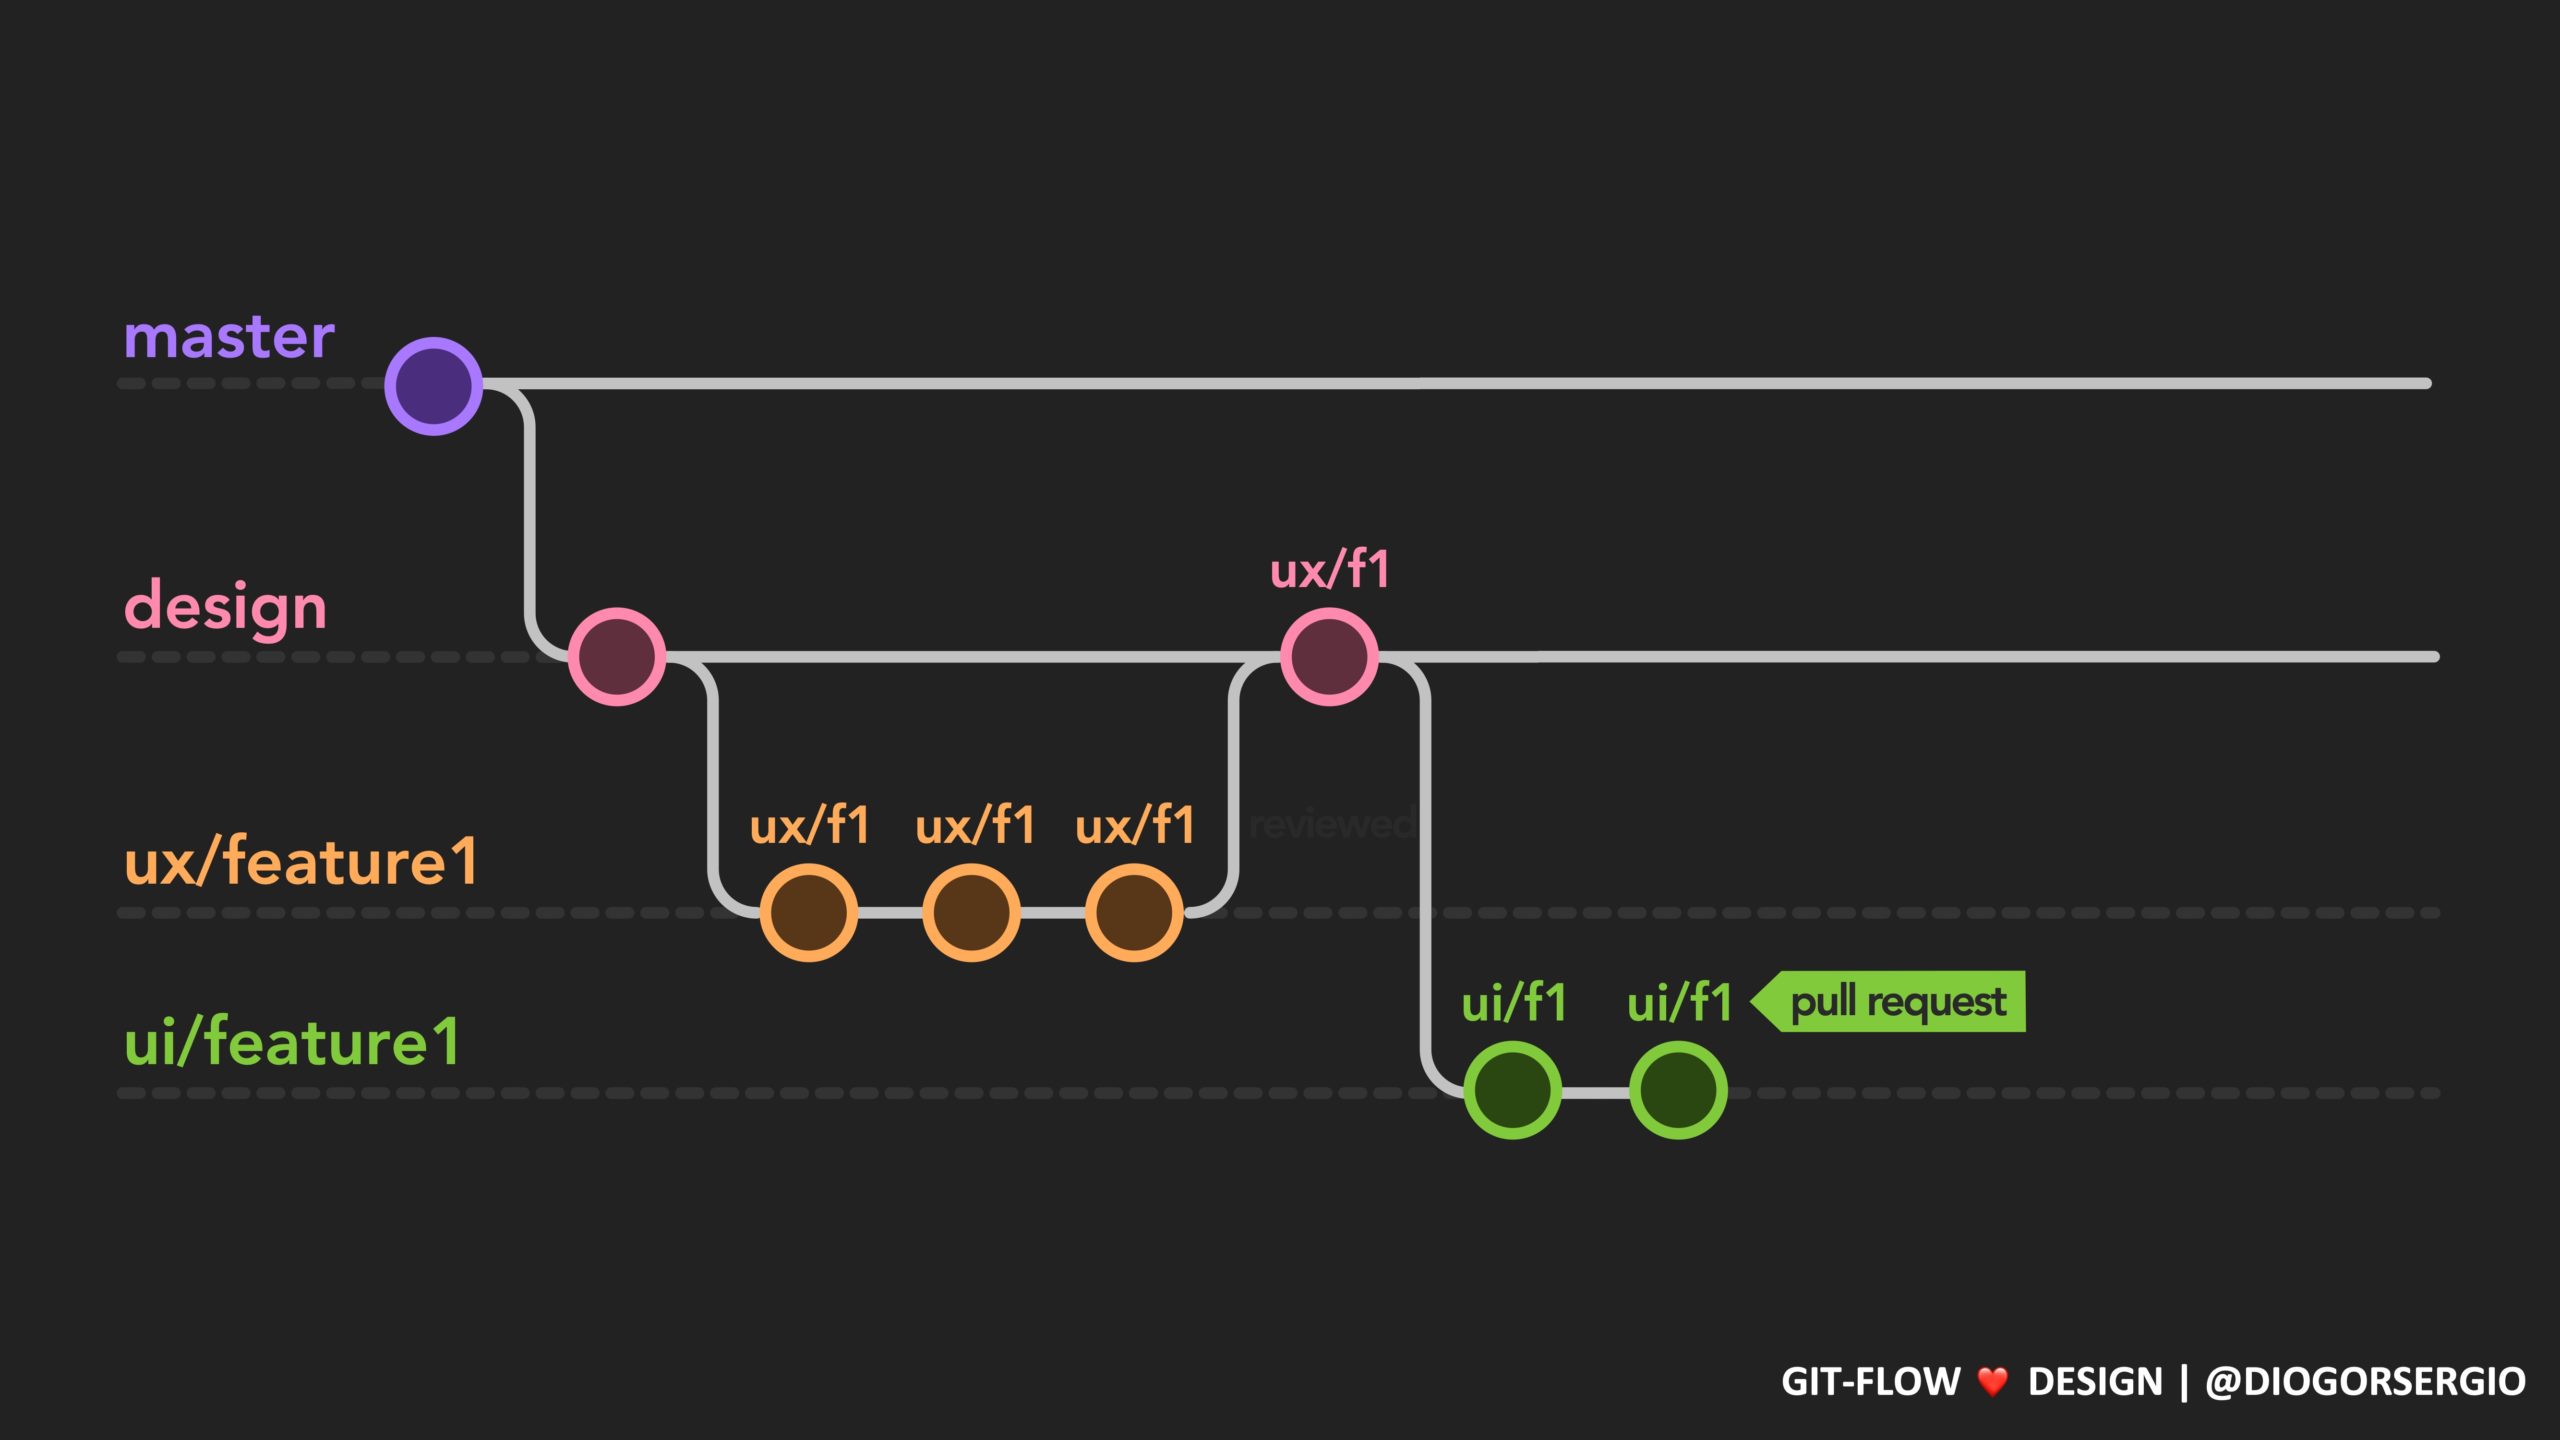
At this point the ux/downloadpage is ready to progress into ui design, so it starts in the same way as ux, with the creation of a ui feature branch named ui/downloadpage (notice the ui prefix this time) and the process is the same. The designer will work on the task and create a merge request when the work is ready for review.
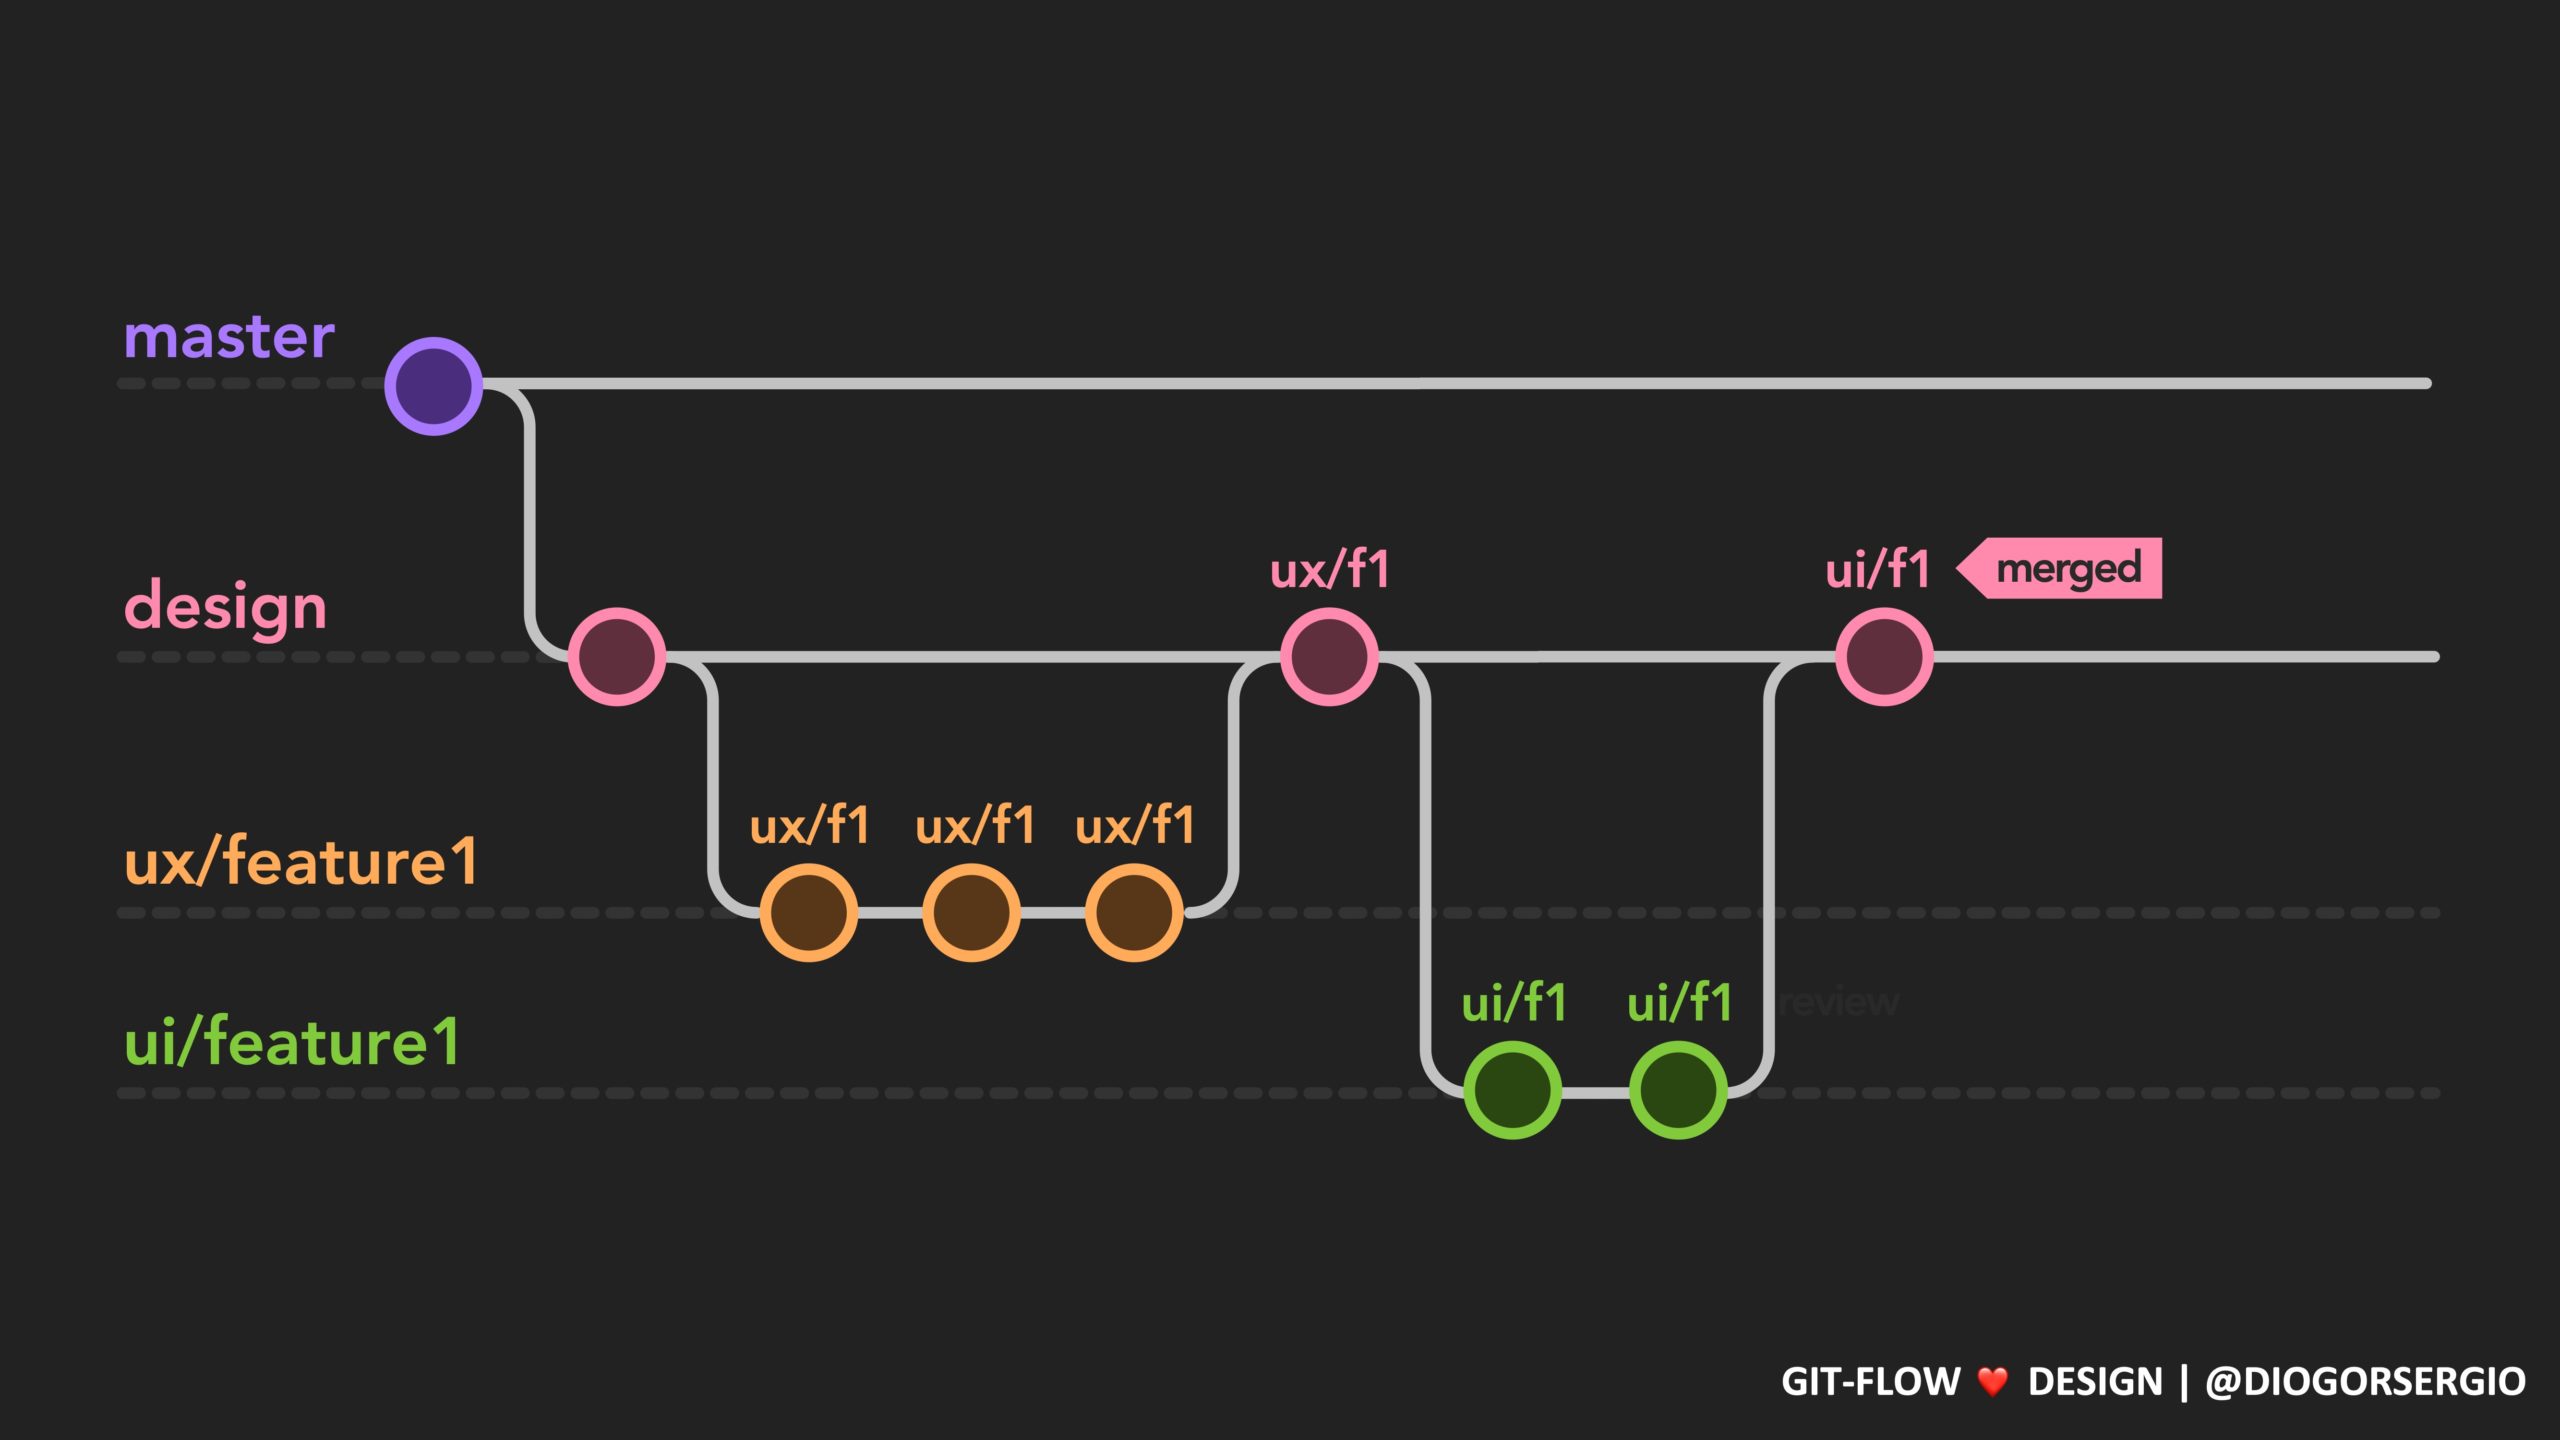
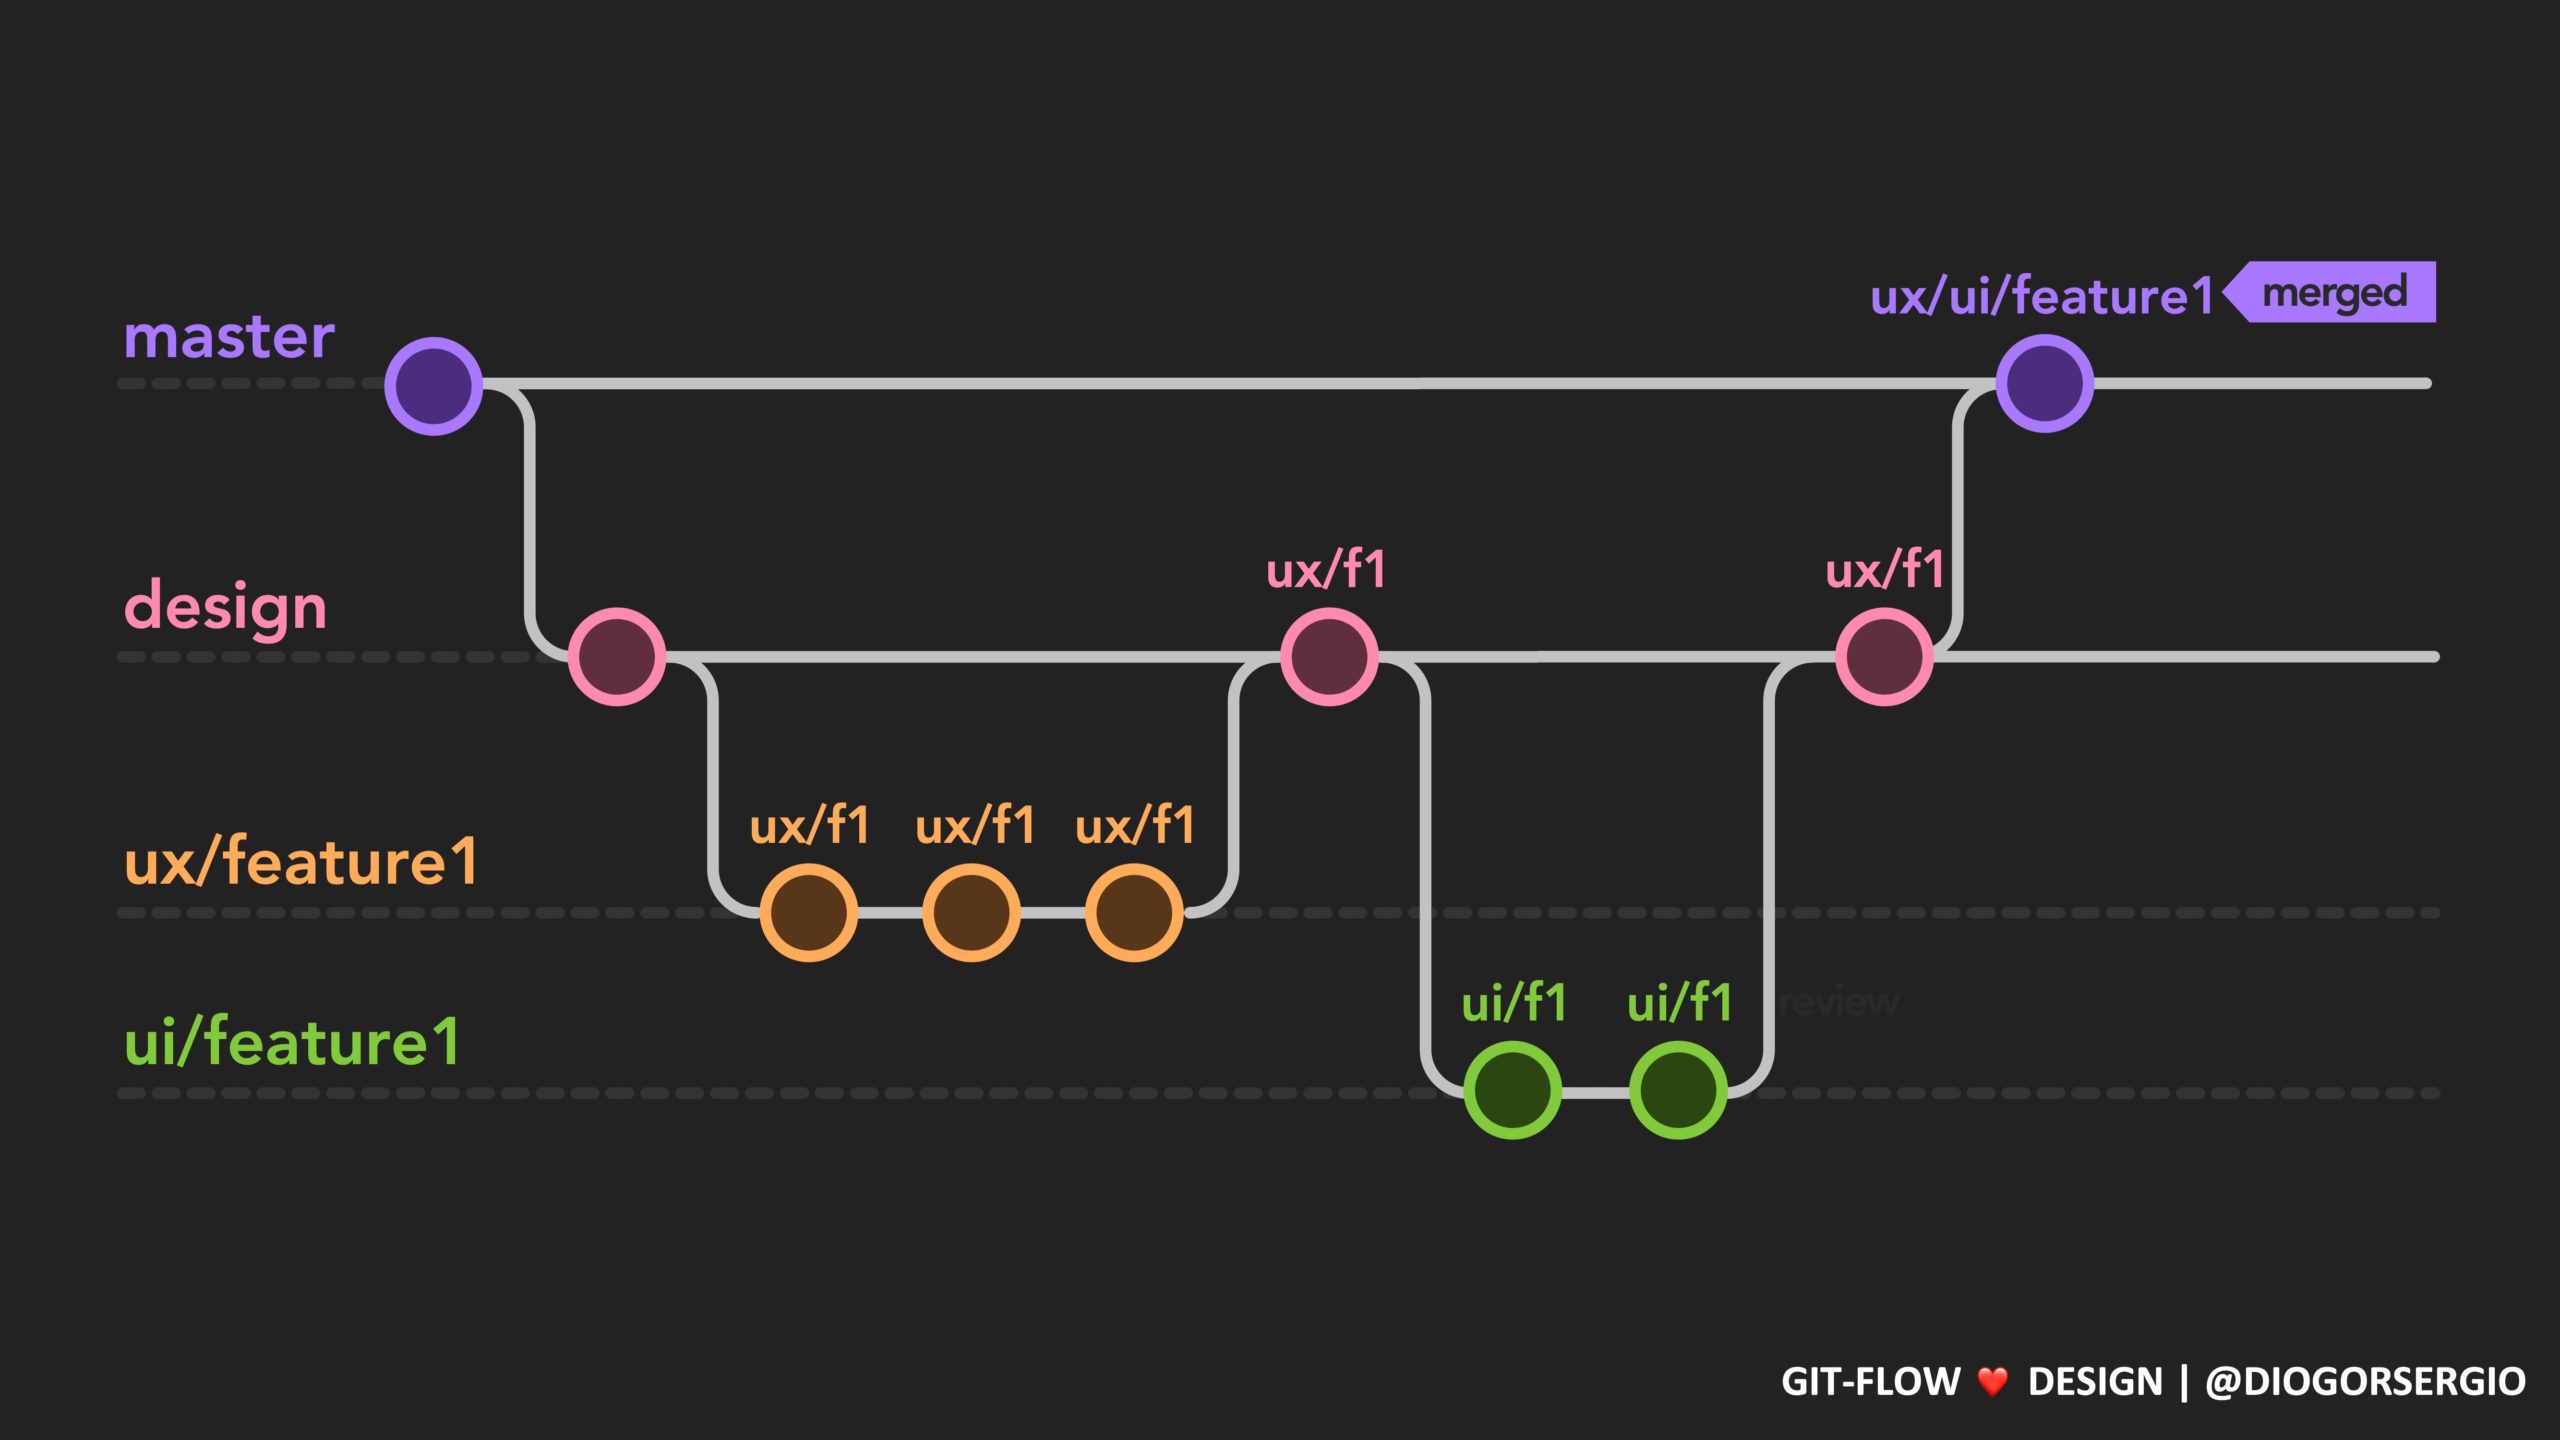
Let’s say both ui and ux branches were merged into design, this means the work for this task is finalised and its ready to be implemented. So the last action required is for a member of the design team to merge the design branch (with both ux and ui work inside) into the master branch. Keep in mind that all the work in the master branch should be ready to be picked for development.
You can read the step by step guide on how to follow this workflow in git further down the page.
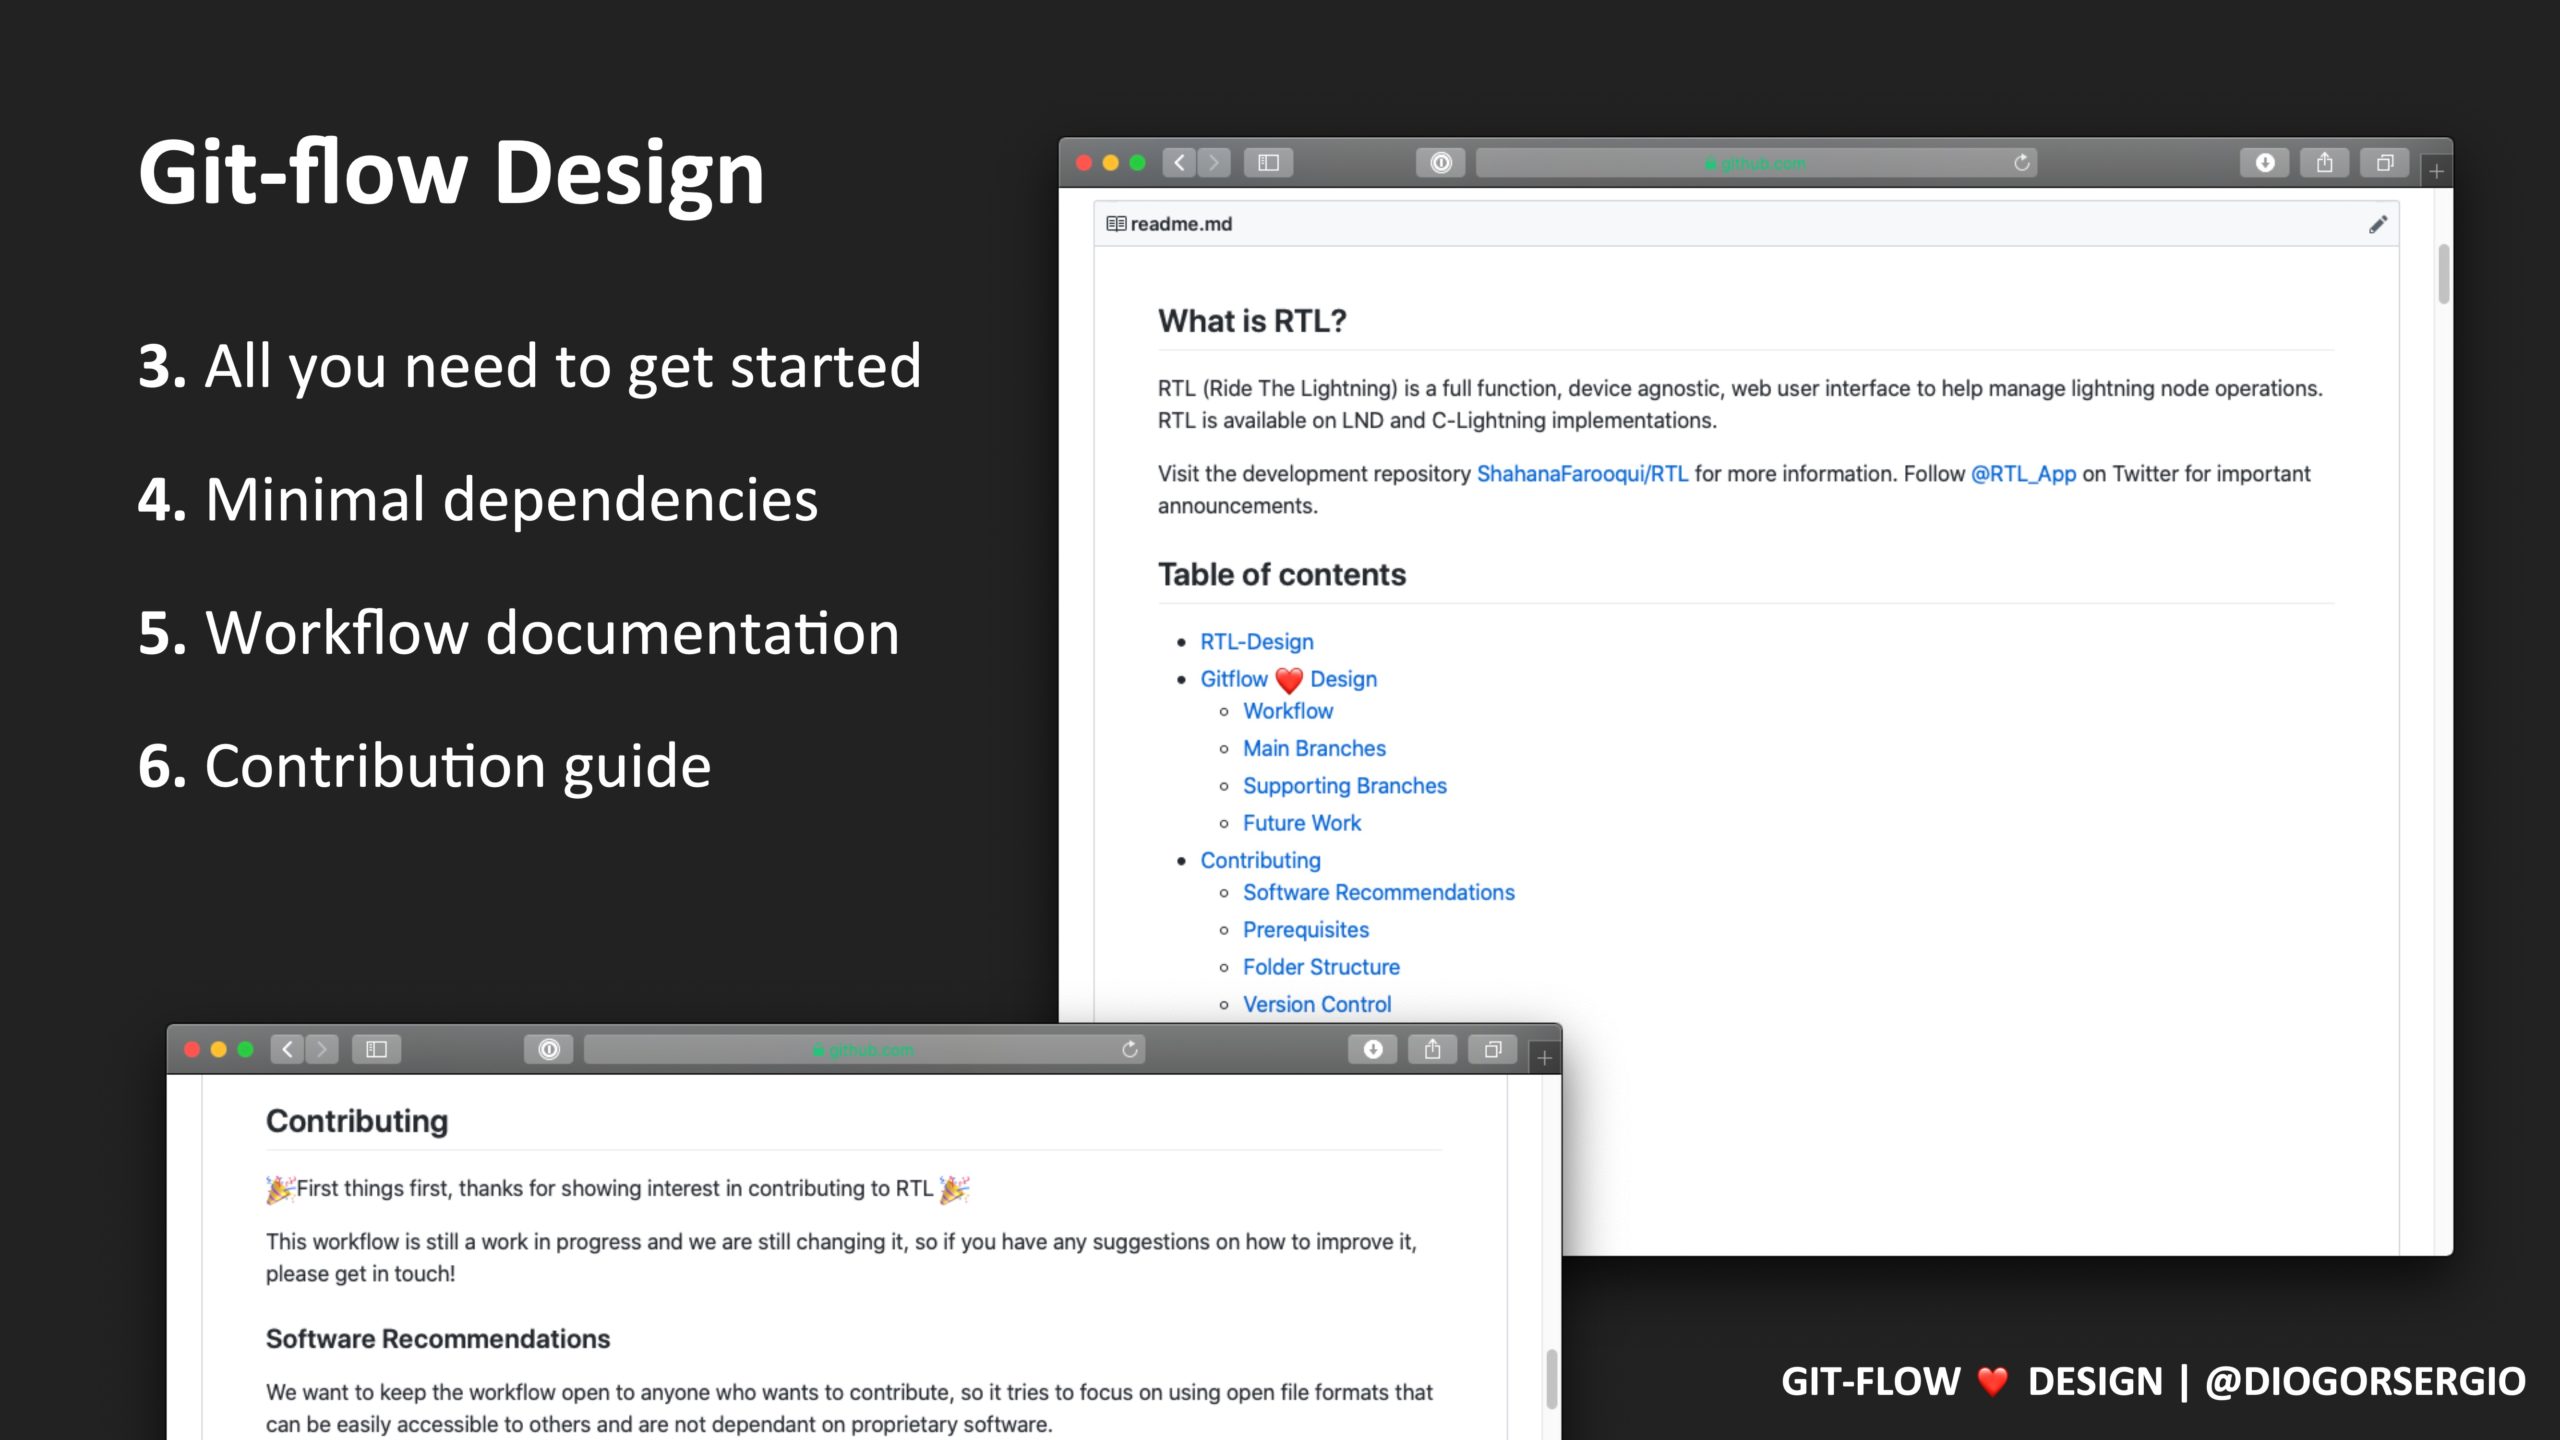
How to Contribute
Prerequisites
- Git – https://git-scm.com/ – If you plan to use the terminal to interact with git.
Software Recommendations
We want to keep the workflow open to anyone who wants to contribute, so we focus on using open file formats that can easily be accessed by others and are not dependant on proprietary software.
Design software:
- Inkscape (Vector graphics editor) – https://inkscape.org/ – Free / Open Source
- GIMP (Image editor) – https://www.gimp.org/ – Free / Open Source
Git – GUI clients:
- Sourcetree – https://www.sourcetreeapp.com/ – Free / Proprietary
- Github* – https://github.com/ – Free / Open Source *(Will need work-arounds to work with Gitlab)
- Other git GUIs – https://git-scm.com/downloads/guis – More clients, choose at your own will.
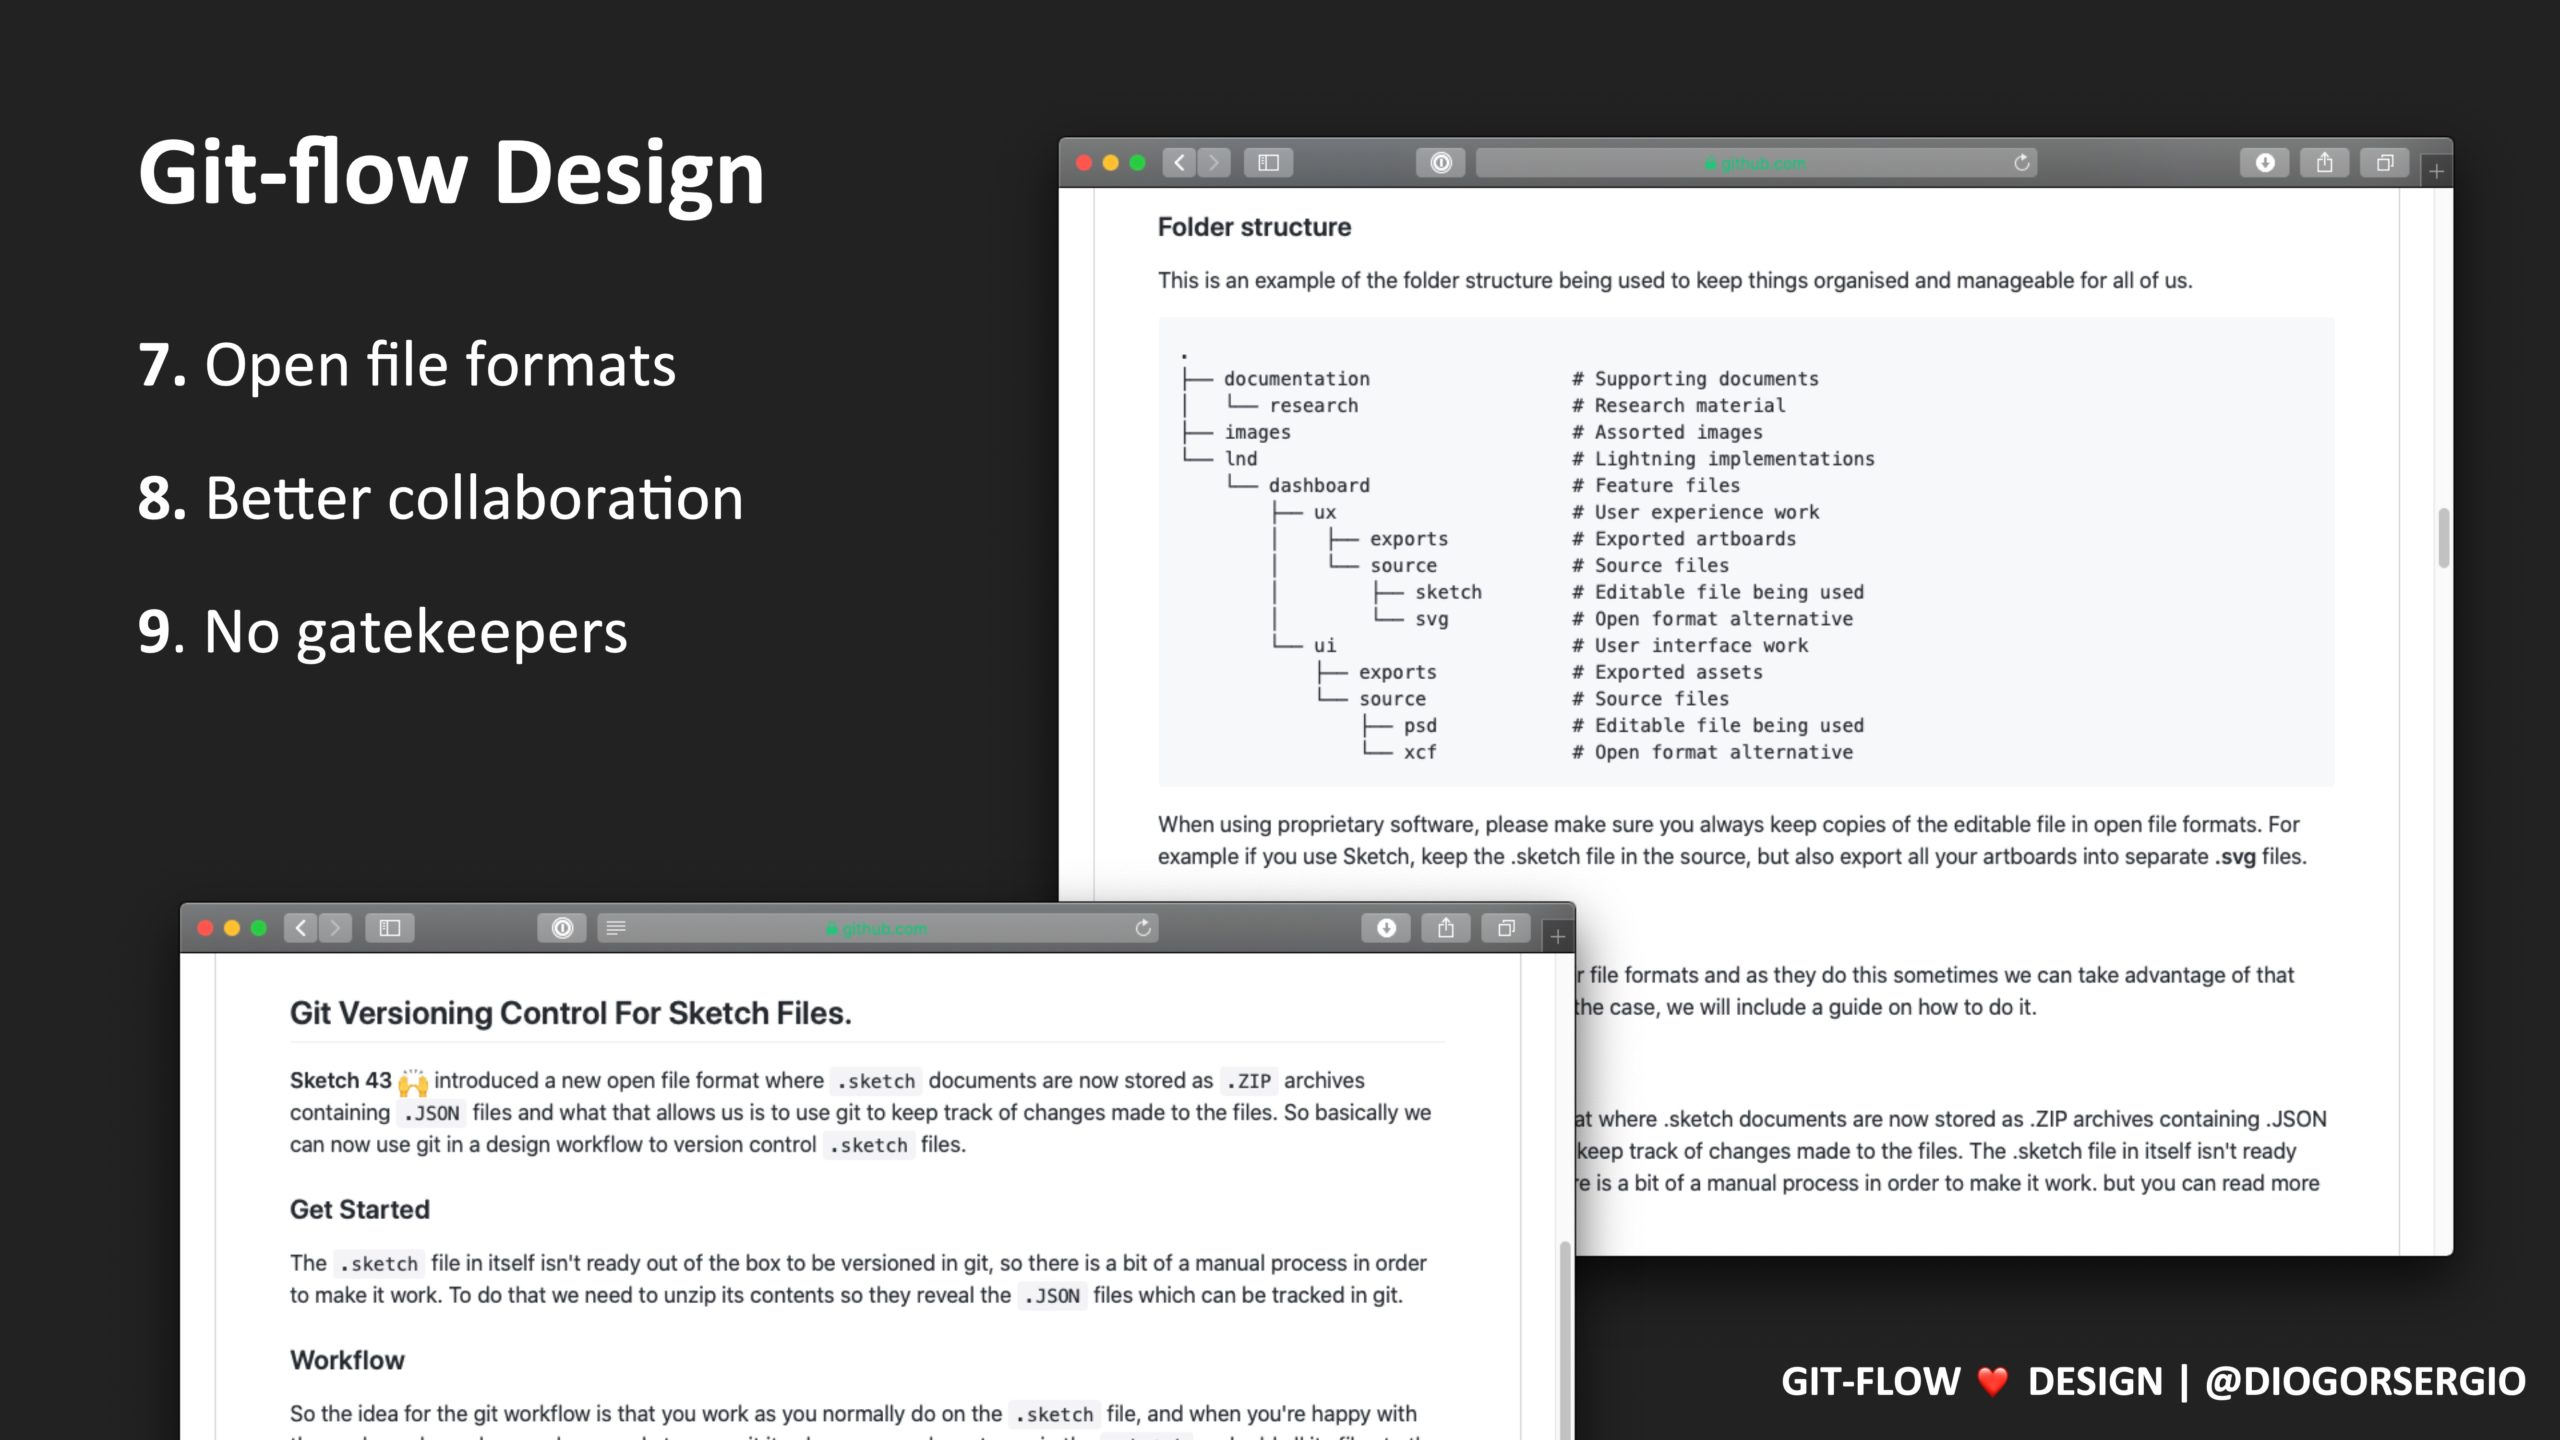
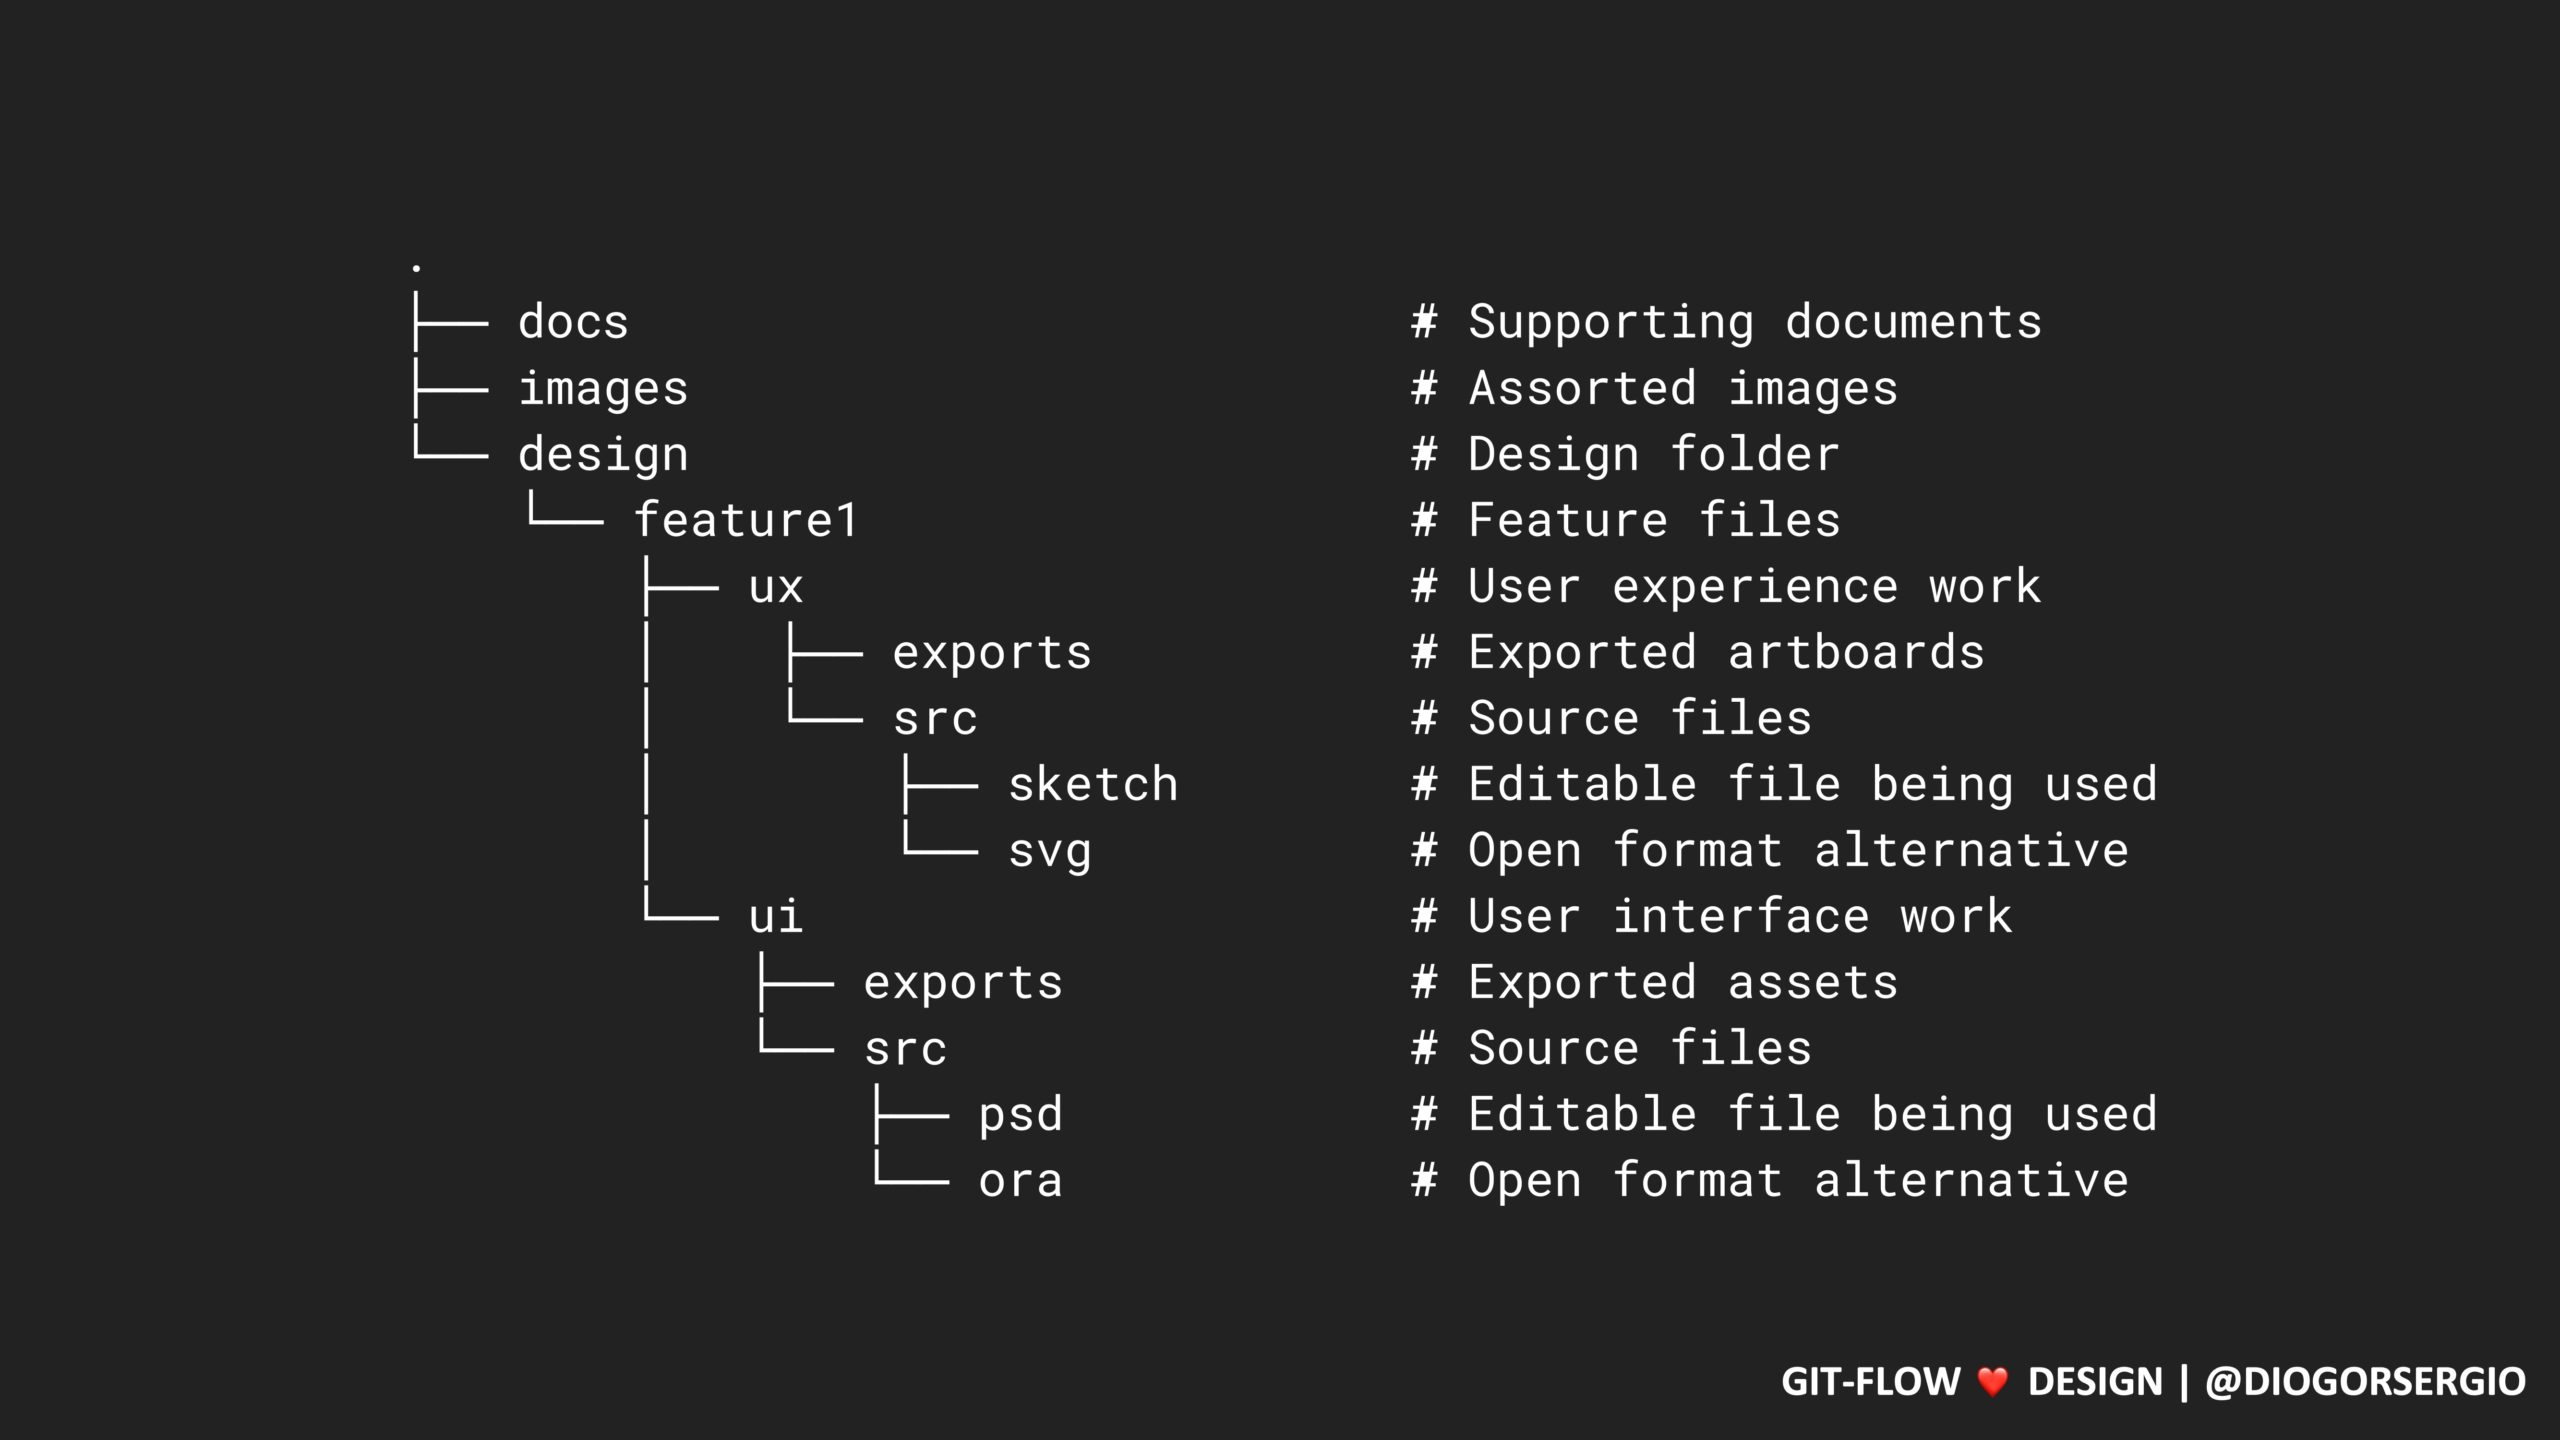
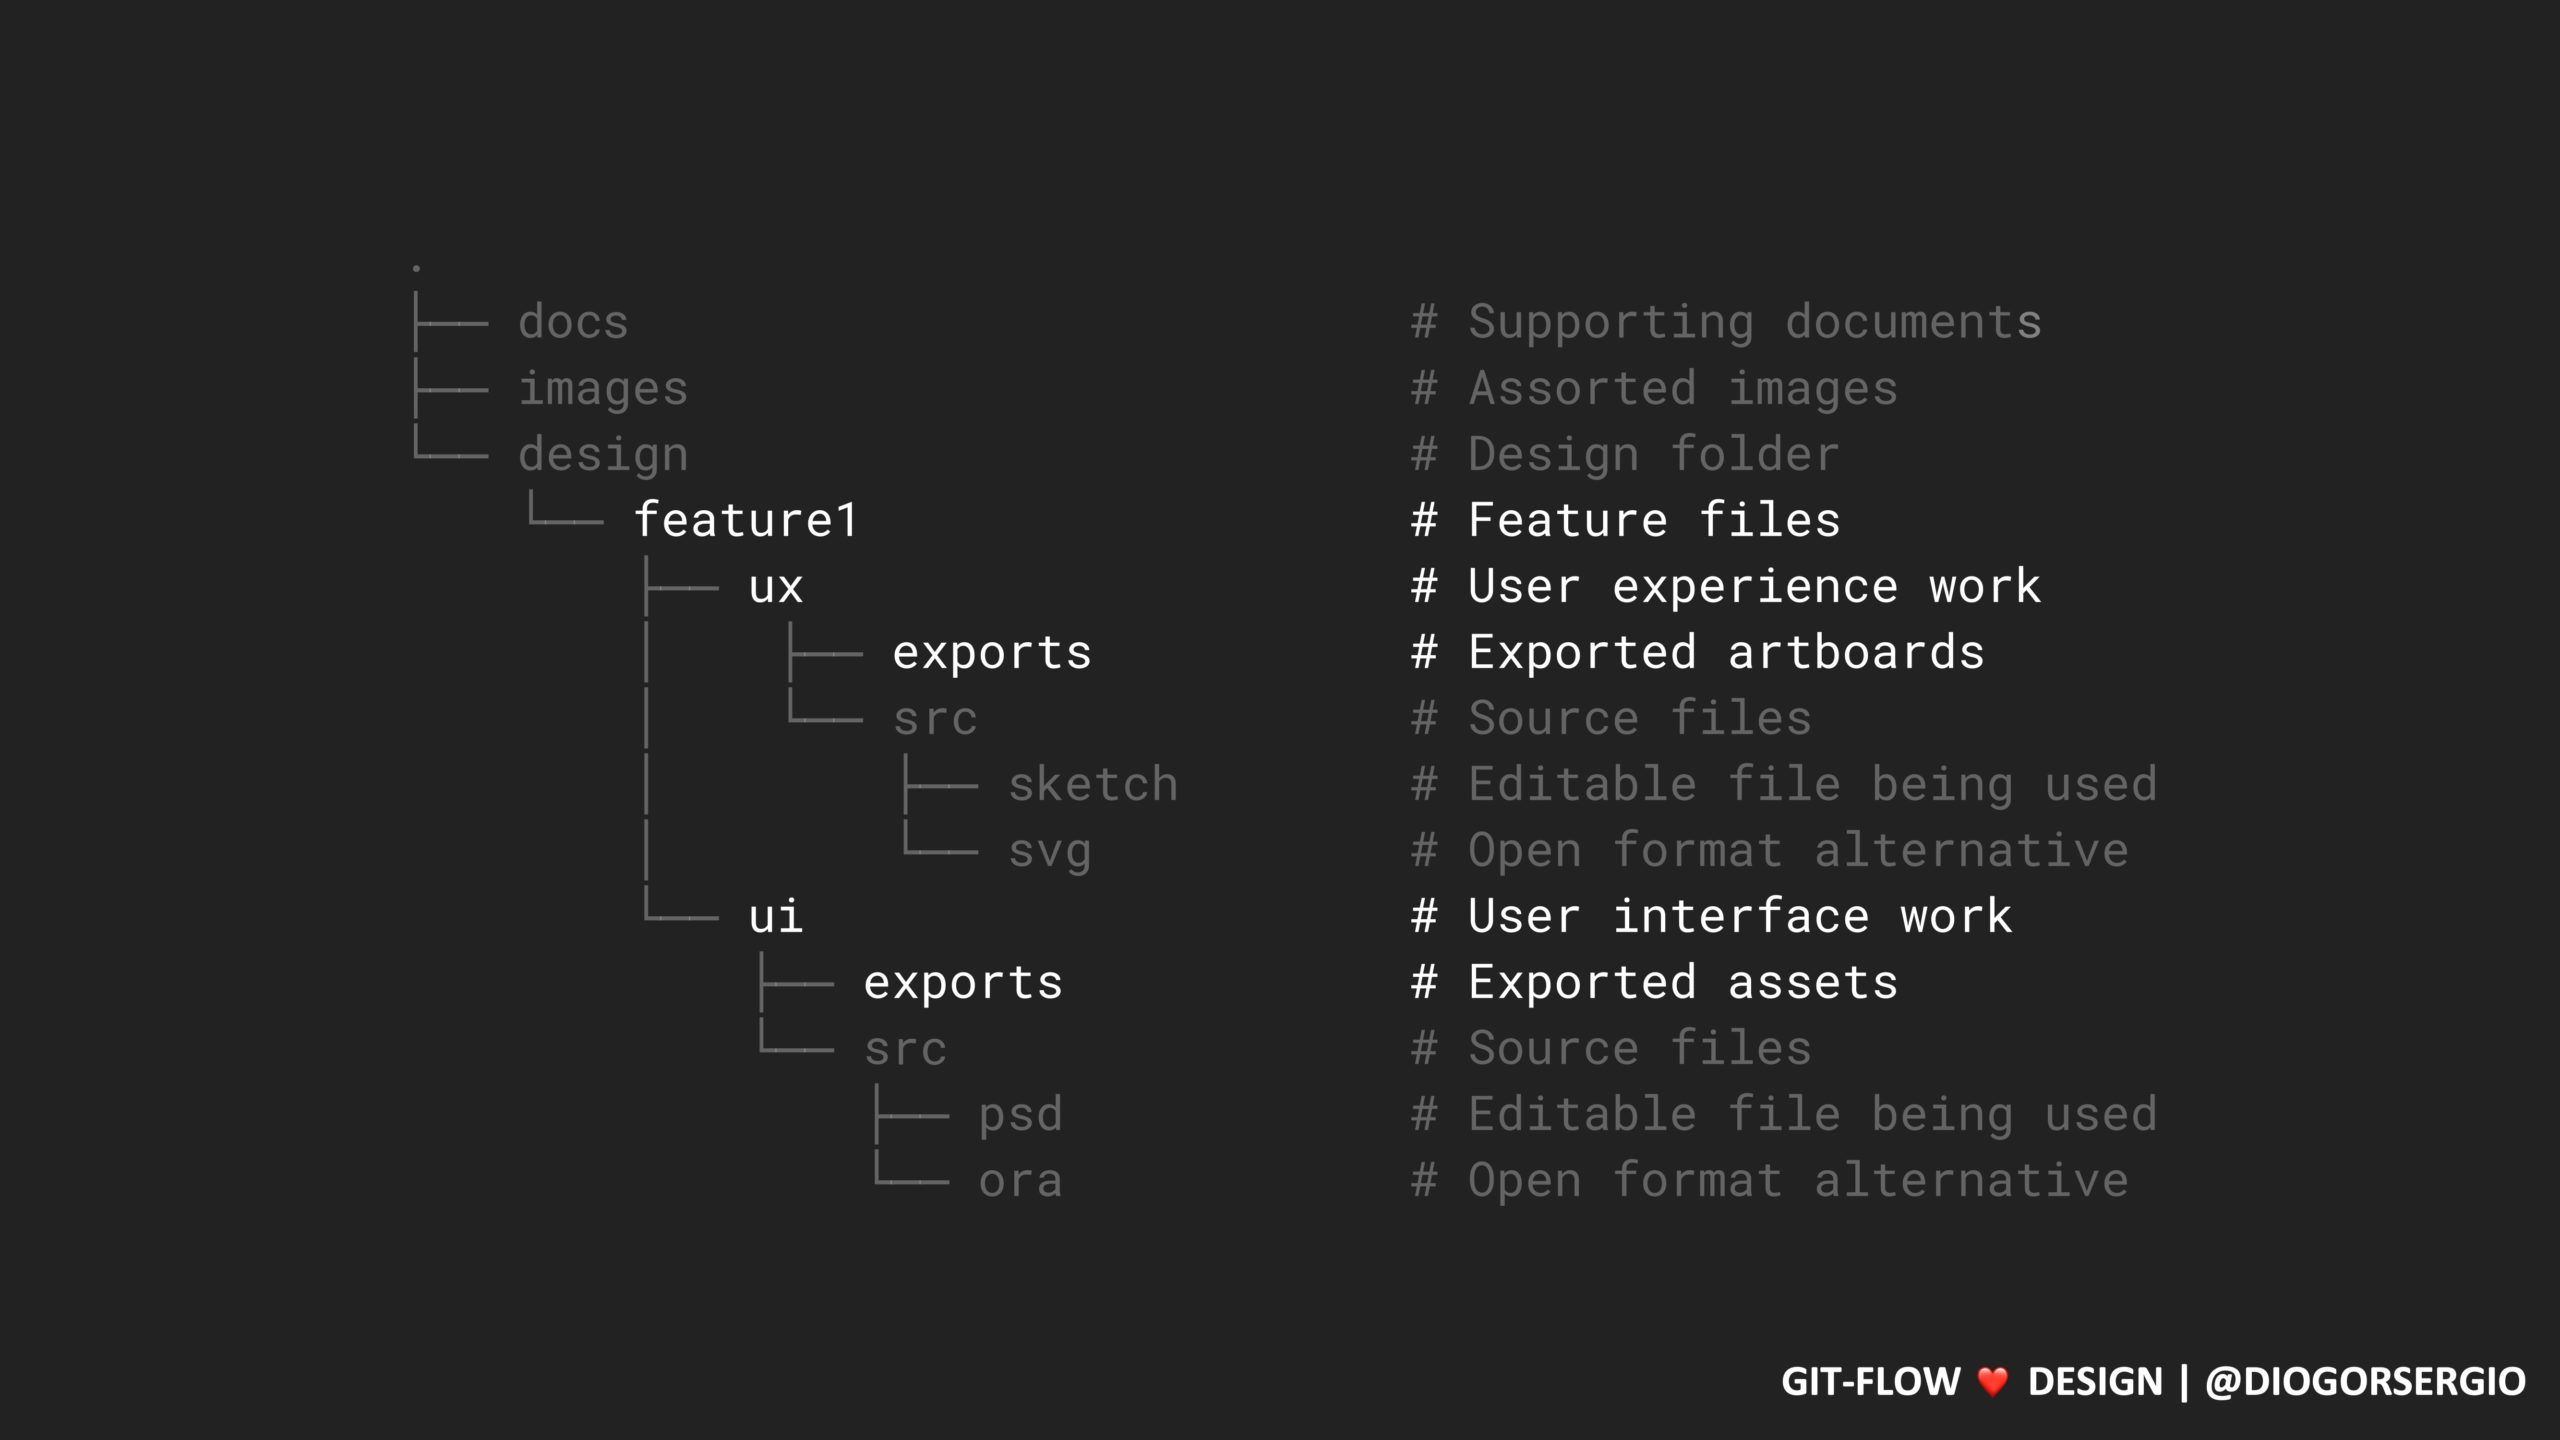
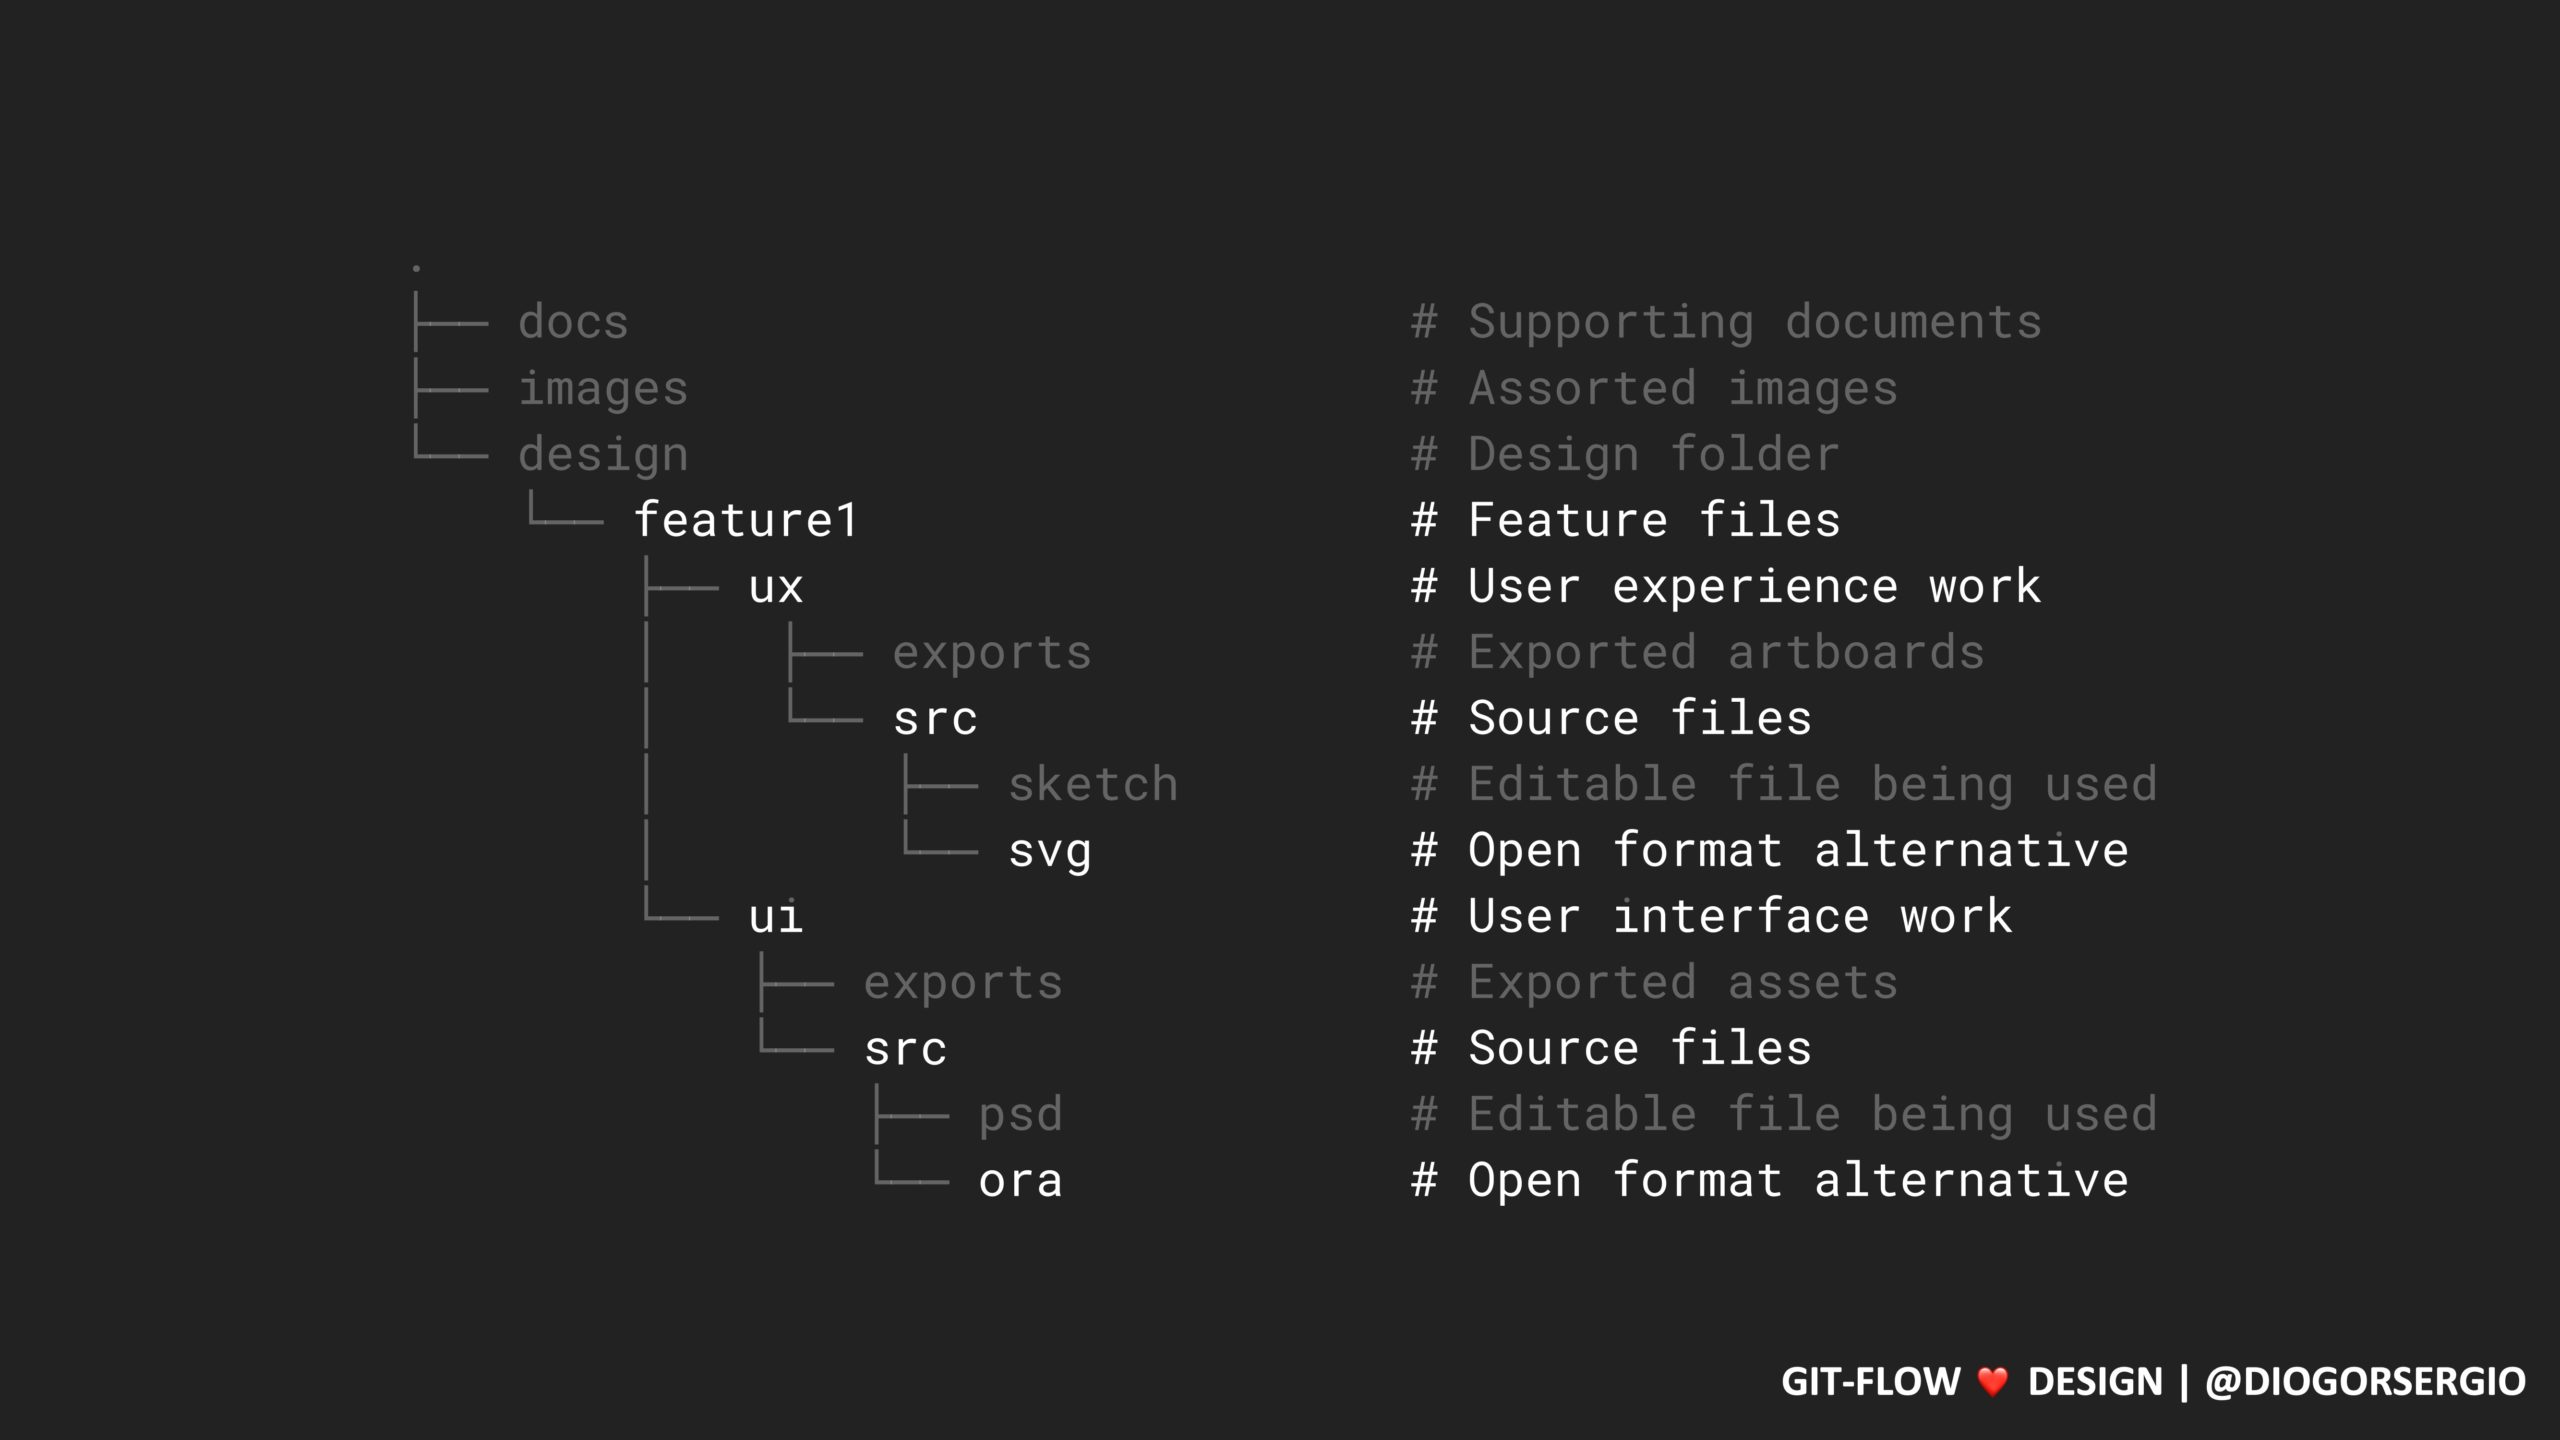
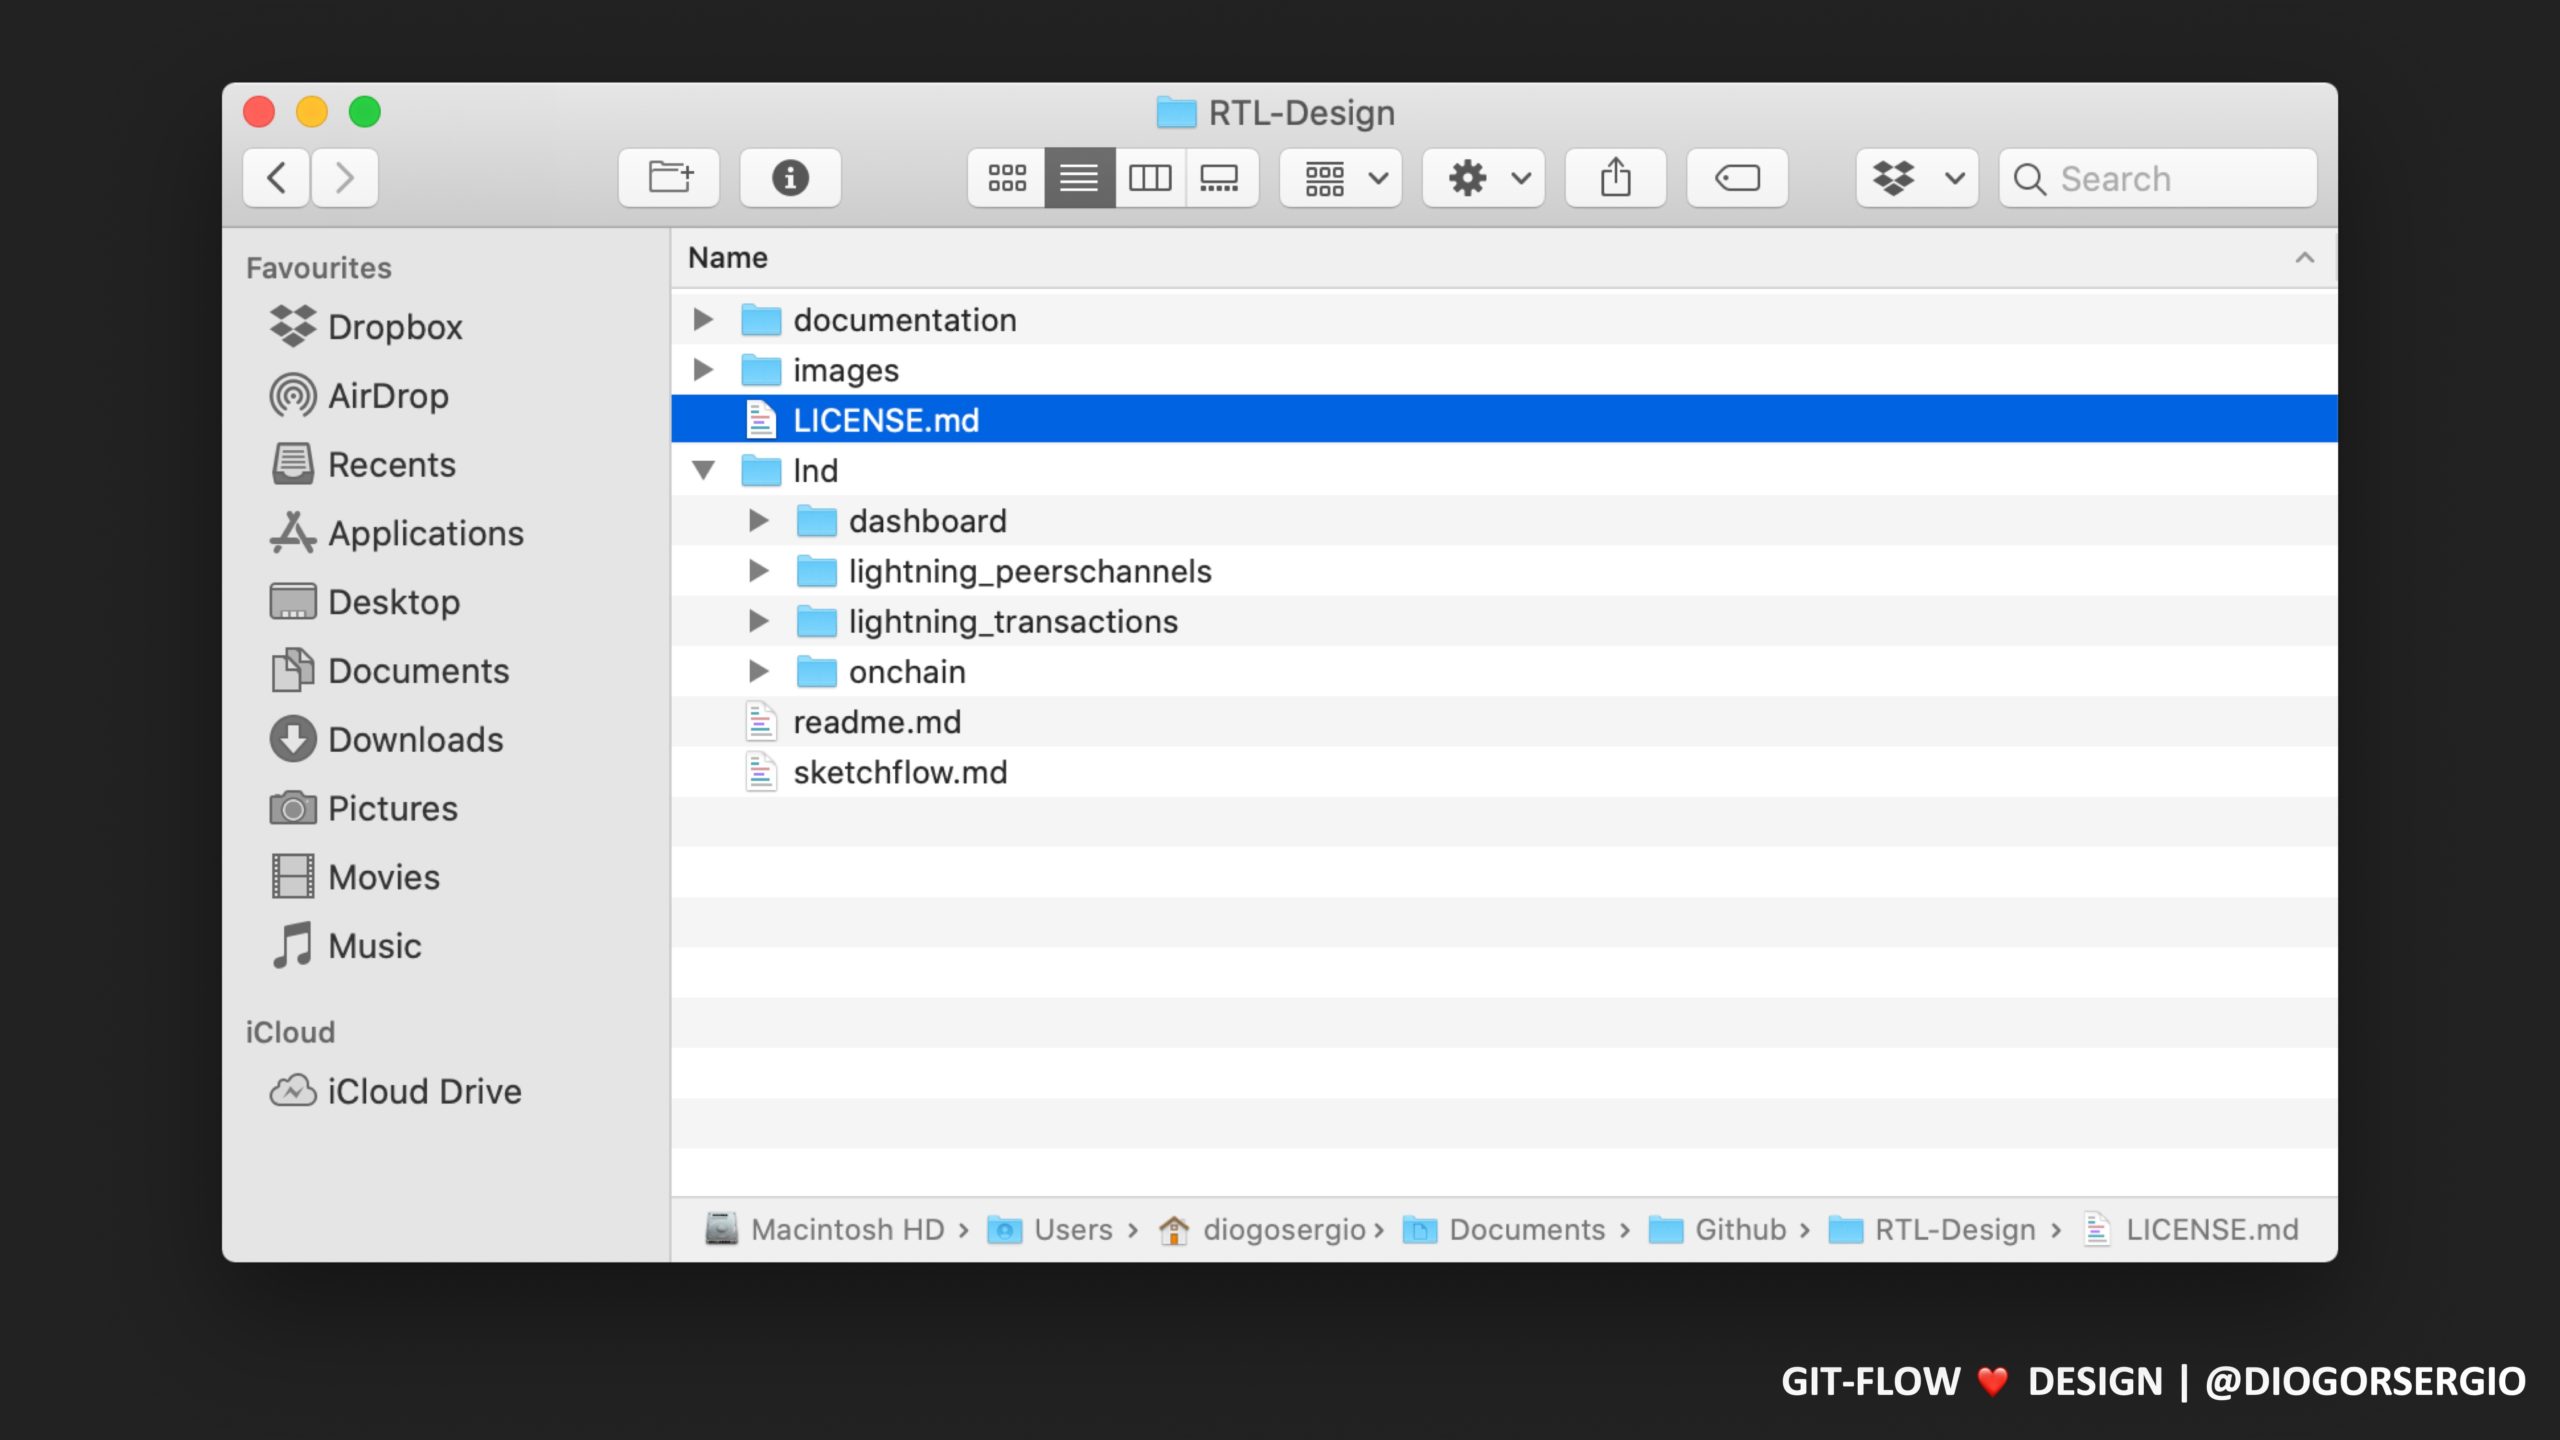
Folder Structure
This is an example of the folder structure being used to keep things organised and manageable for all of us.
.
├── images                         # Images to support this repository
└── project                        # Project folder (e.g.: web)
    └── task/feature               # Task or feature folder
        ├── ux                     # User experience work
        │    ├── exports           # Exported artboards
        │    └── source            # Source files
        │        ├── *sketch       # Editable file being used *sketch as an example
        │        └── svg           # Open format alternative
        └── ui                     # User interface work
            ├── exports            # Exported assets
            └── source             # Source files
                ├── *psd           # Editable file being used *psd as an example
                └── xcf            # Open format alternative

Important: When using proprietary software, please make sure you always keep copies of the editable file in open file formats. For example if you use Sketch, keep the .sketch file in the source, but also export all your artboards into separate .svg files.
Getting Started Guide
Terminal
If you’re quite comfortable with command line applications and prefer to interact with git that way, then this will give you an overview on how to do it.
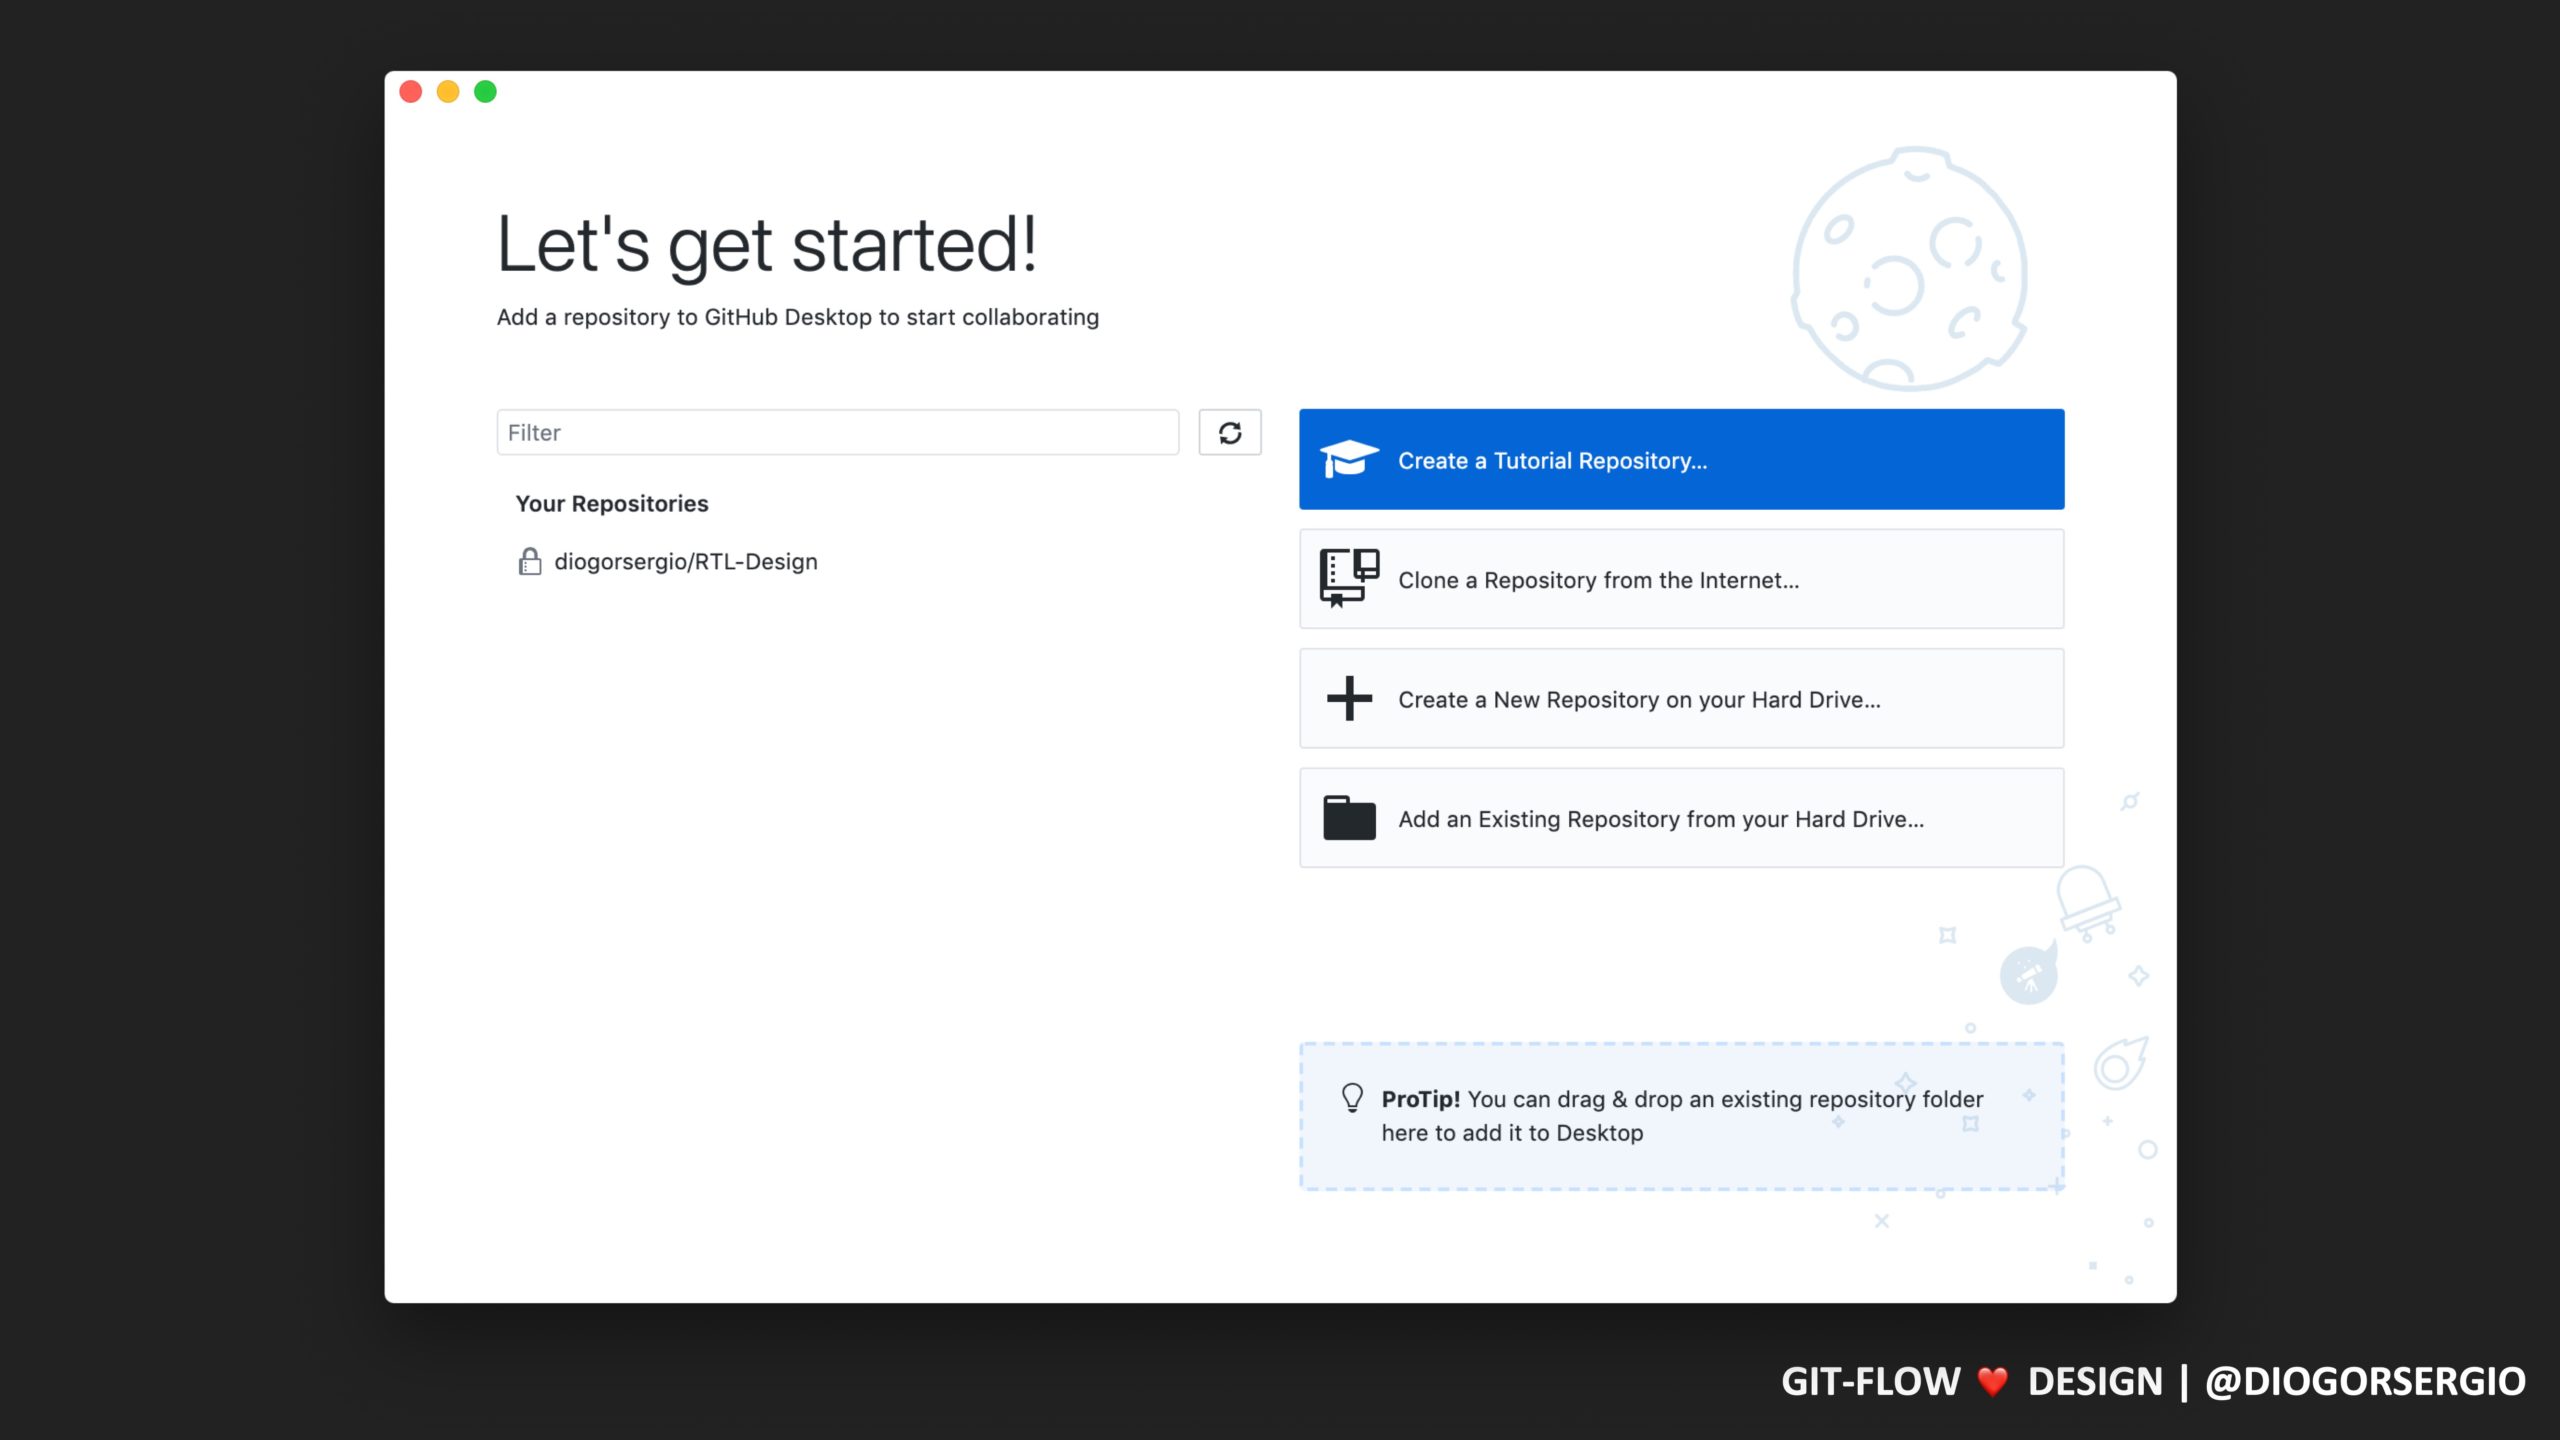
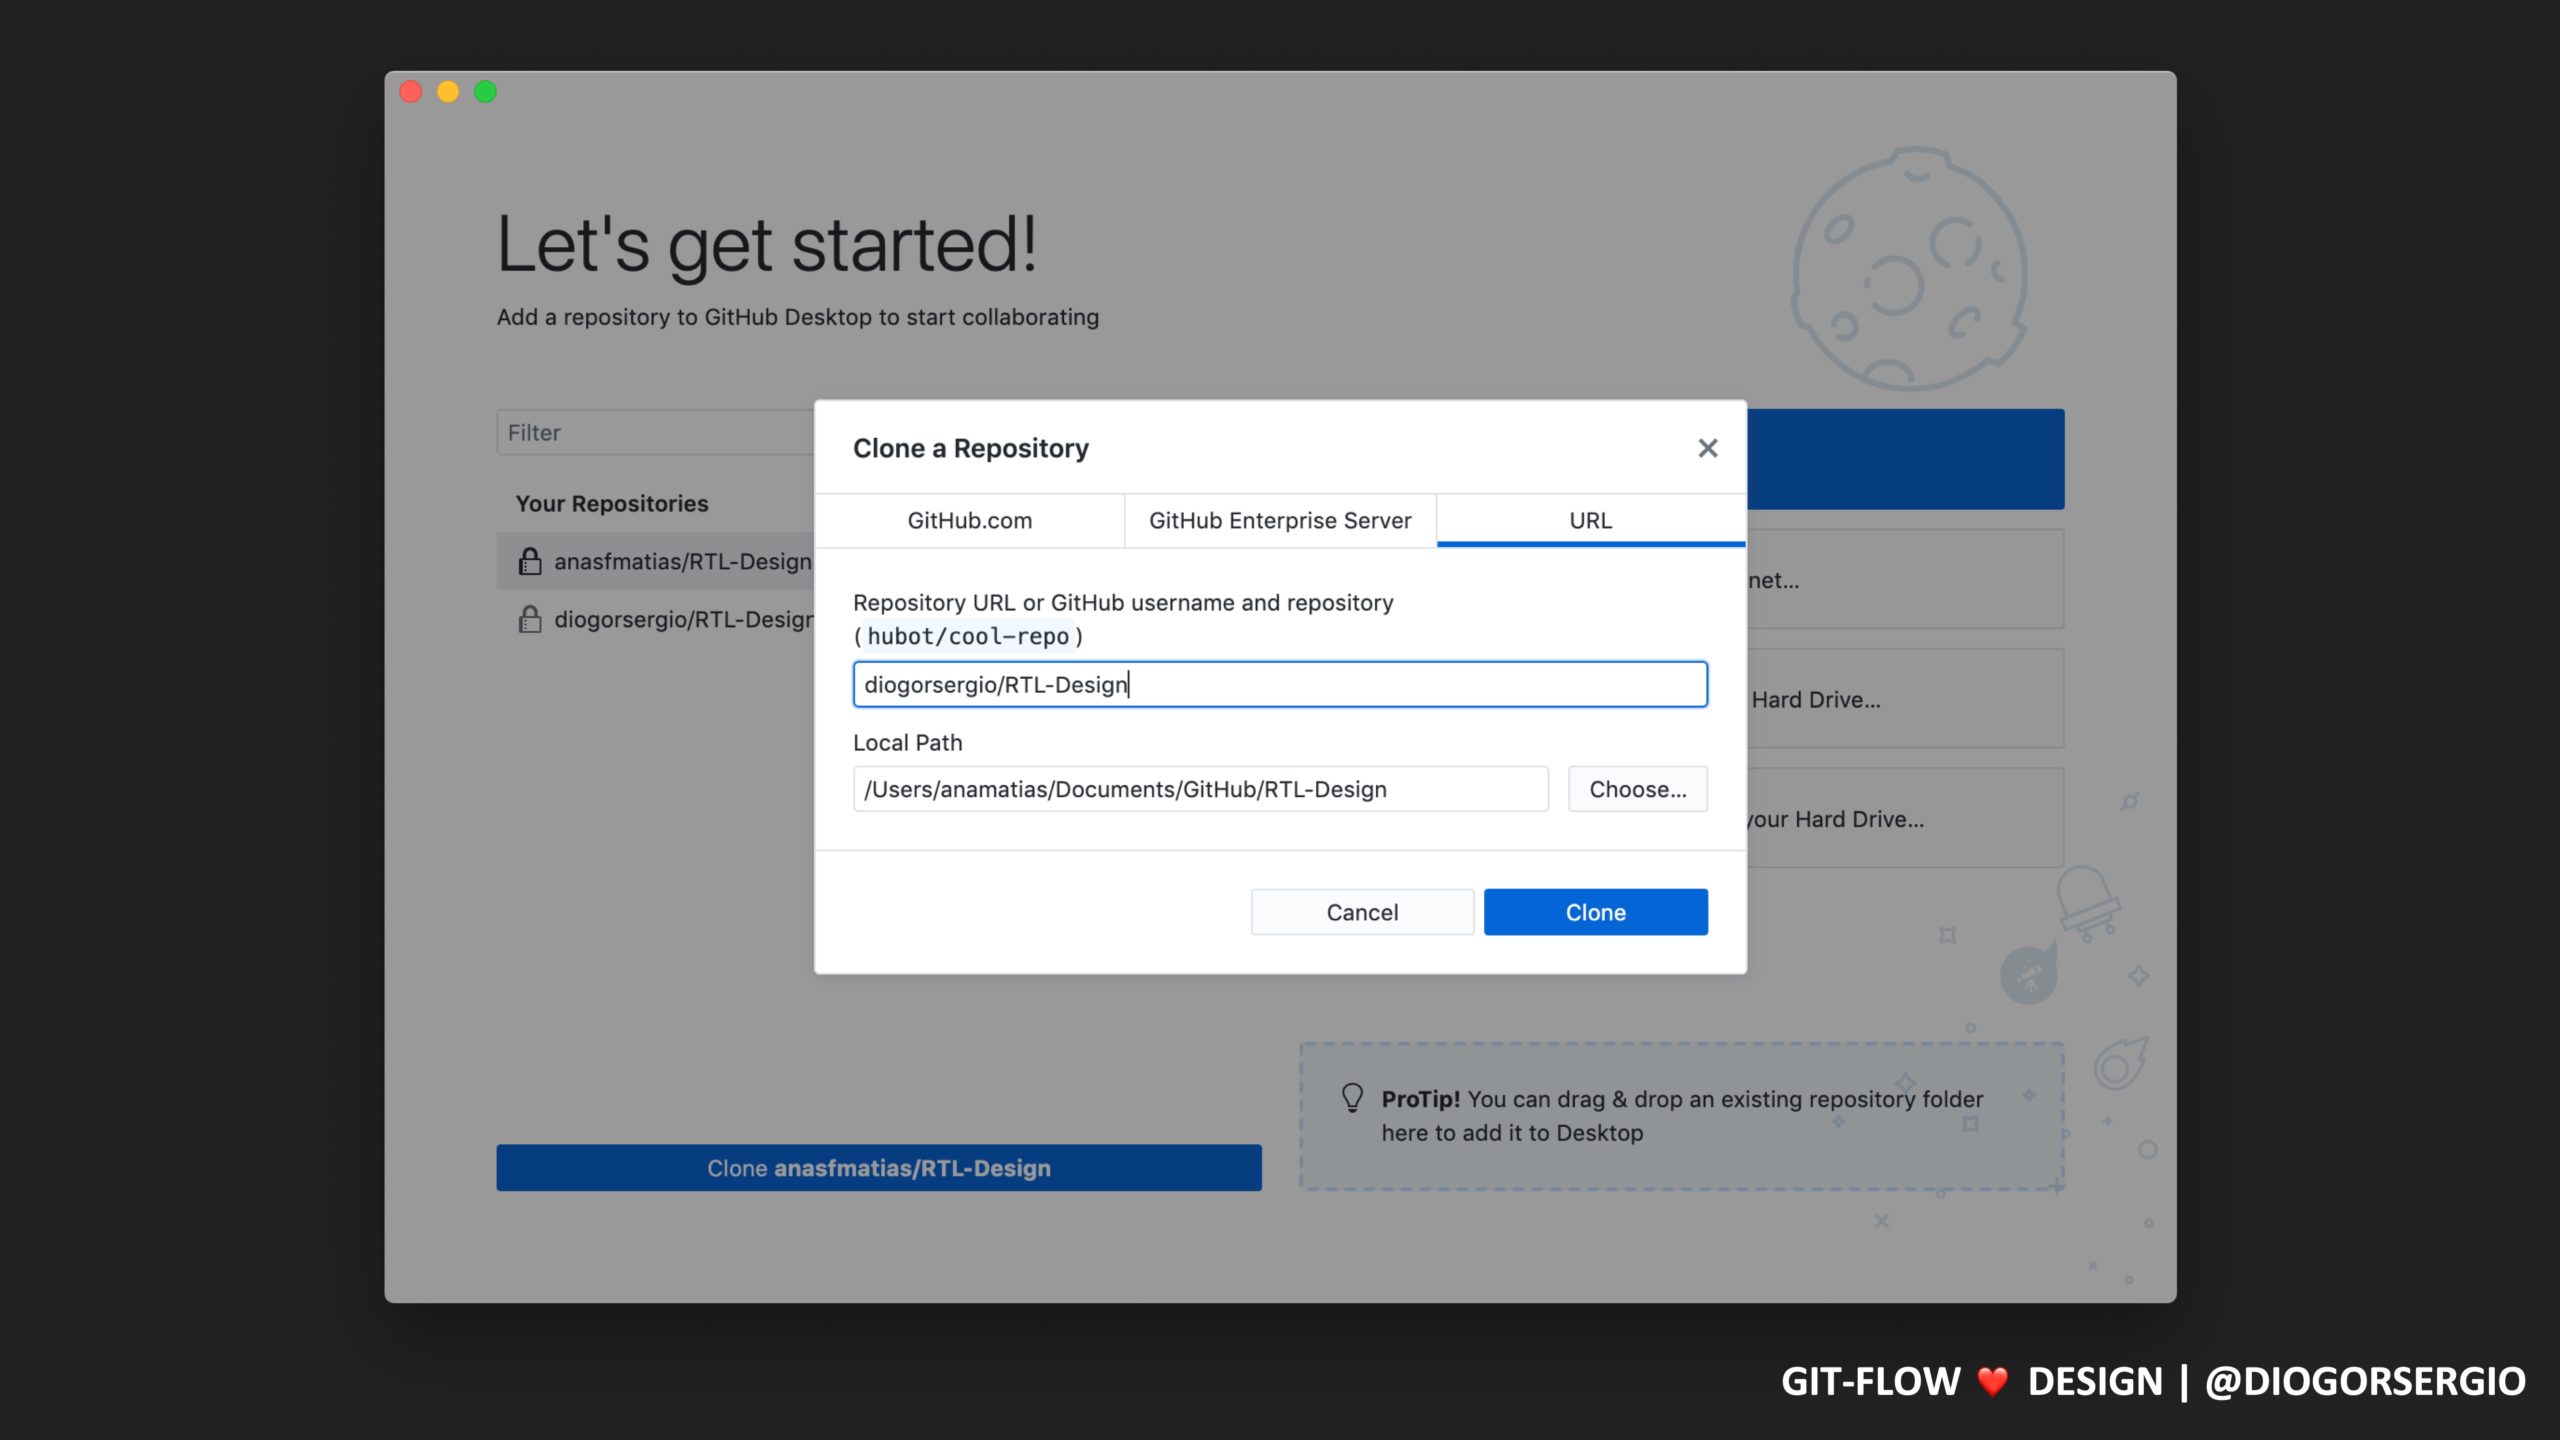
Step 1 – Clone the Project Repository
# Open the directory to where you want to download the repository.
$ cd ~Documents
# Clone the design repository.
$ git clone git@gitlab.torproject.org:torproject/ux/design.git
# Go into its directory.
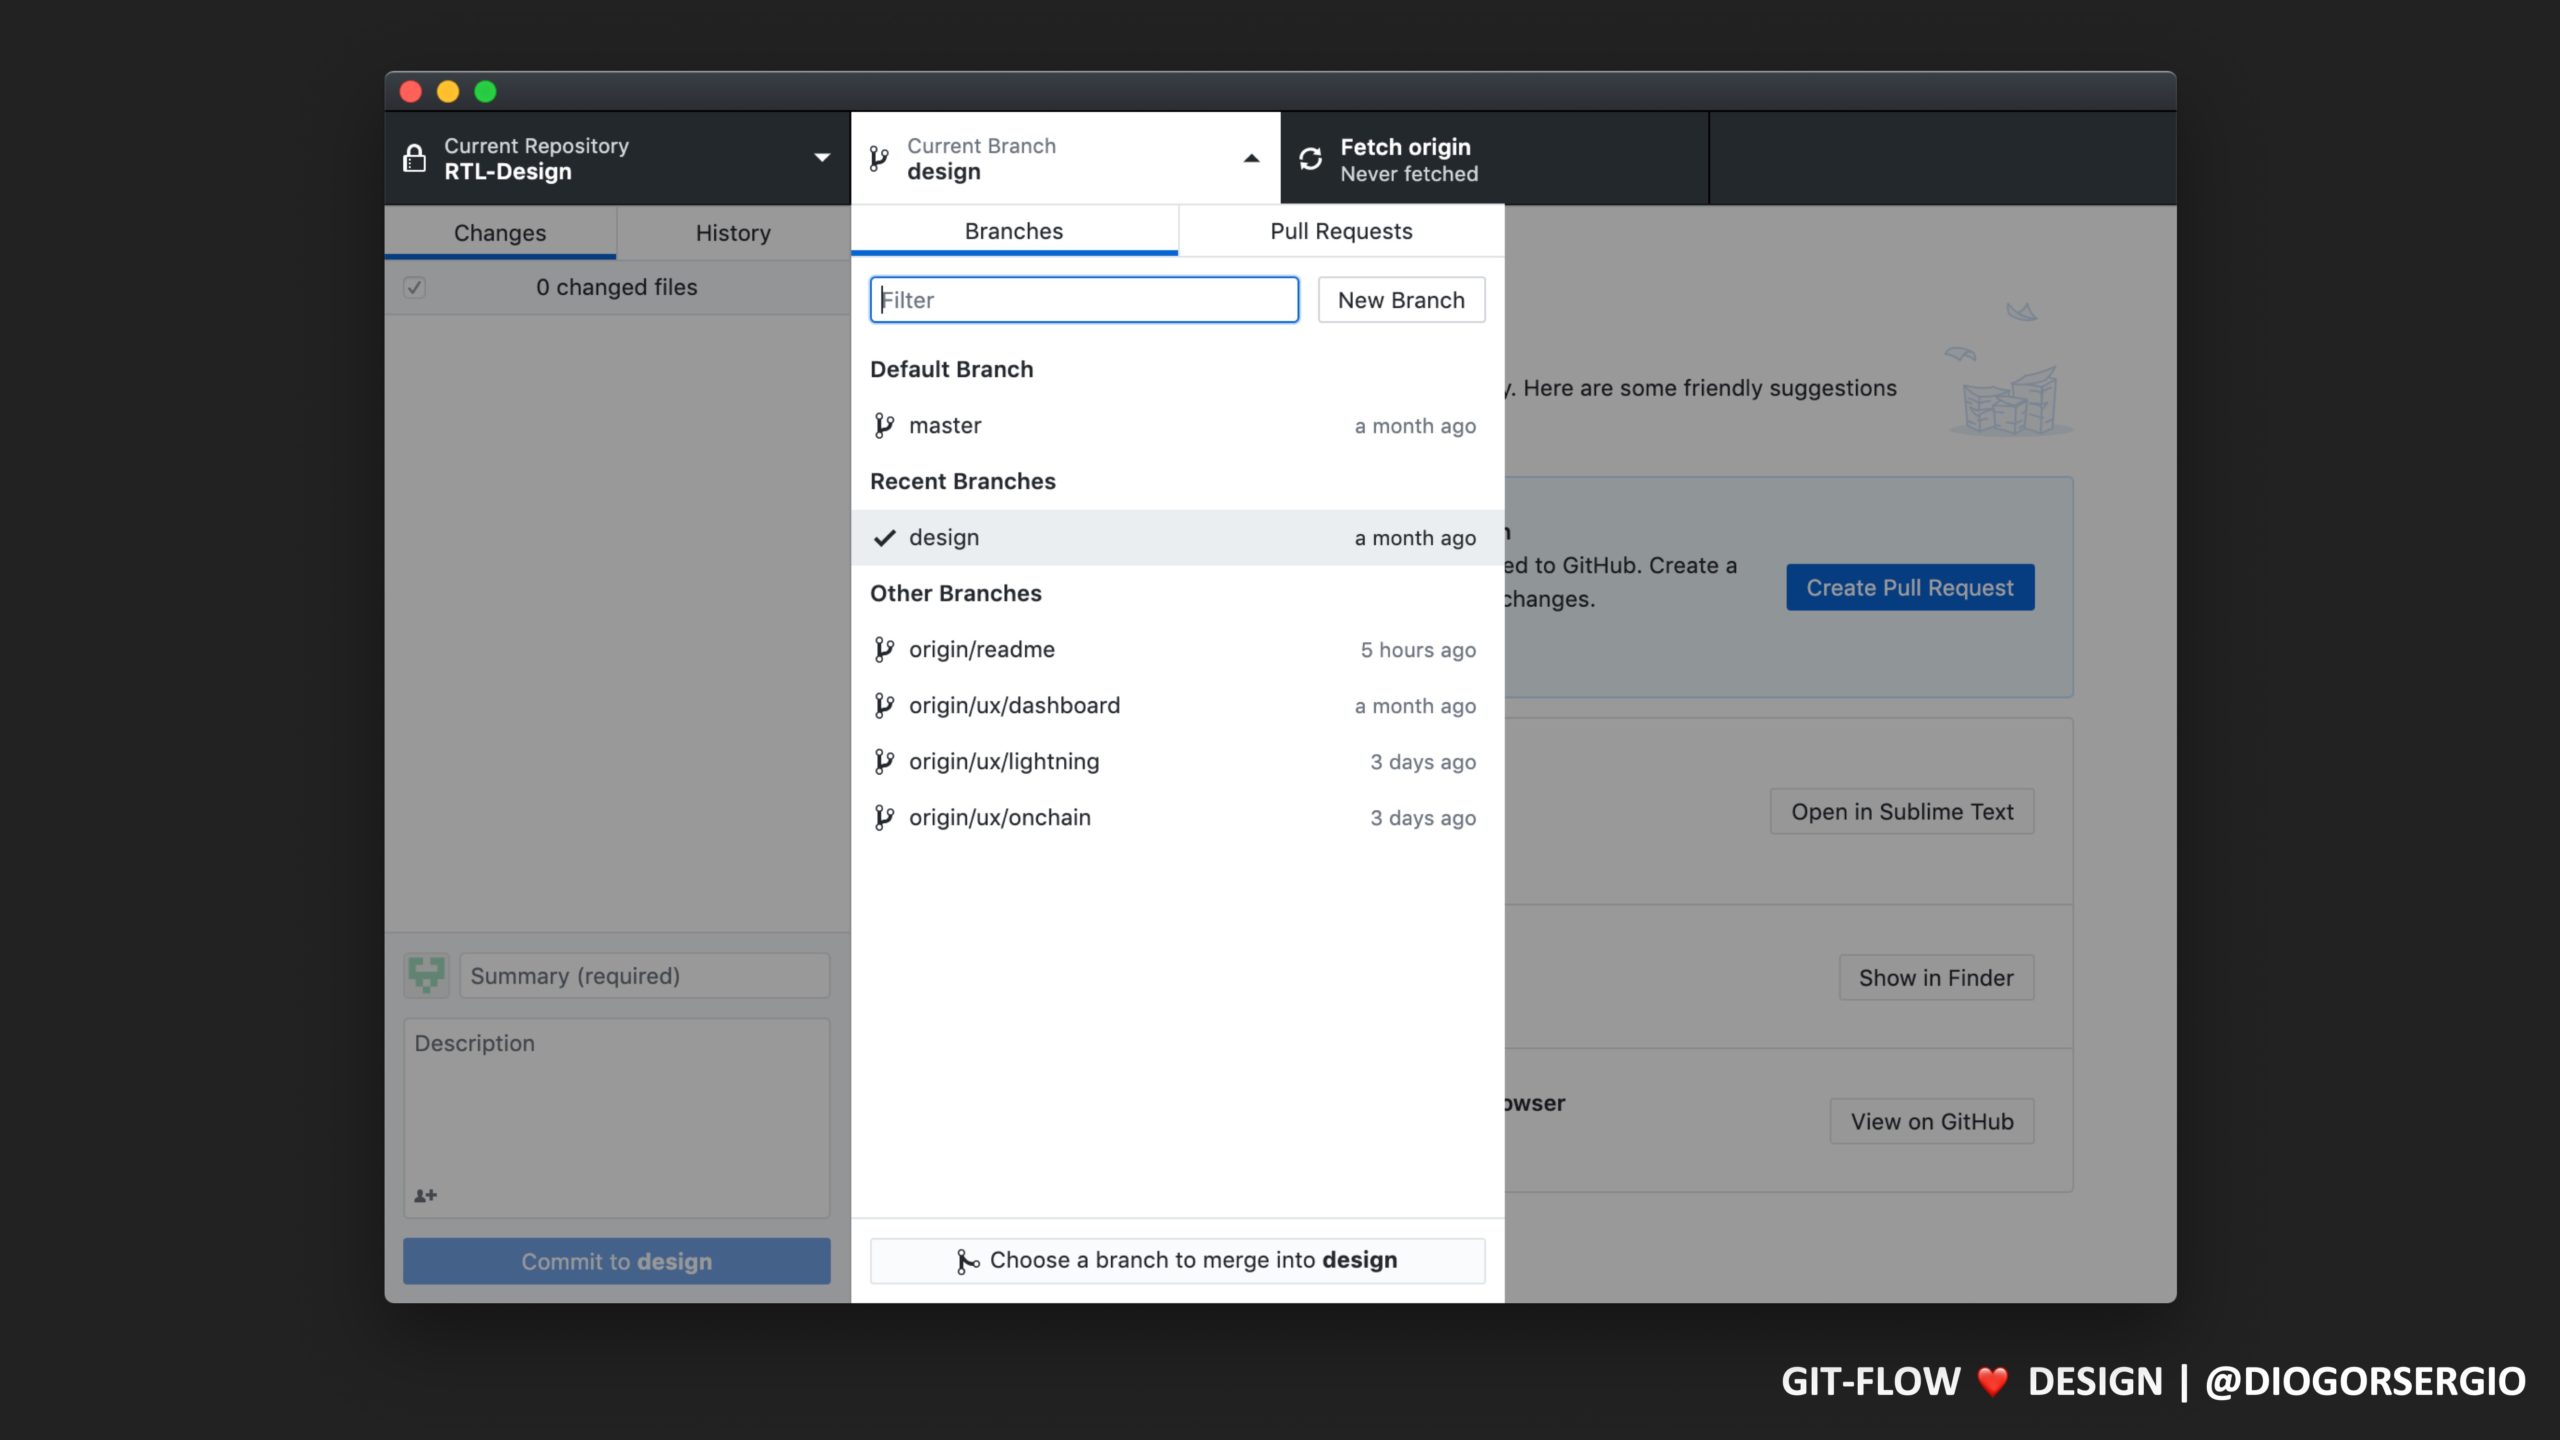
$ cd designStep 2 – Switch to the Design Branch
# You're now in the master branch, so let's switch to the design branch.
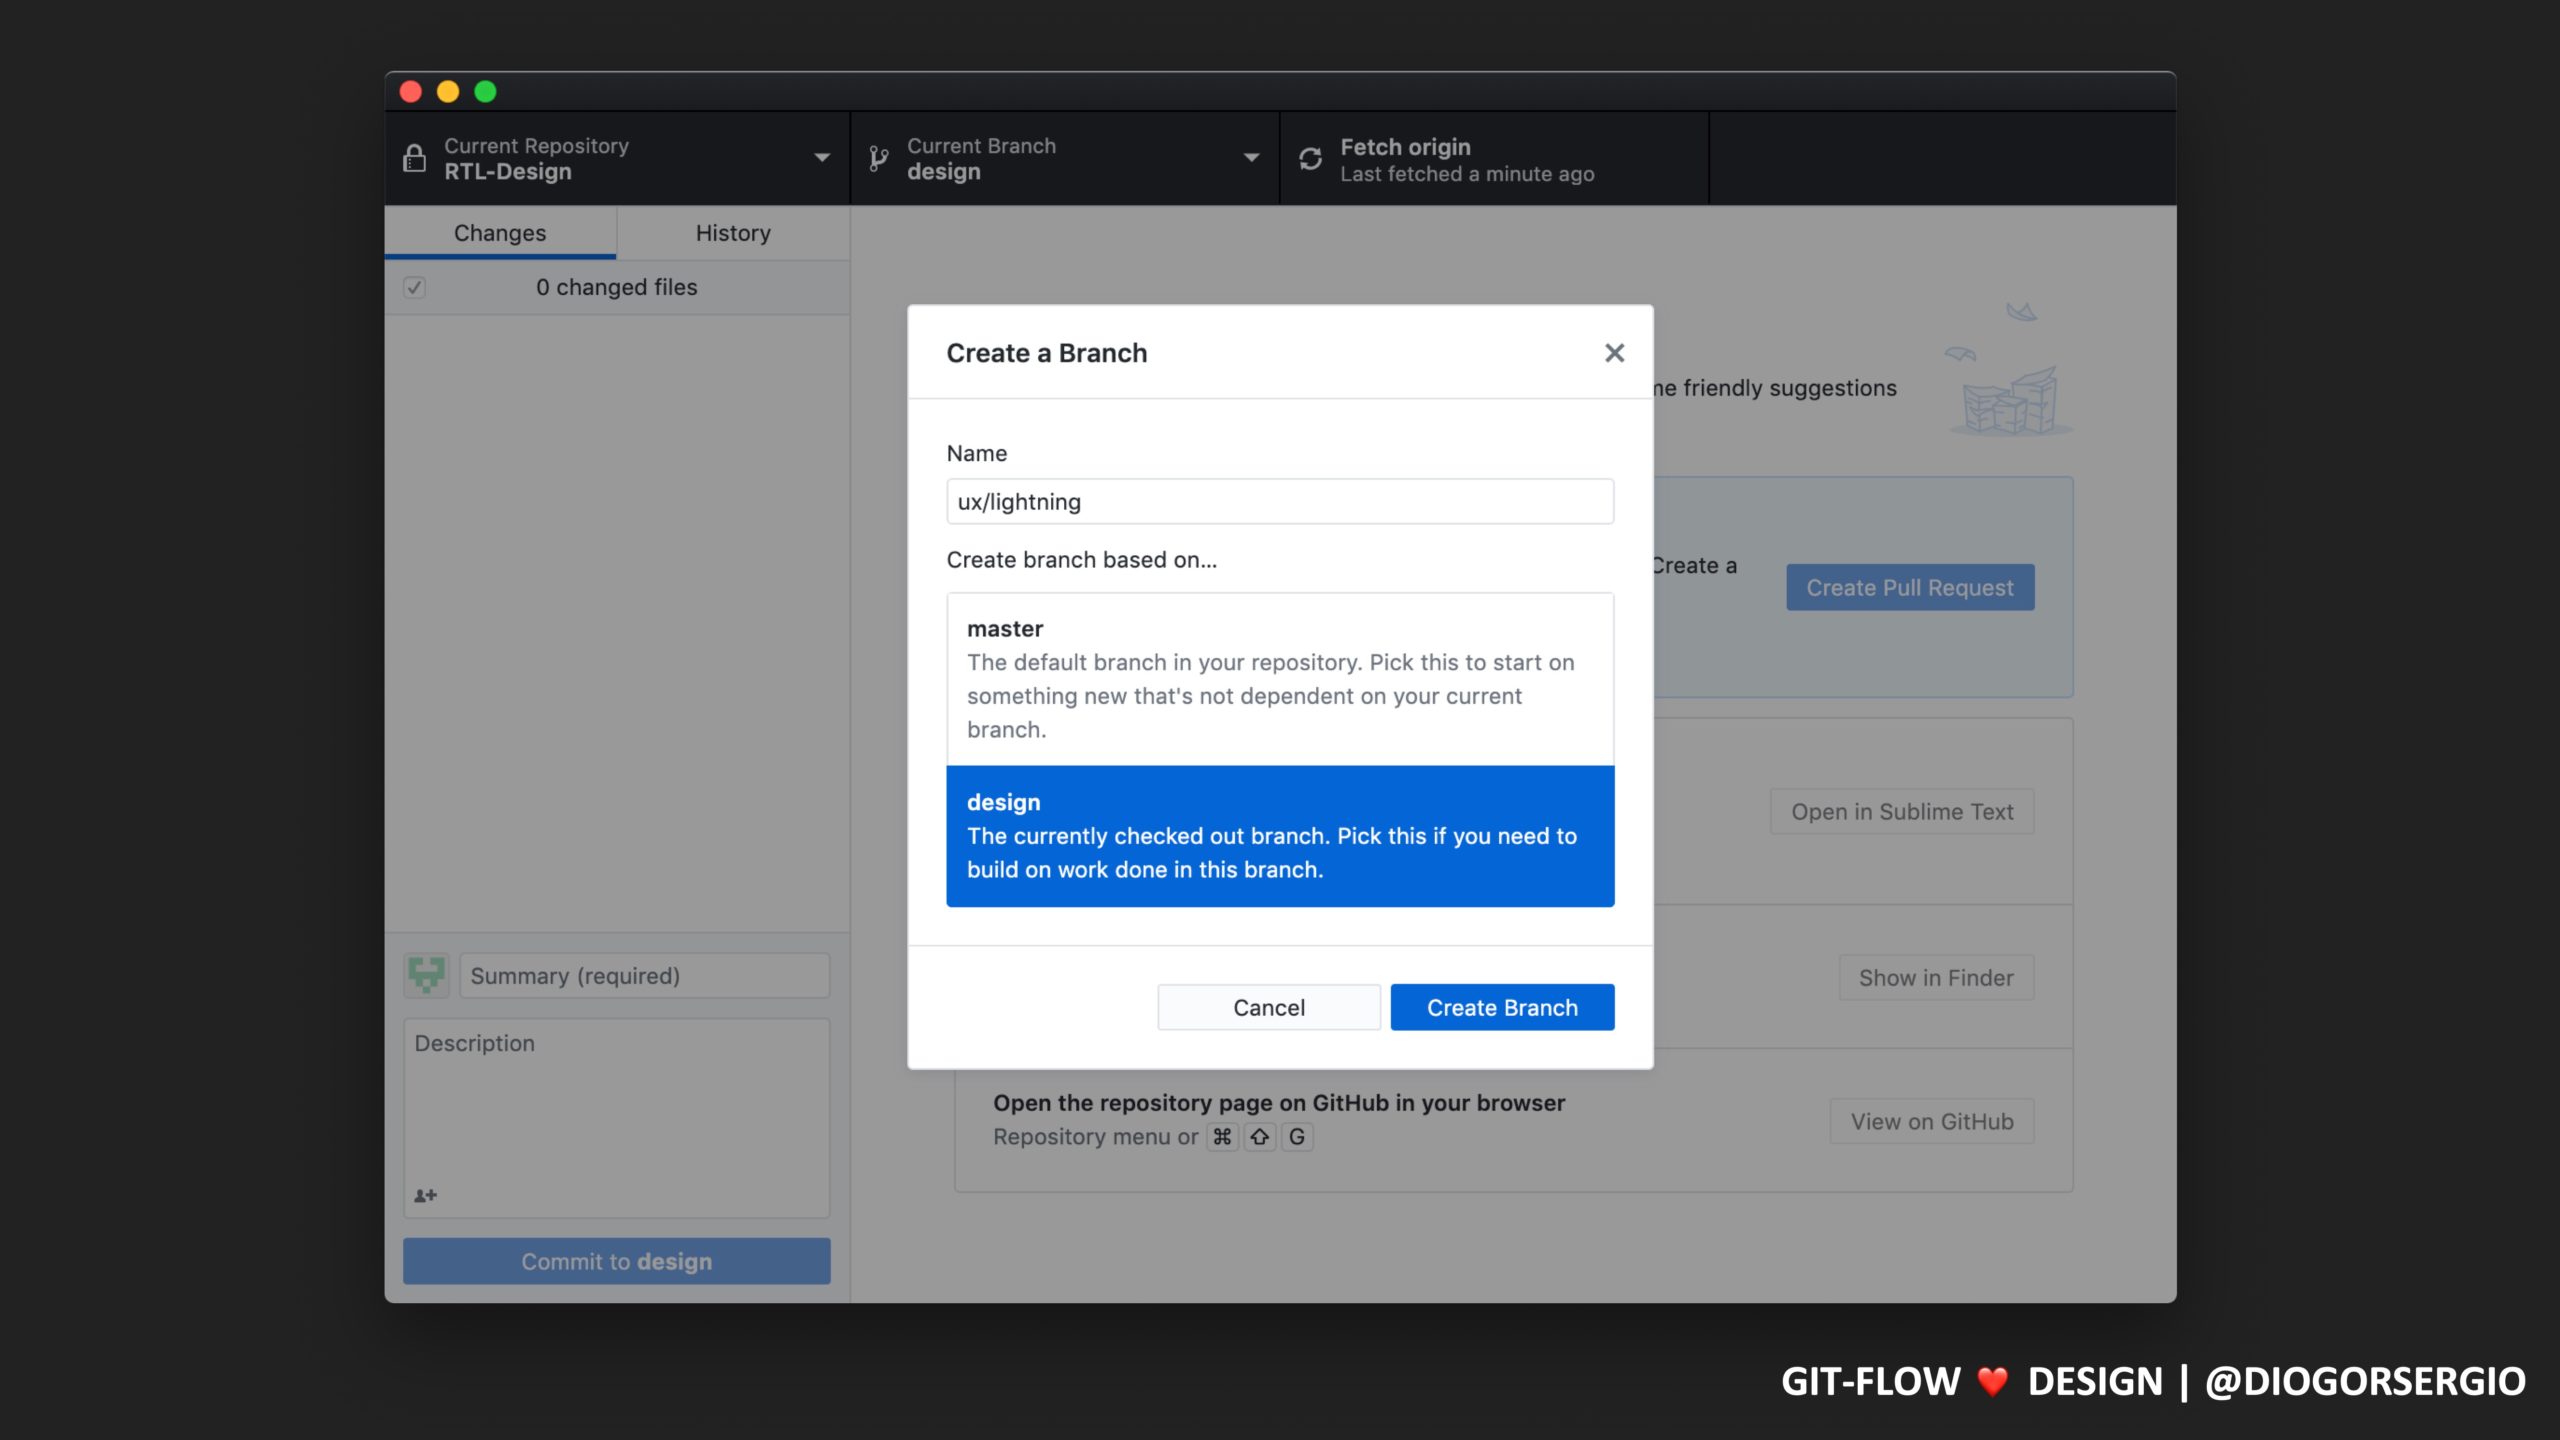
$ git checkout designStep 3 – Create a Task/Feature Branch
# Always create task/feature branches based on design and use prefixes accordingly ux/, ui/ or uxui/.
# Name should follow prefix/name, replace accordingly. e.g.: ux/downloadpage,
$ git checkout -b ux/name
Step 4 – Work on The Task
# At this point you are ready to start working.
# Make sure you follow the correct folder structure when creating your files.
# Check the status of the current branch, after working on it.
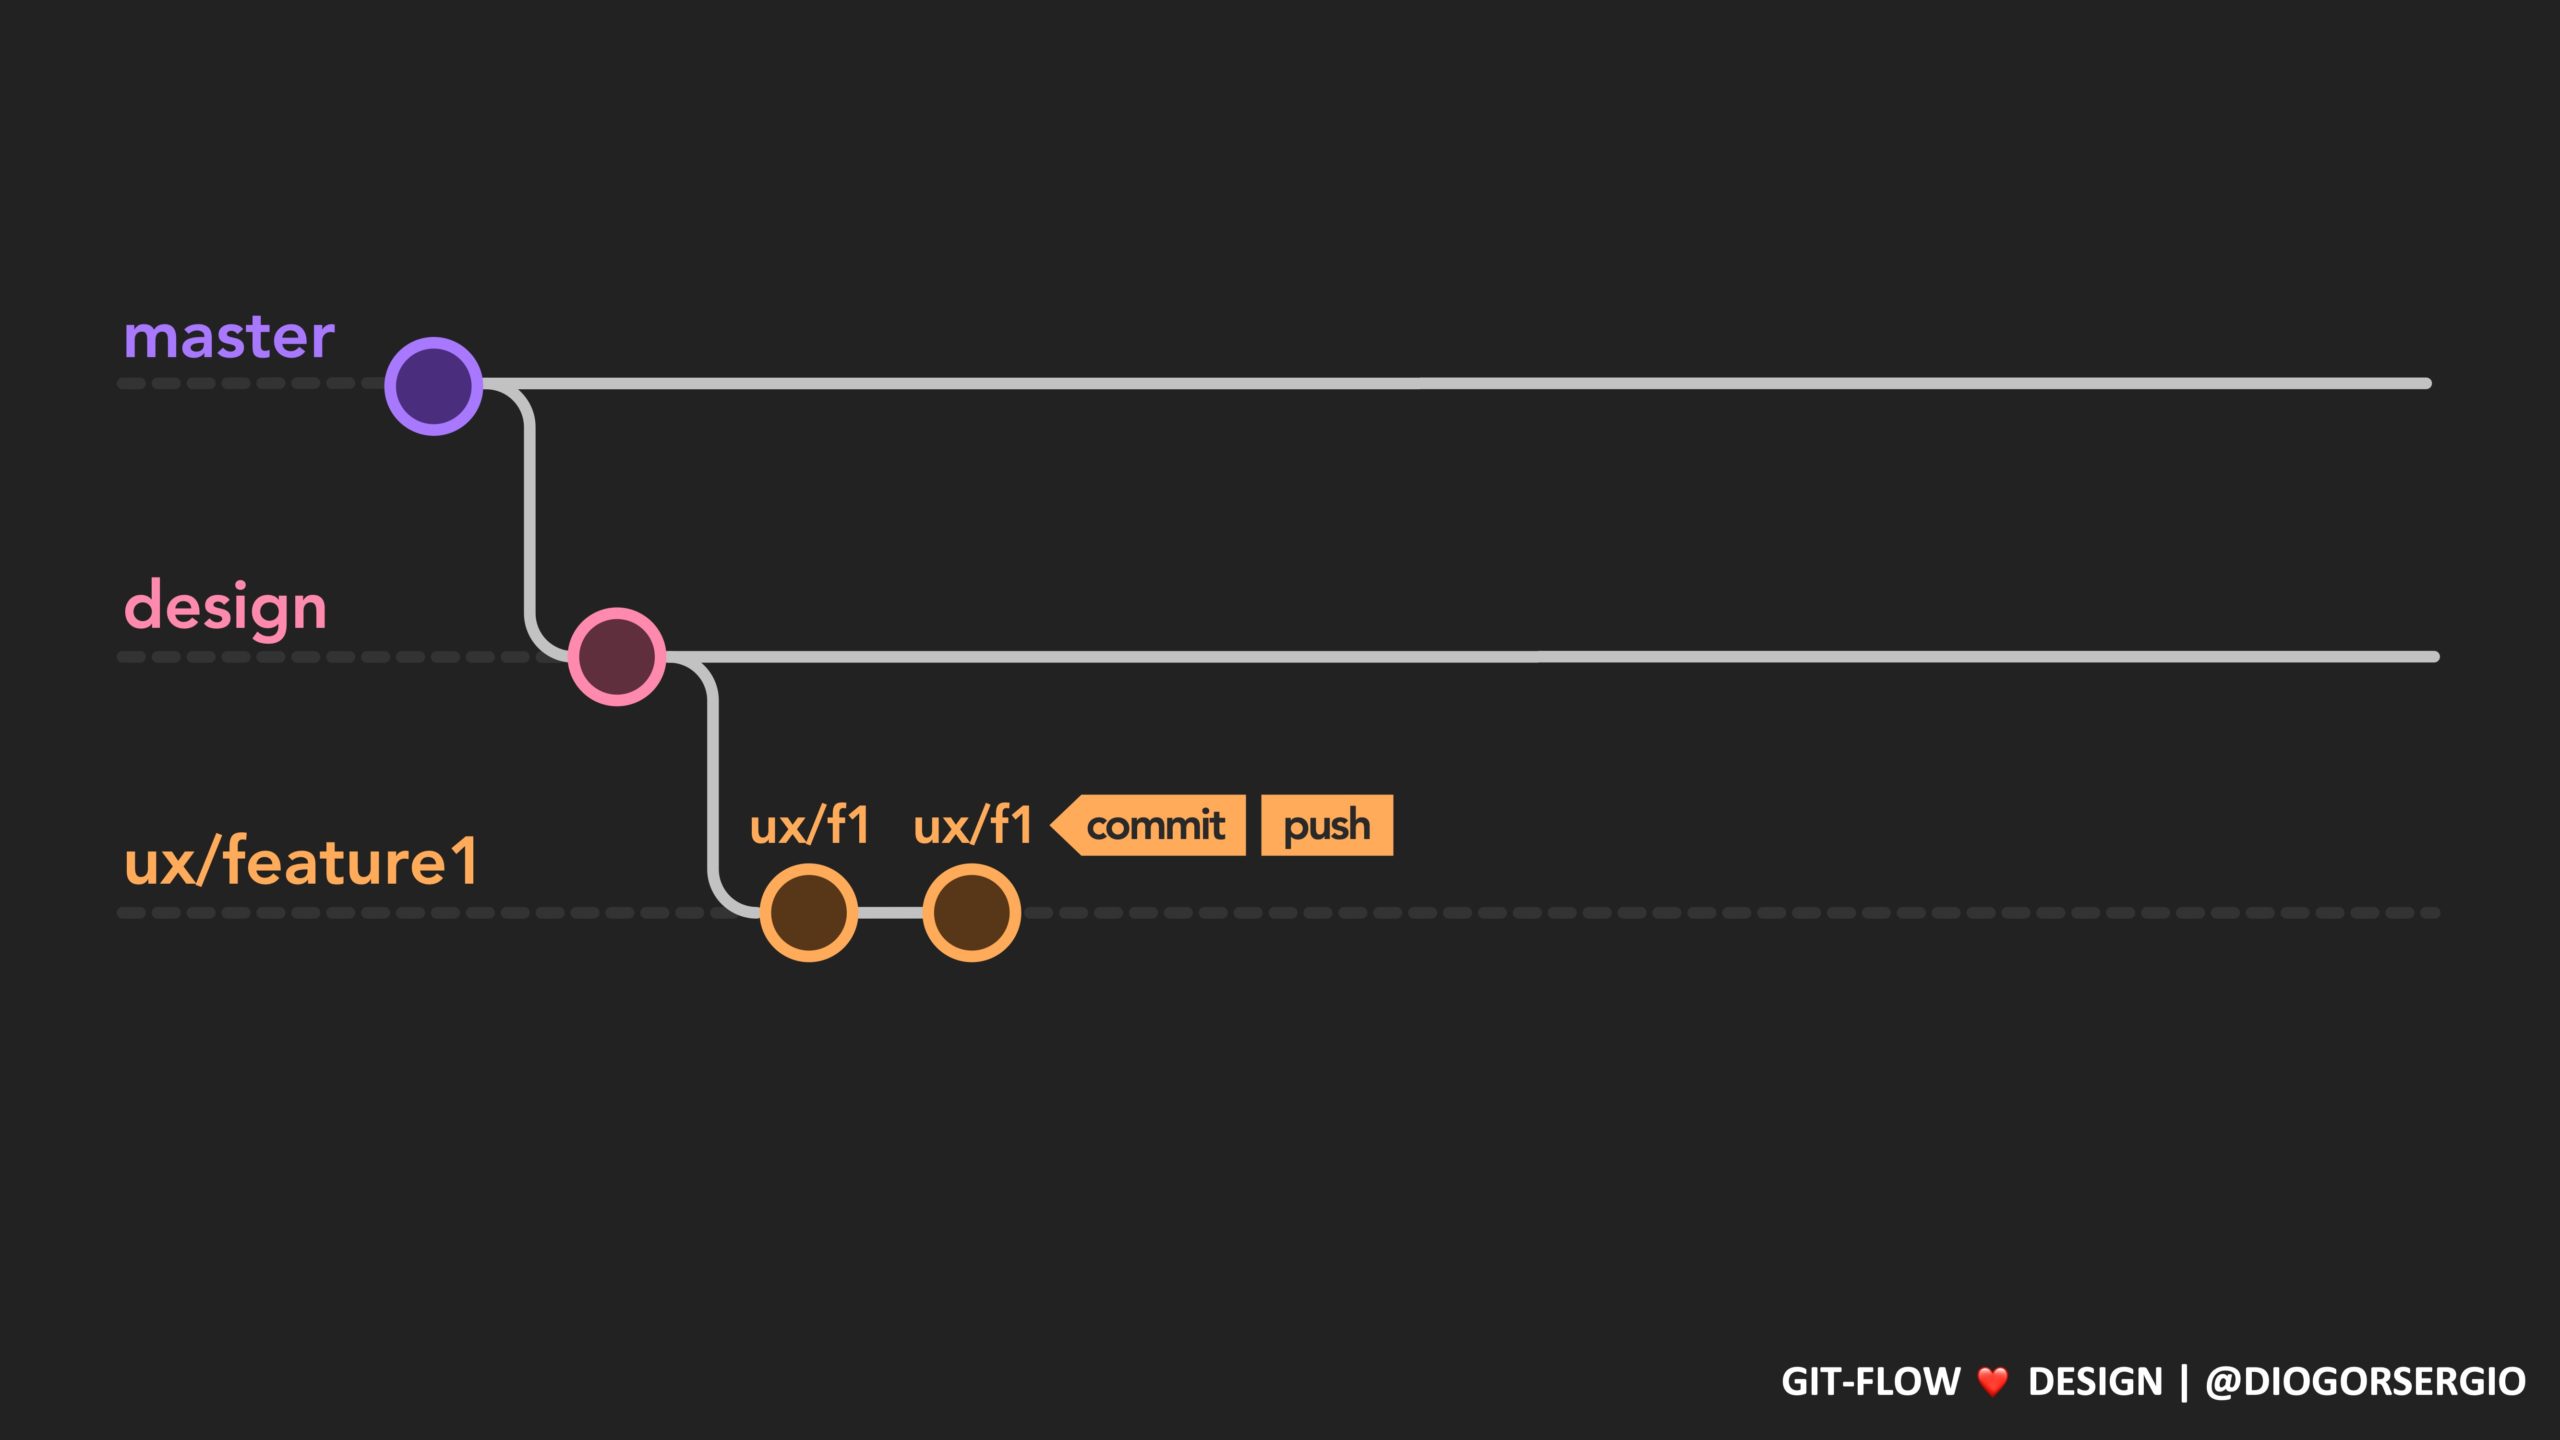
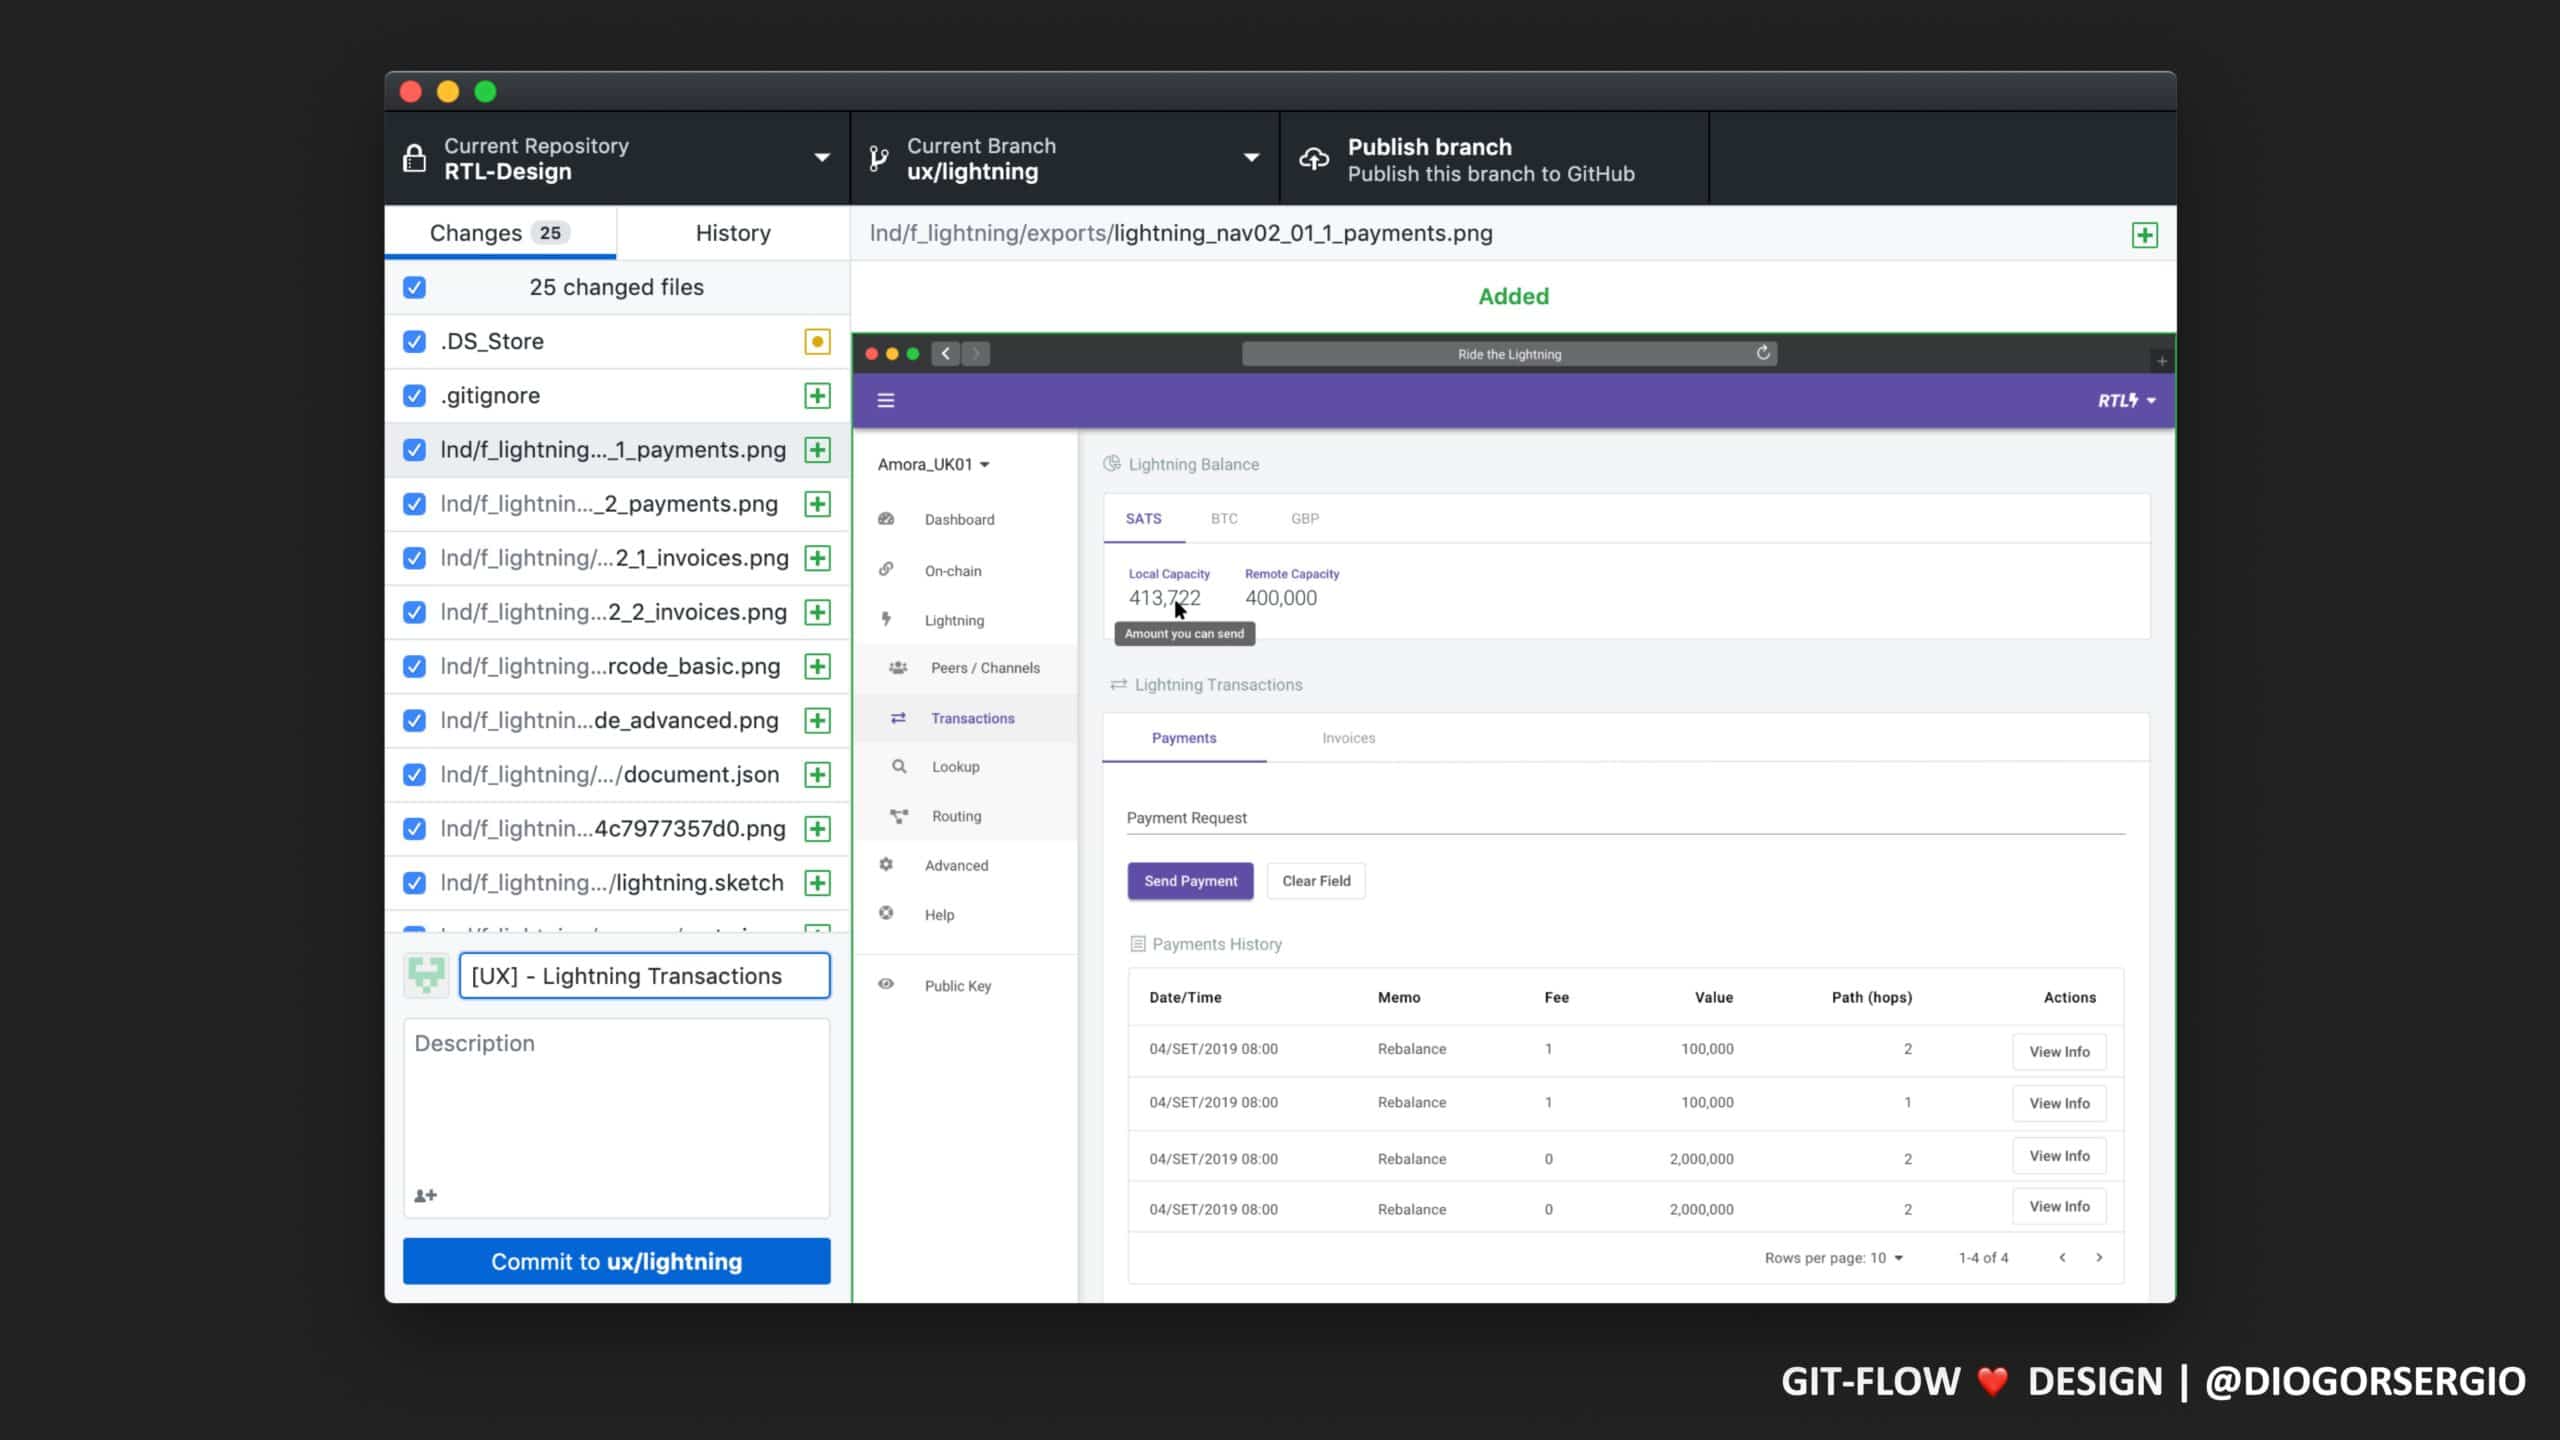
$ git statusStep 5 – Add and Commit Changes
When you finish a design iteration and are ready to show it to gather feedback, you will have to commit your work, so it can be pushed to gitlab for everyone to see. Commit titles should start with [UX] or [UI] accordingly to the work they include and a couple words describing the scope of the work.
Keep in mind that you can commit multiple times.
# First you need to add the work and changes, you have just made.
# -A stands for --All.
$ git add -A
# Now that the files are added, you can commit them.
# The title should include the prefix followed by the scope of the work.
# E.g.: '[UX] - Download Page Redesign'
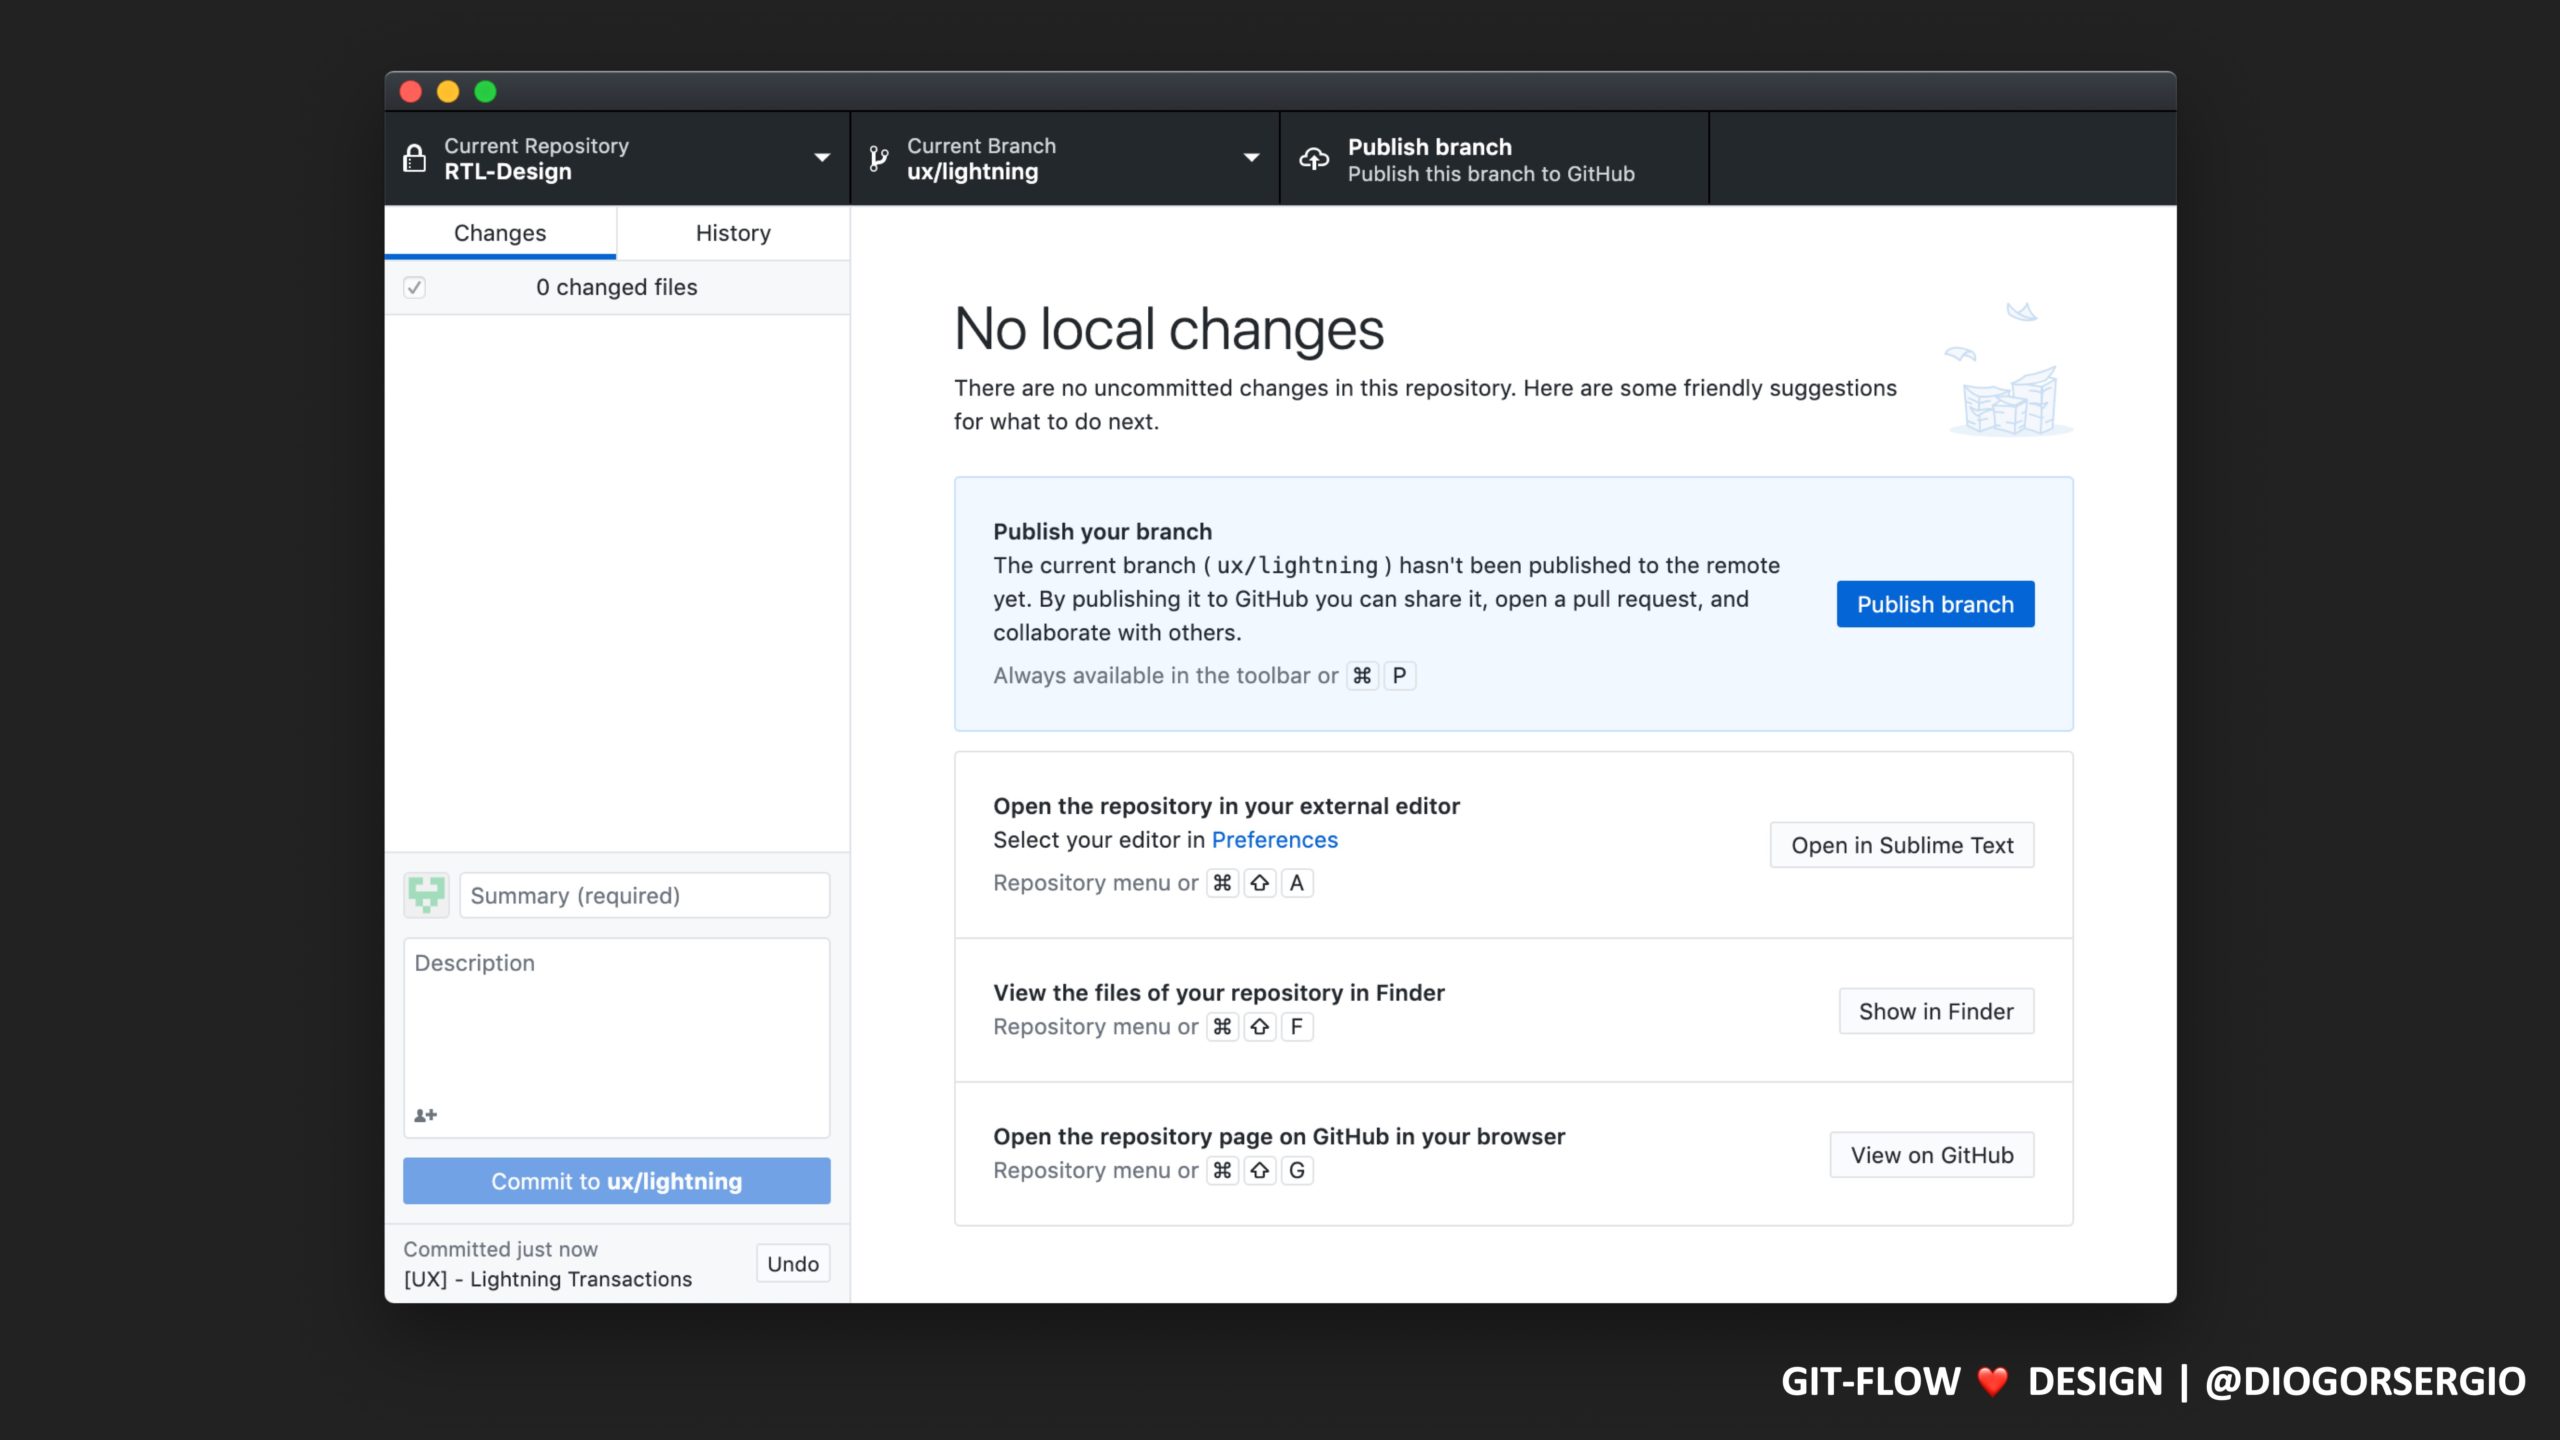
$ git commit -m '[UX] - Short Description of the Work'Step 6 – Push Changes to git
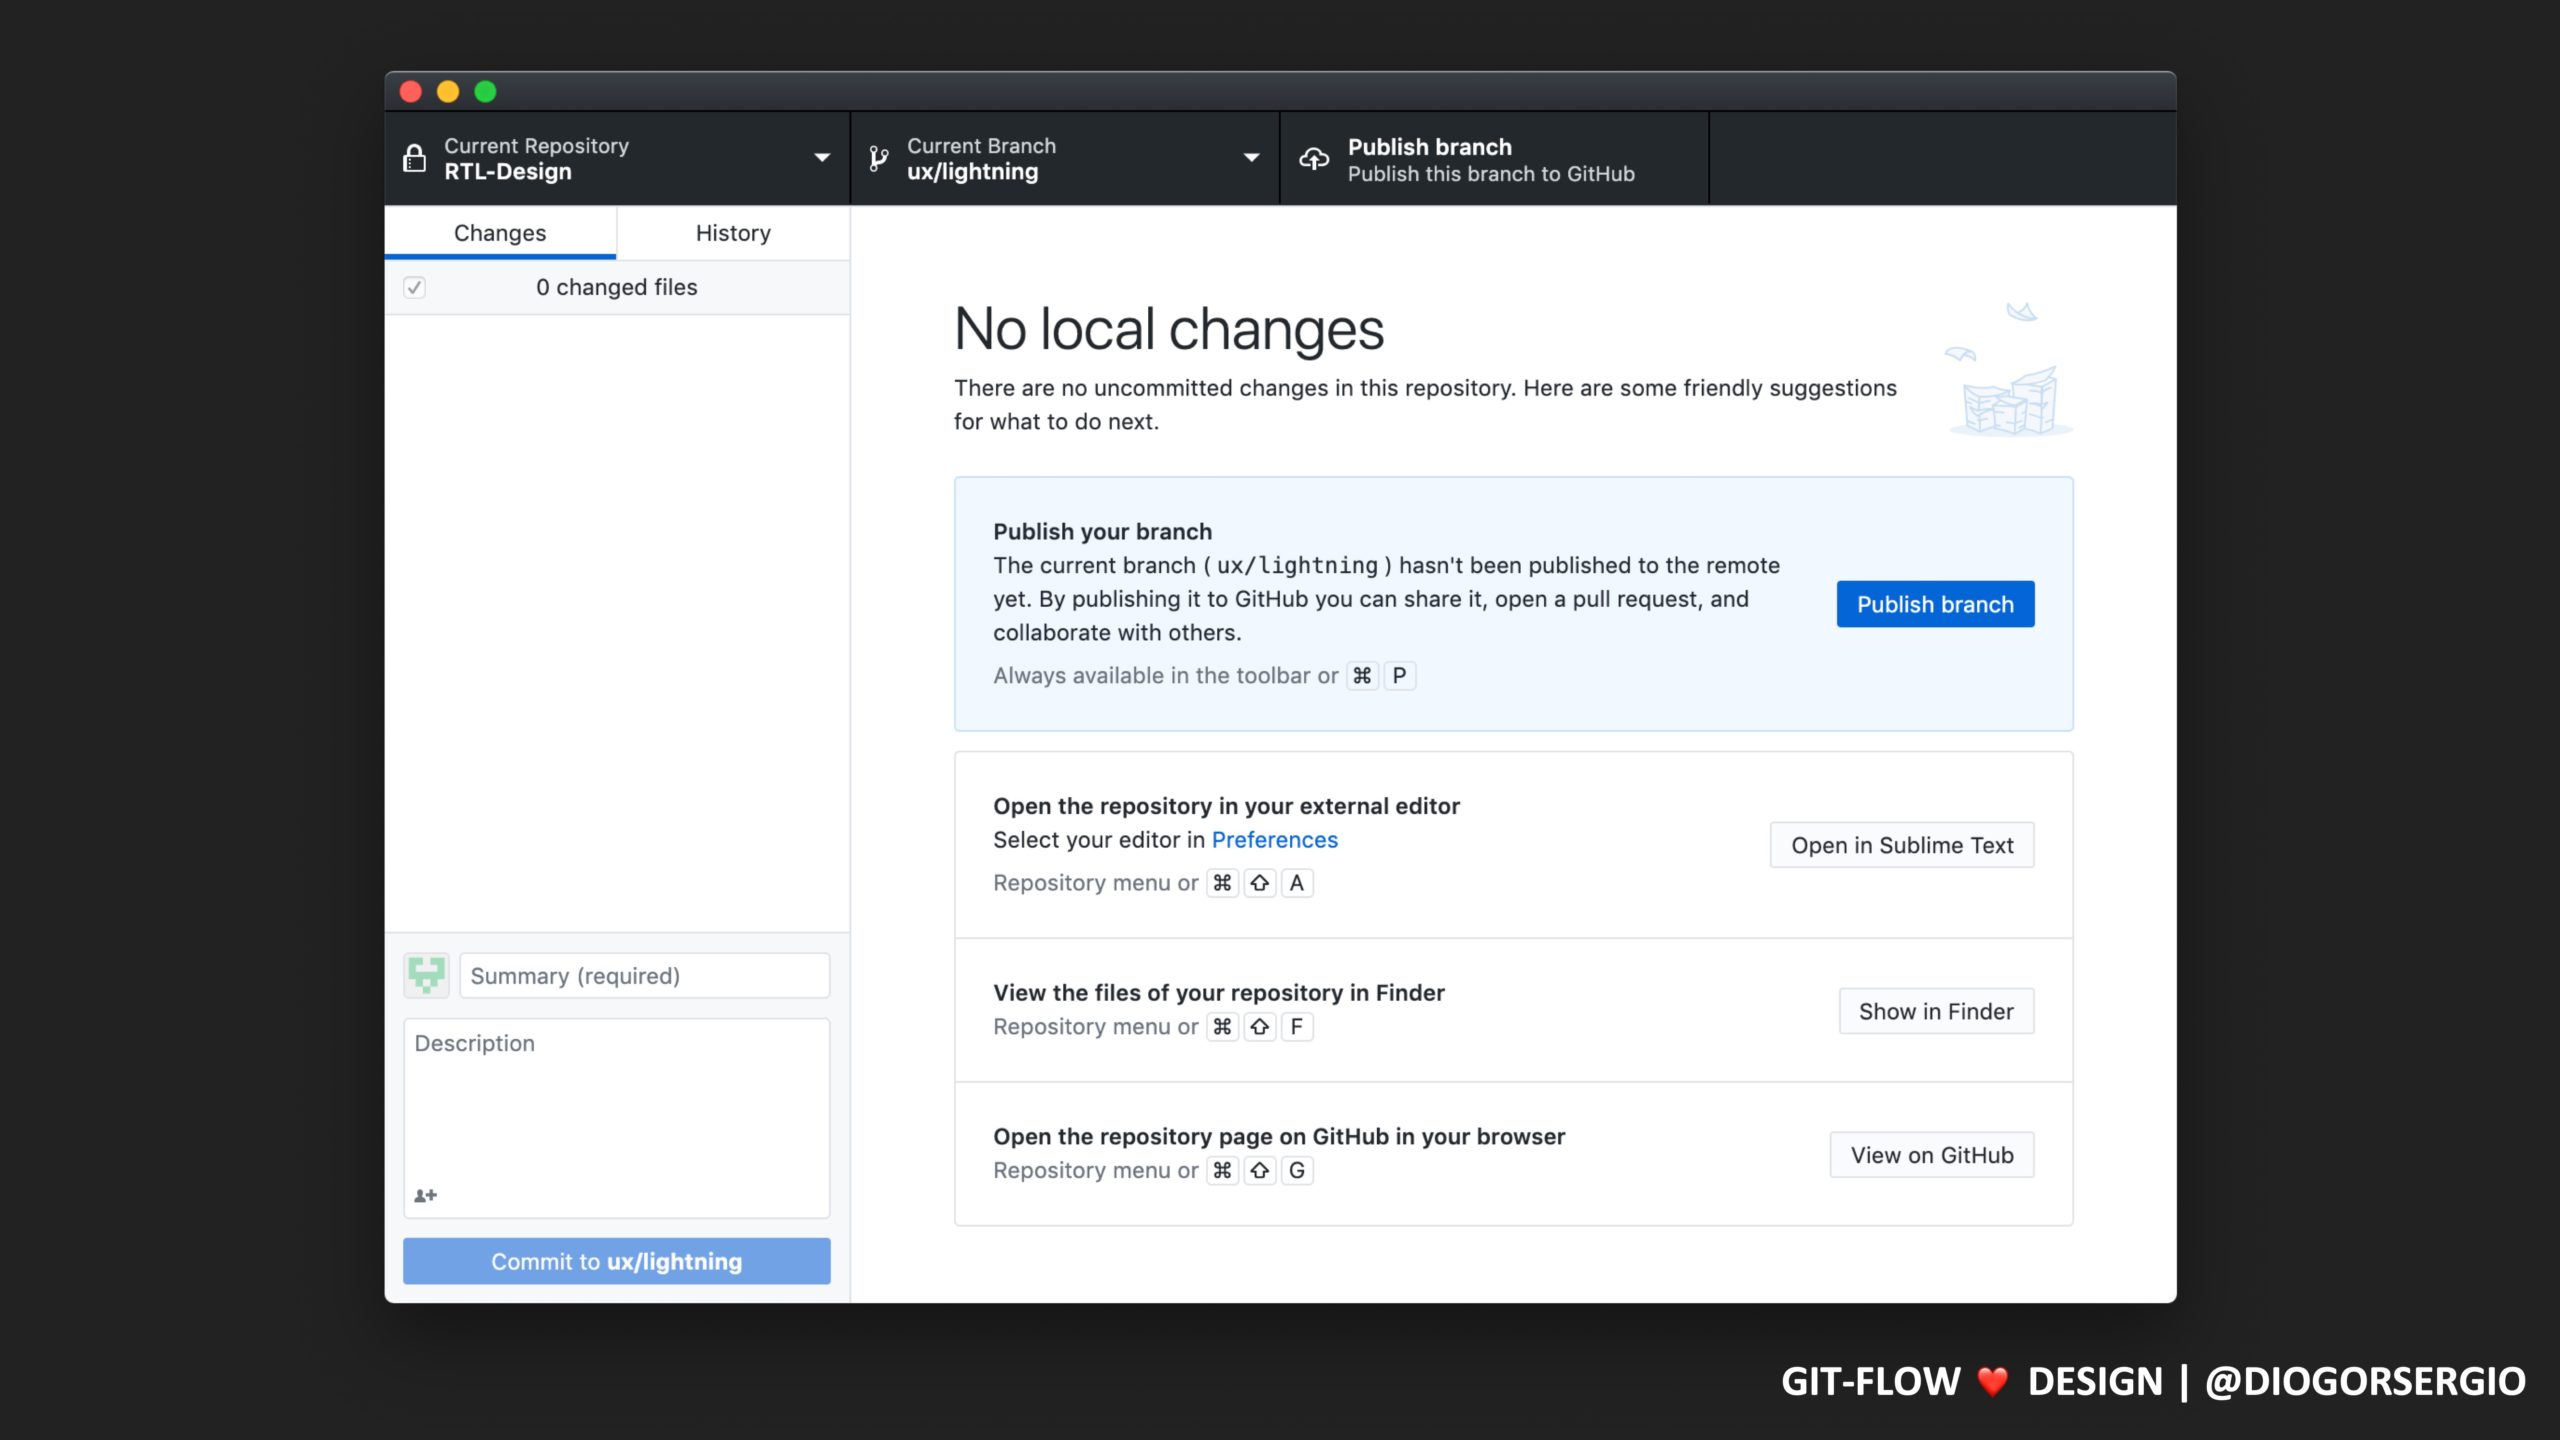
After you commit, the work is still only available locally on your machine, to make it available for everyone to see, you will have to push this commit to git.
# You have to push them up-stream (-u) to origin. E.g. git push -u origin ux/downloadpage
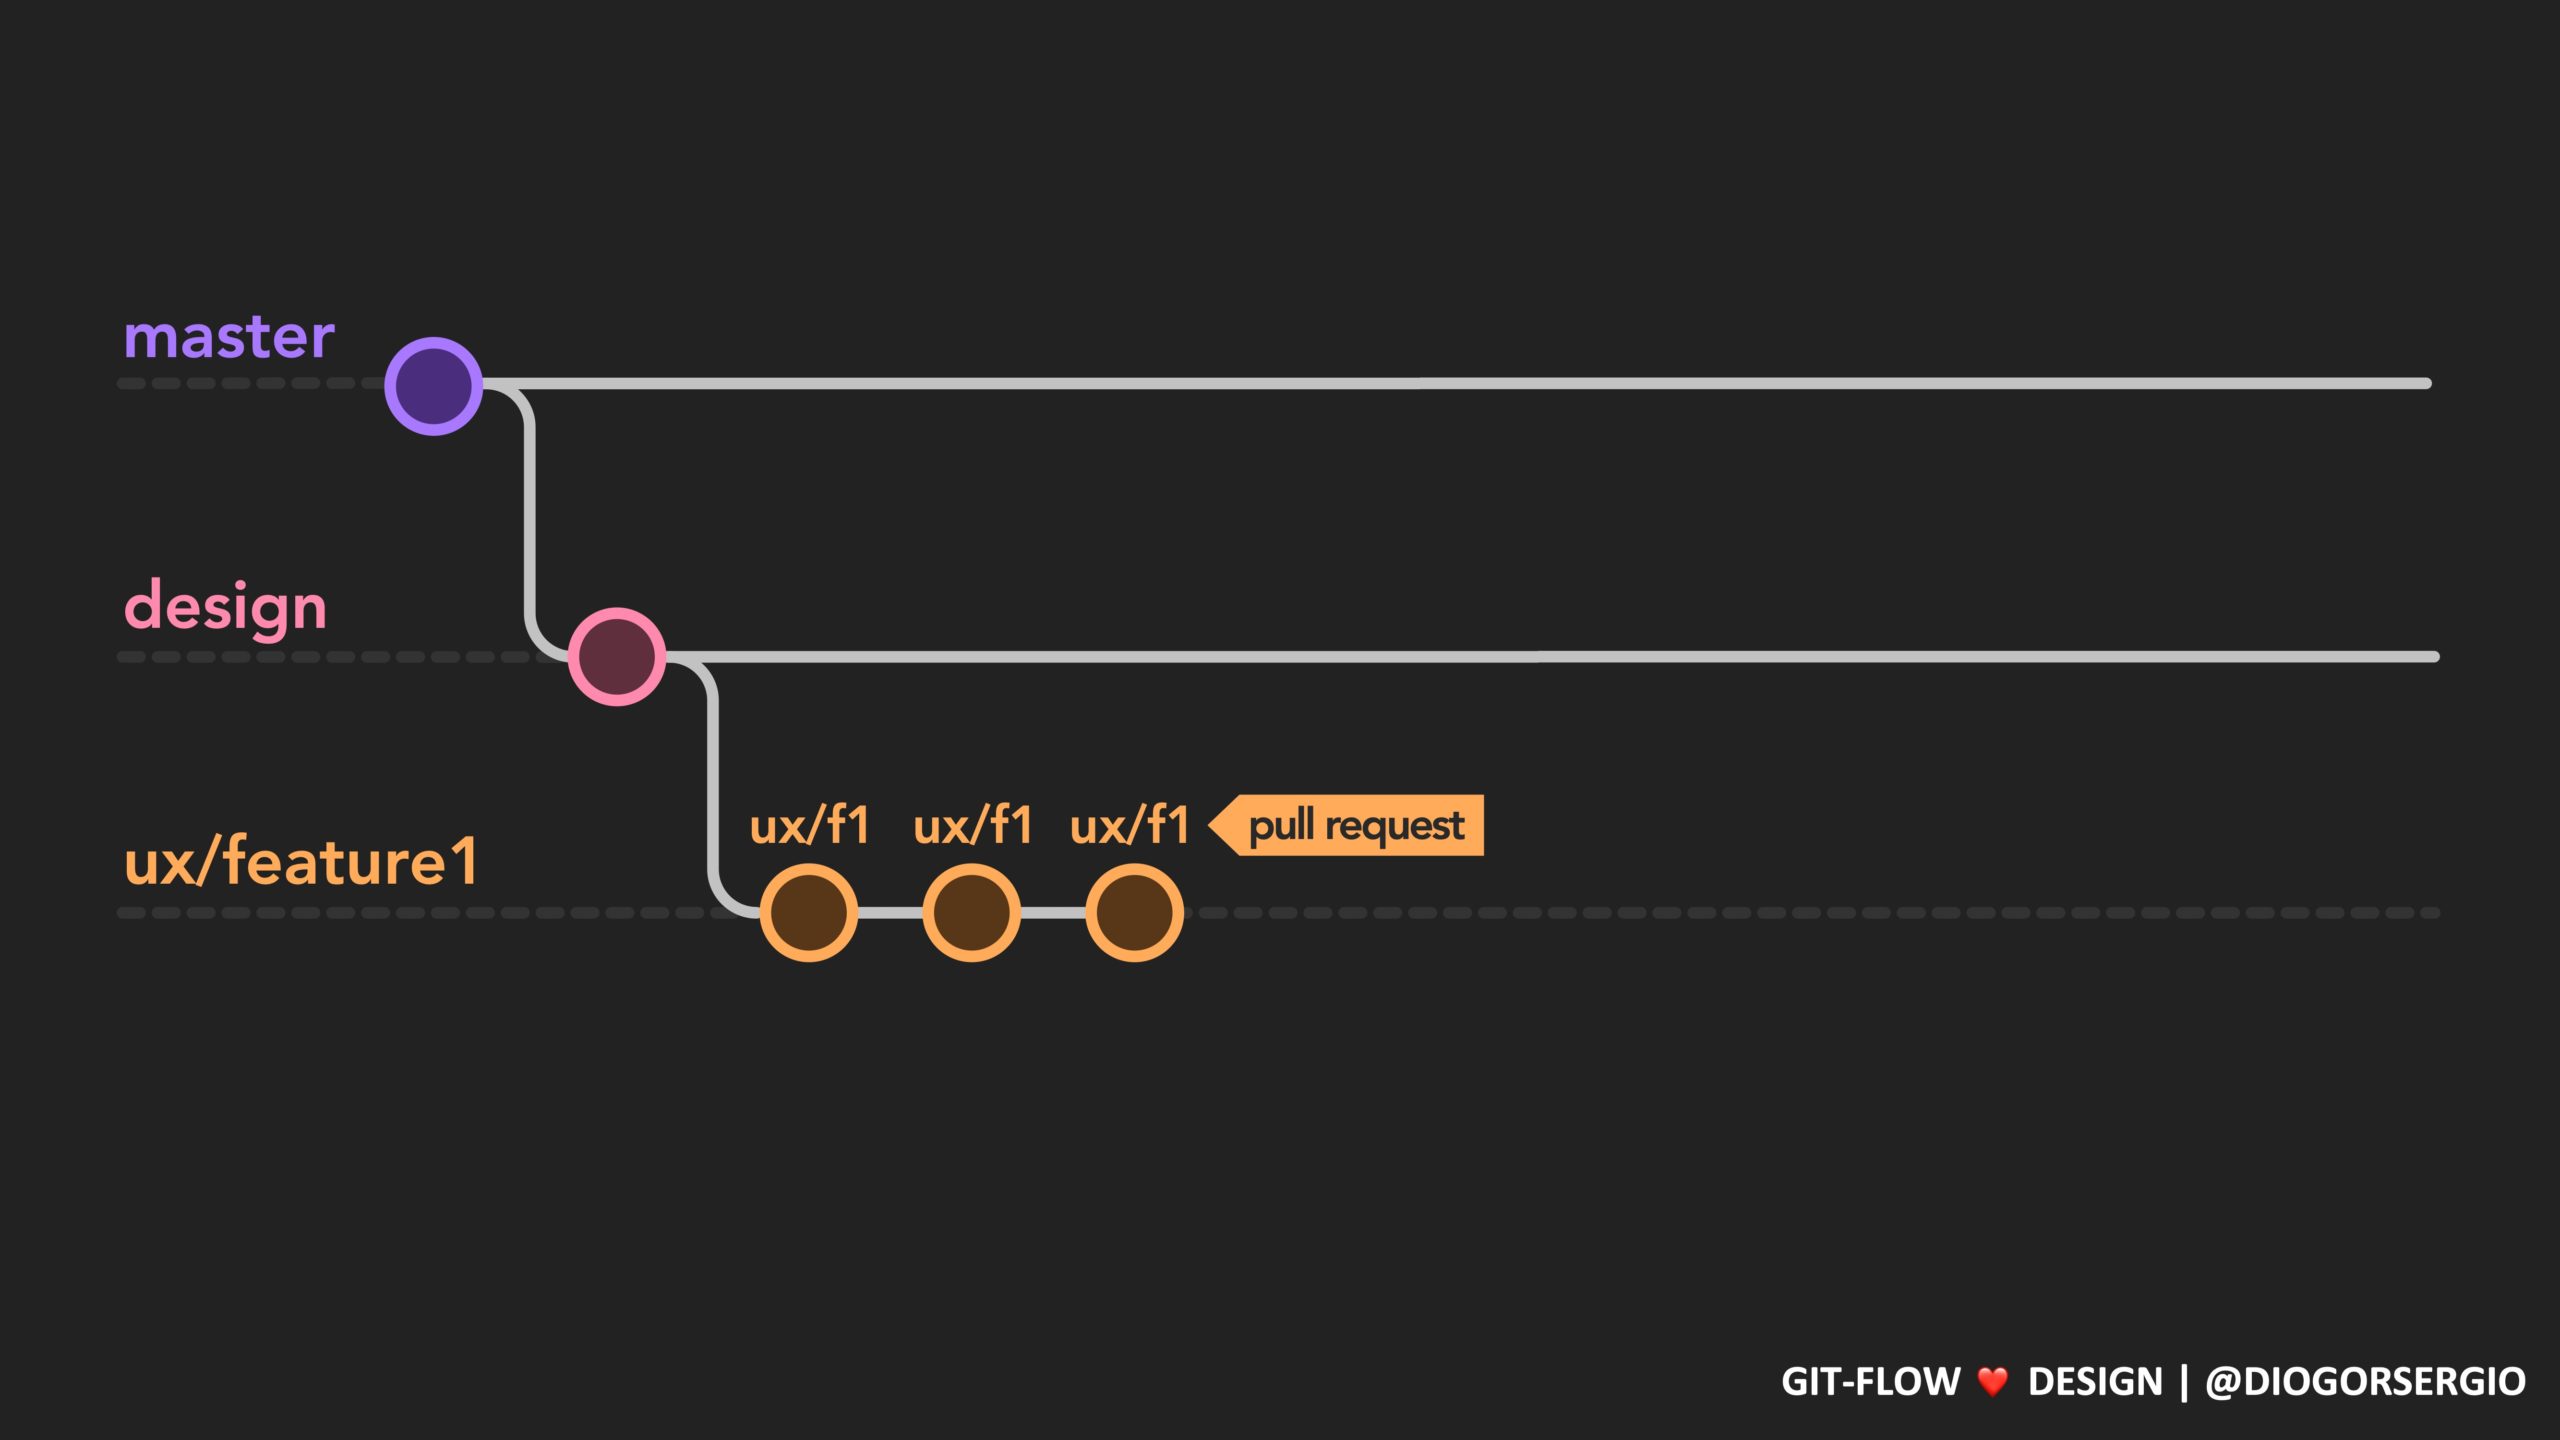
$ git push -u origin ux/nameStep 7 – Merge Request
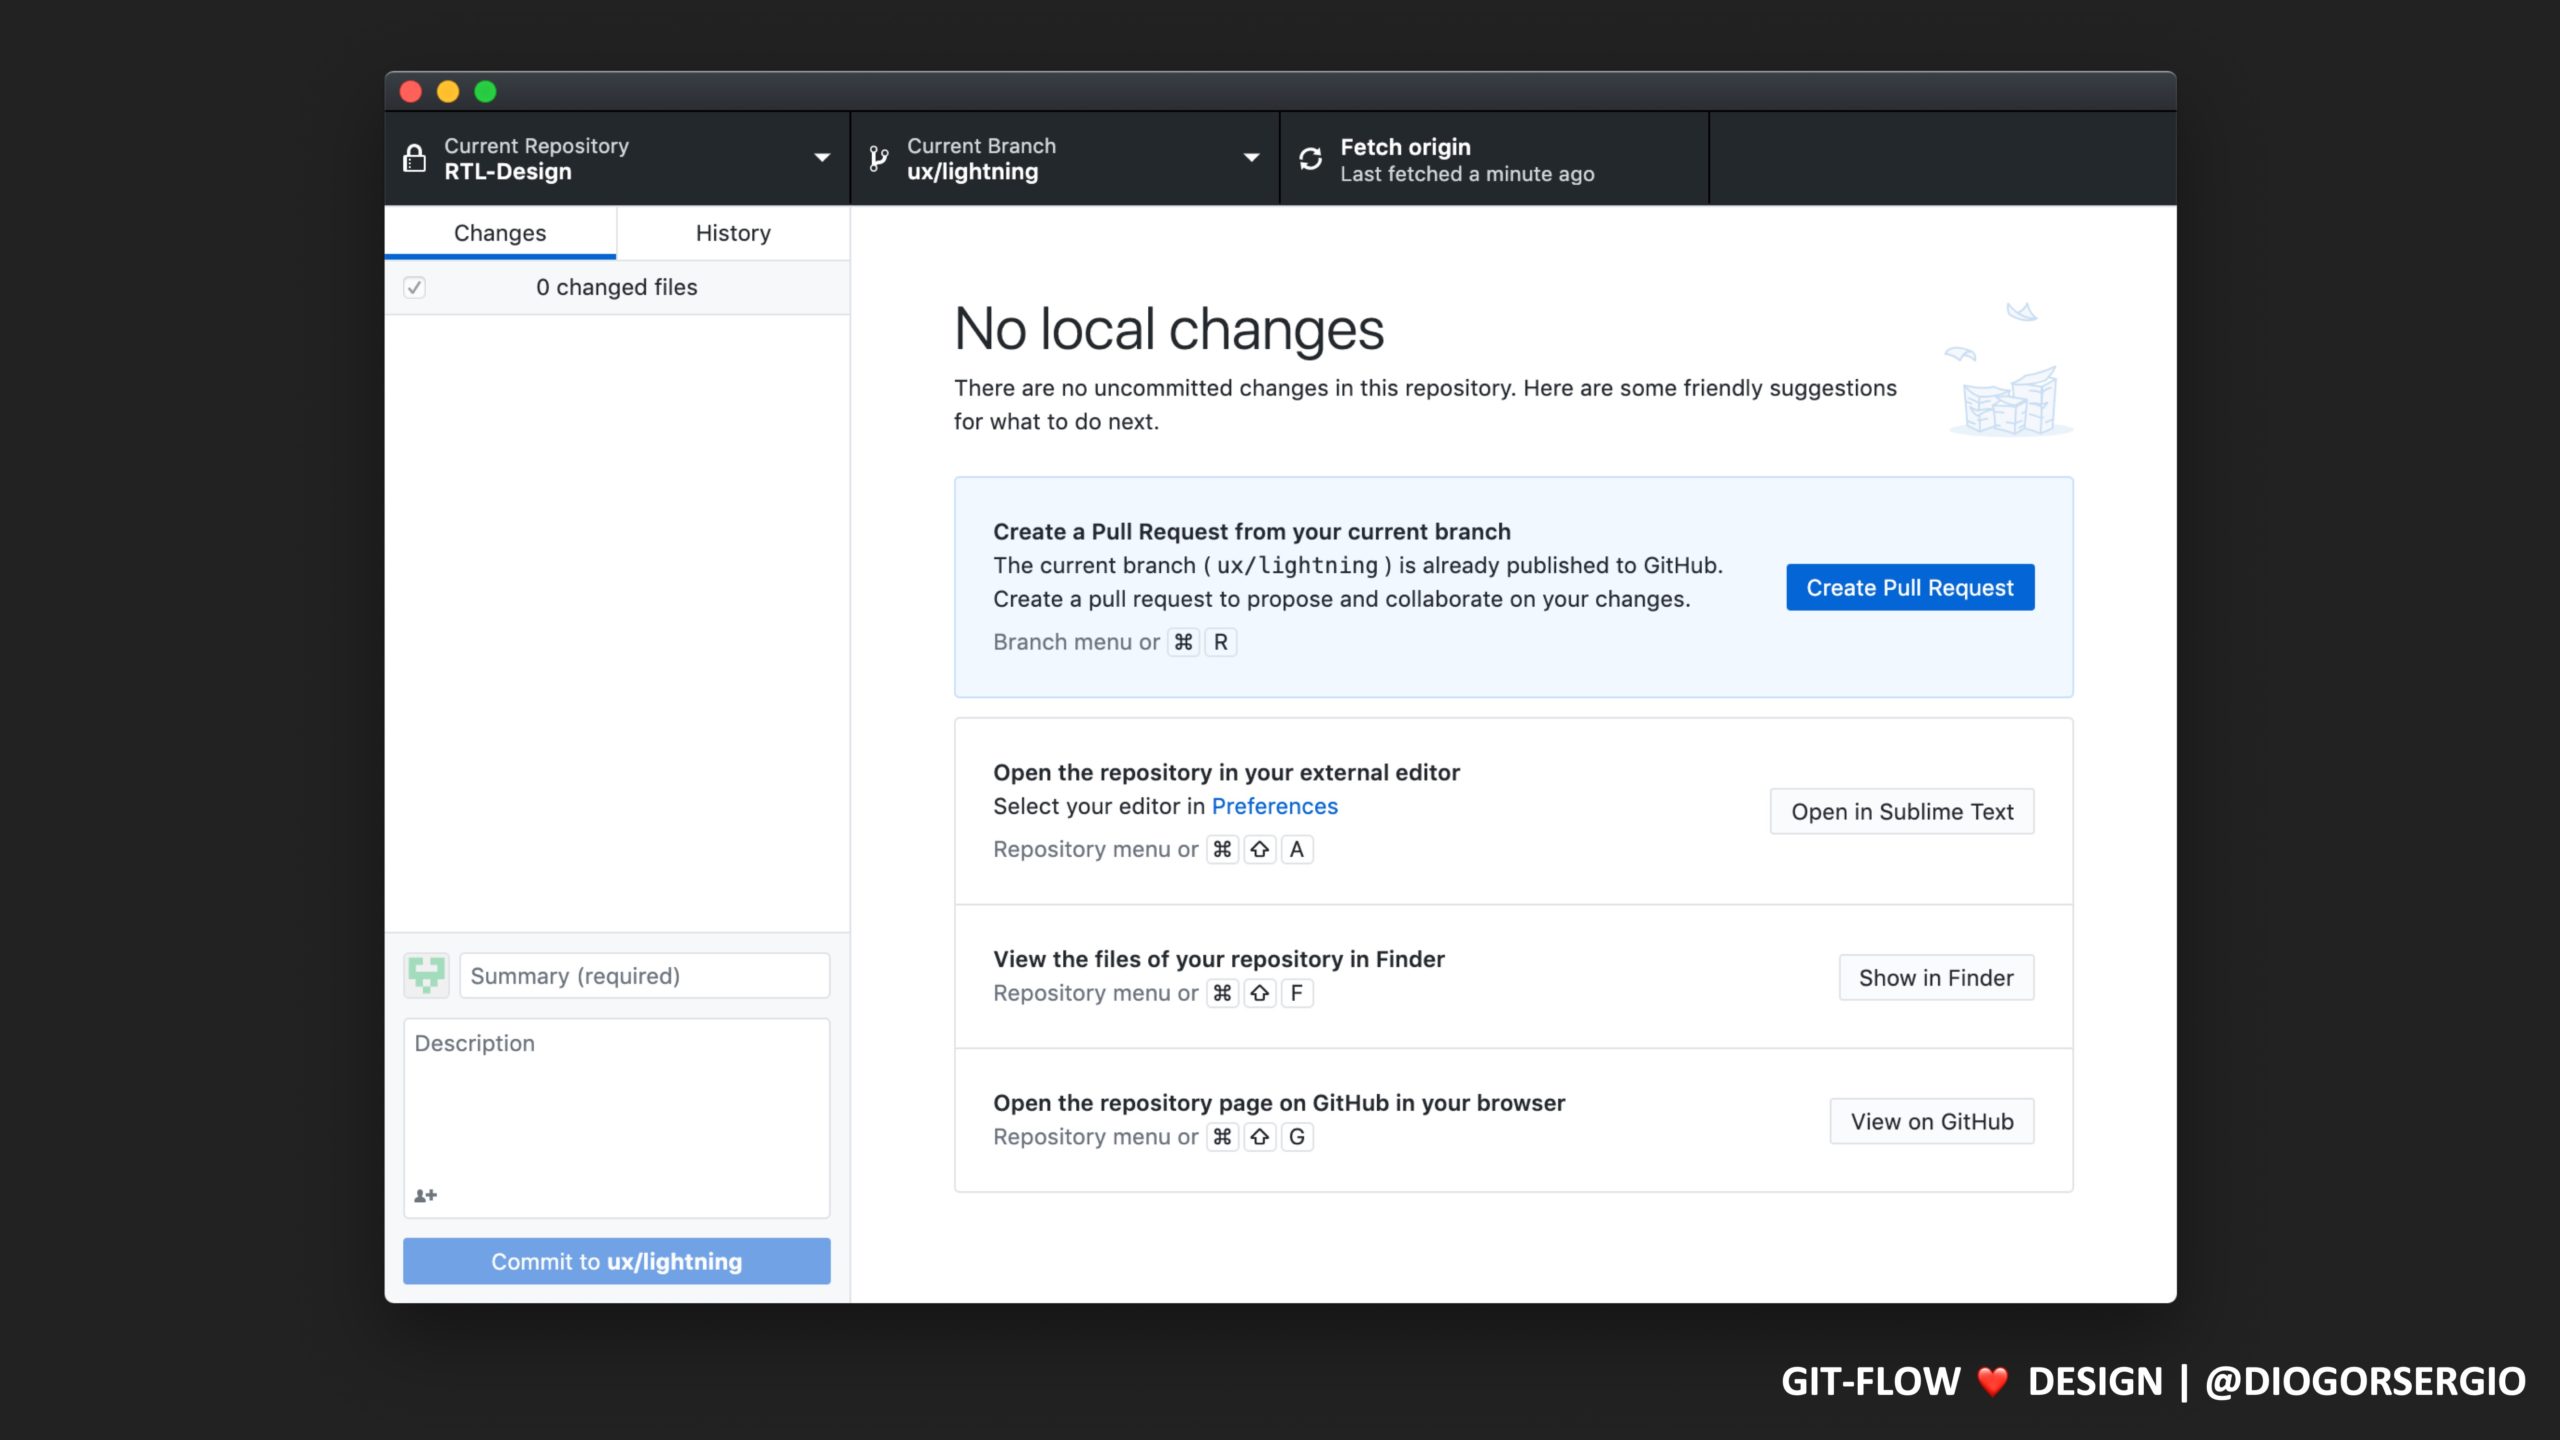
If your work is now finalised and you have committed and pushed it, the last step is to get it reviewed by the design team. In order to do this, you will have to create a merge request.
To do this, simply open https://gitlab.torproject.org/torproject/ux/design and if you pushed recently you will see a message at top of the page announcing it with a button to create a merge request. Just click that button to open the merge request interface and follow the steps.
If you have pushed the work sometime ago, do the same and open https://gitlab.torproject.org/torproject/ux/design and click on Merge Requests on the left side menu and then New Merge Request, and this will open the merge request interface and now just follow the steps.
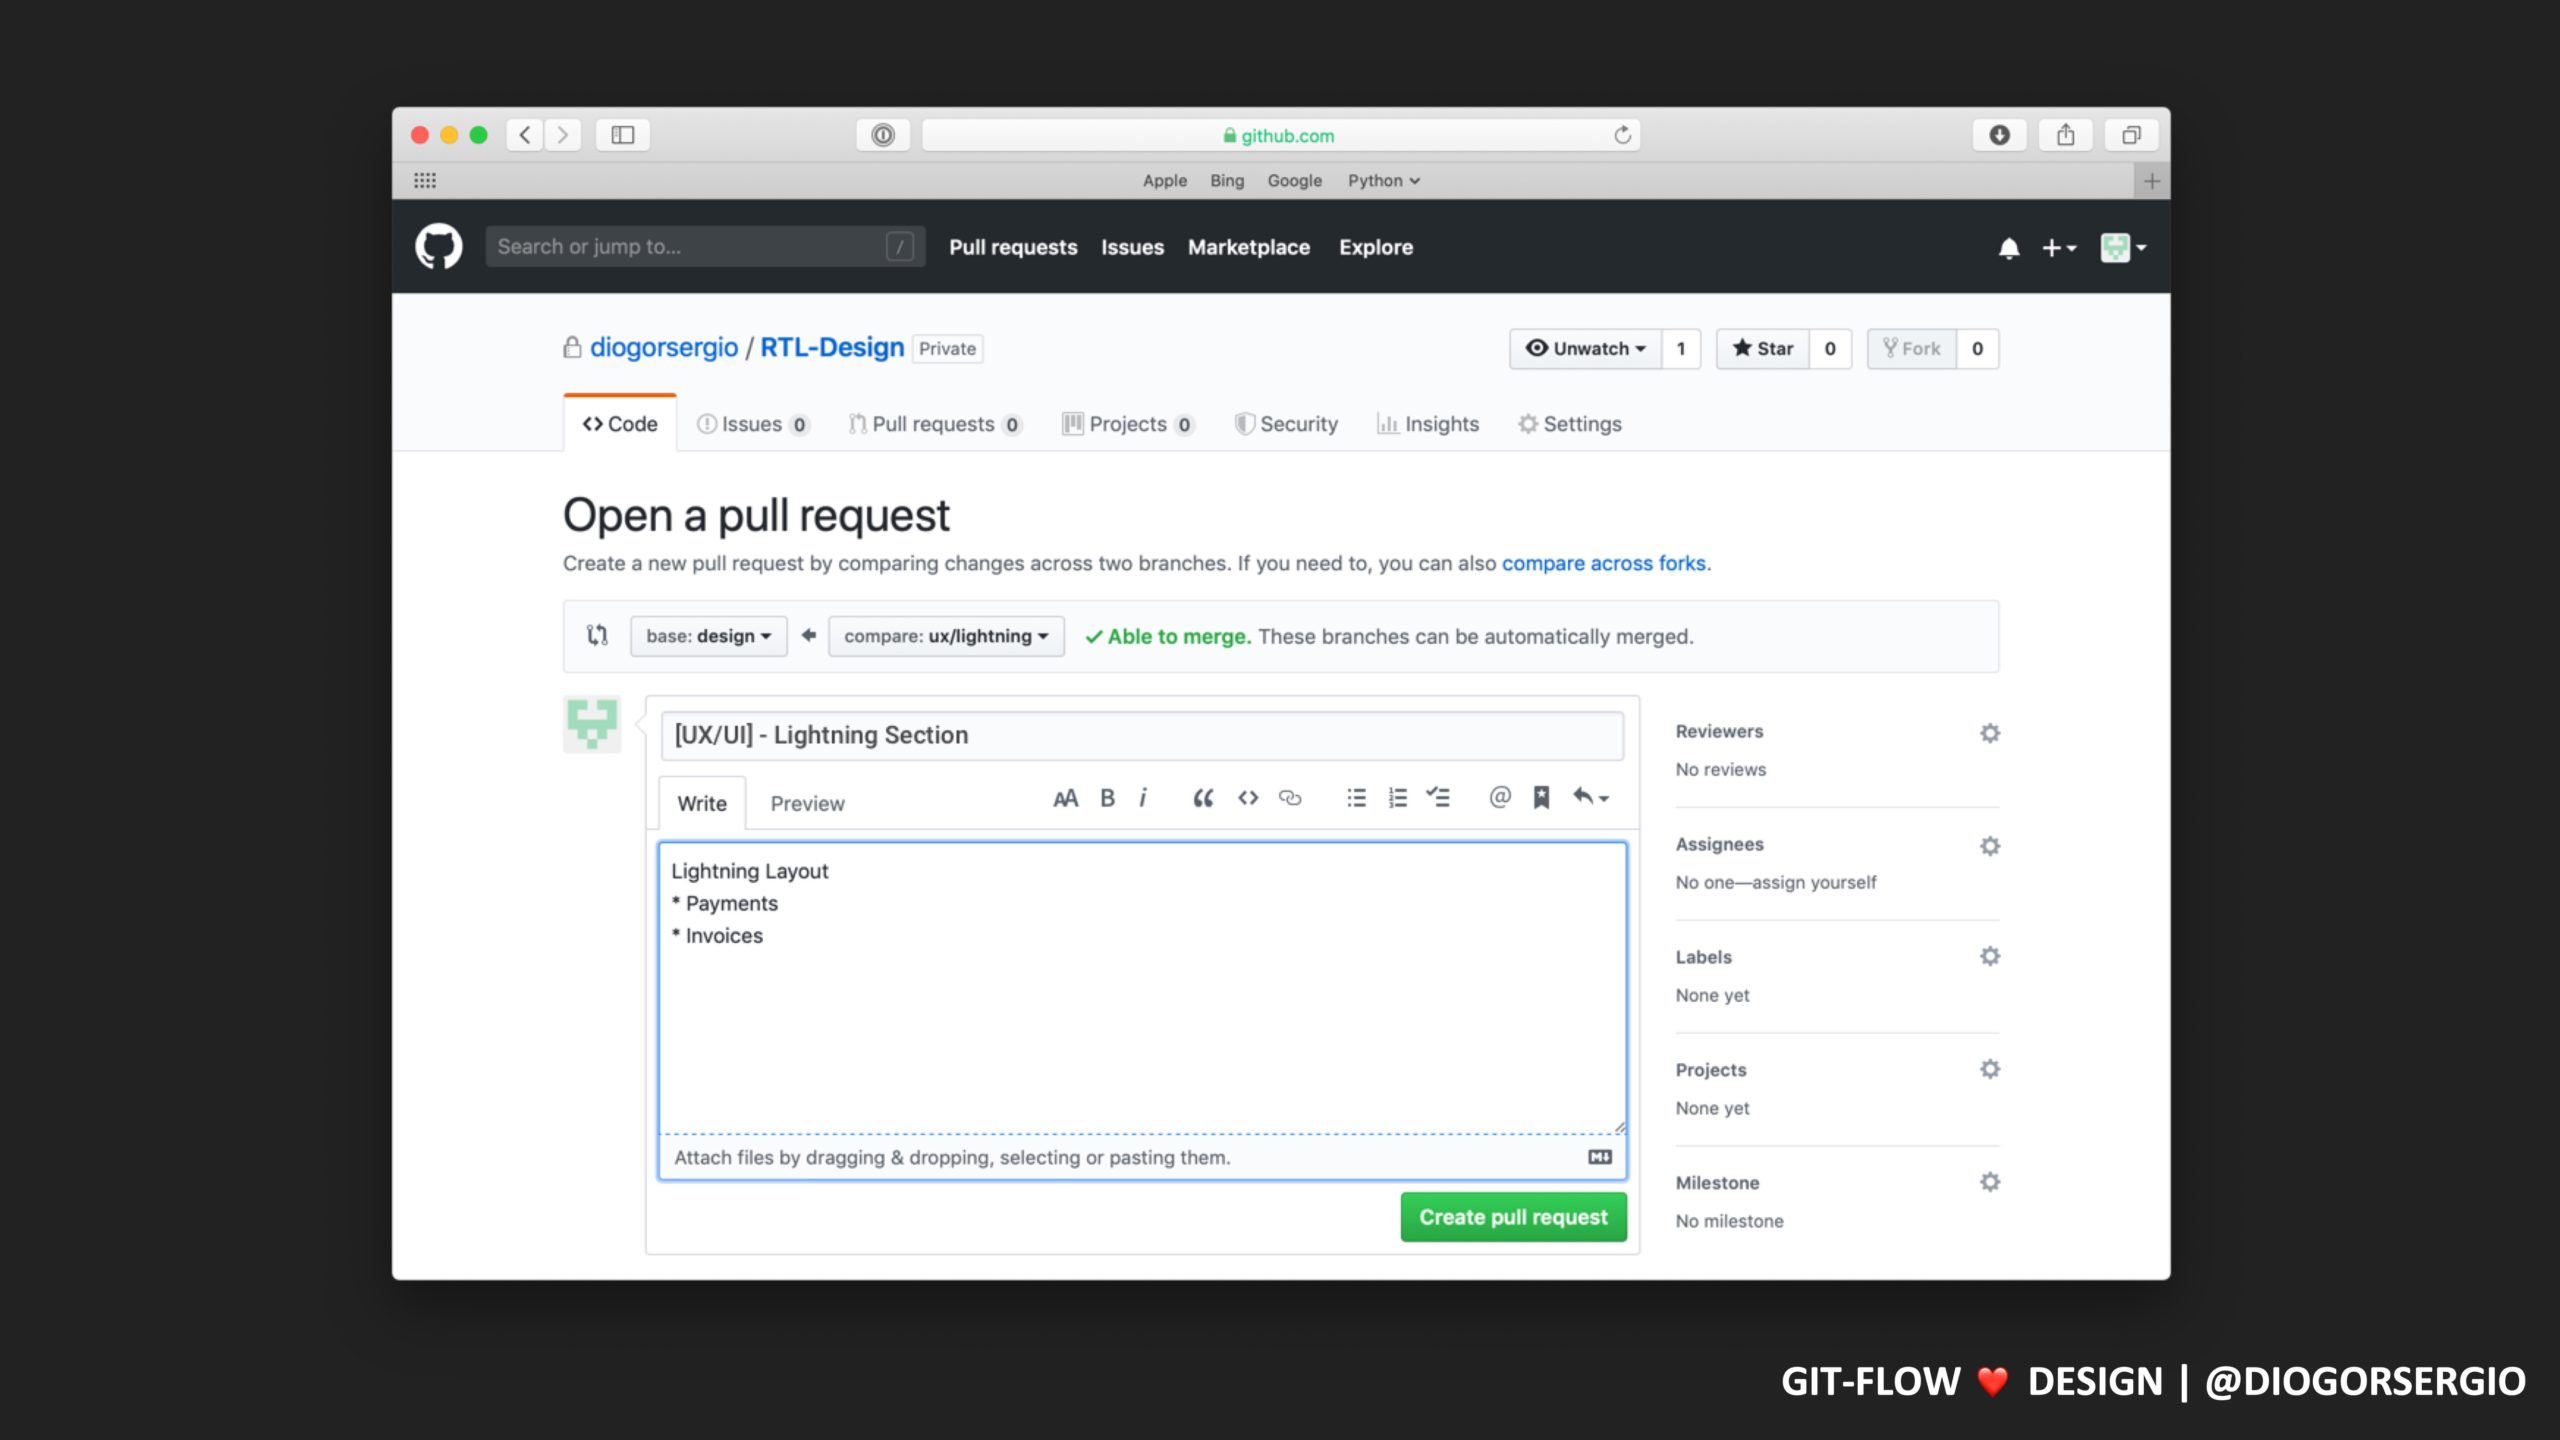
Please make sure you select the source branch as your own, and the target branch as design.
Step 8 – Celebrate! 🎉🎉
You have just made your first contribution to the tor project!